Build Your Own AI Expense Management System with Reimbursement Automation Using Clappia
By
Vidhyut Arumugam
April 3, 2025
|
10 Mins
Table of Contents
Tired of chasing receipts and waiting weeks for reimbursements?
Managing business expenses shouldn’t feel like navigating a maze of paperwork, email threads, and approval bottlenecks. Yet, for most companies—especially growing teams—manual expense tracking still means lost receipts, data entry errors, and delayed payments that frustrate both employees and finance teams.
But there’s a better way.
With the rise of AI and no-code platforms, you can now build a fully automated, AI-powered expense management app in just a few steps—no technical skills required. Whether you're a startup founder, an operations lead, or part of a finance team, this guide will walk you through creating a smart, scalable solution that makes submitting, approving, and reimbursing expenses as smooth as possible.
Let’s dive in and start building your custom AI Expense Management and Reimbursement App—the smarter way to manage business spend.
Prerequisites for Building Your AI Expense Management App
Before we dive into the actual process, here are some things you need to know:
Understanding how expense management works in your organization.
No need for any technical or coding knowledge.
A basic understanding of computer knowledge is enough.
We'll start from scratch, making it easy for anyone to follow along.
What Does This AI Expense Management App Do?
An AI-powered expense management and reimbursement app simplifies the process of submitting, tracking, and approving expenses. Here’s what it will enable users to do:
Submit expenses by uploading receipts or entering details manually.
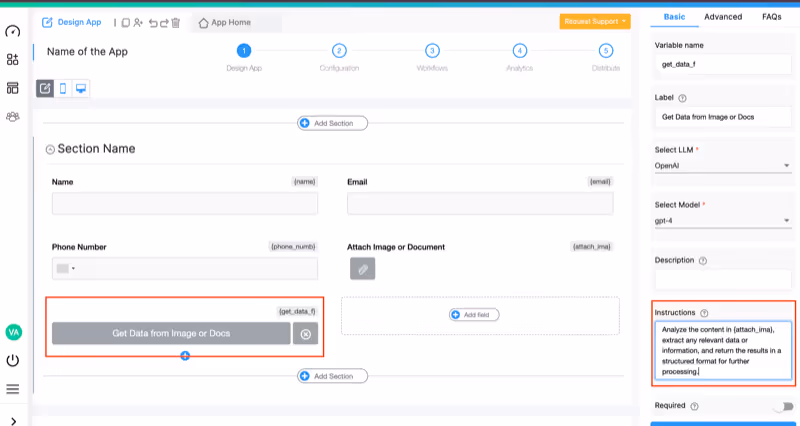
Use AI to extract key data from receipts automatically.
Set up an approval workflow to ensure compliance.
Track the status of submitted expenses in real time.
Generate reports for better financial analysis.
Integrate with existing finance tools for seamless data management.
Why Choose an AI Expense Management System?
Manual expense management is prone to human errors, lost receipts, and delayed reimbursements. By digitizing and automating the process, businesses can:
Improve efficiency by reducing manual data entry.
Ensure accuracy with AI-driven receipt scanning.
Speed up approvals with automated workflows.
Maintain transparency and compliance with a structured process.
Save time and costs associated with traditional expense management.
Benefits of Automating Expense Management
Time-Saving: Reduces the need for employees to manually enter data and track receipts.
Error Reduction: AI minimizes errors in data extraction.
Faster Approvals: Automated workflows speed up approvals and reimbursement processing.
Better Tracking: Users can monitor the status of their claims in real-time.
Seamless Integration: Connects with accounting and finance software for smooth data flow.
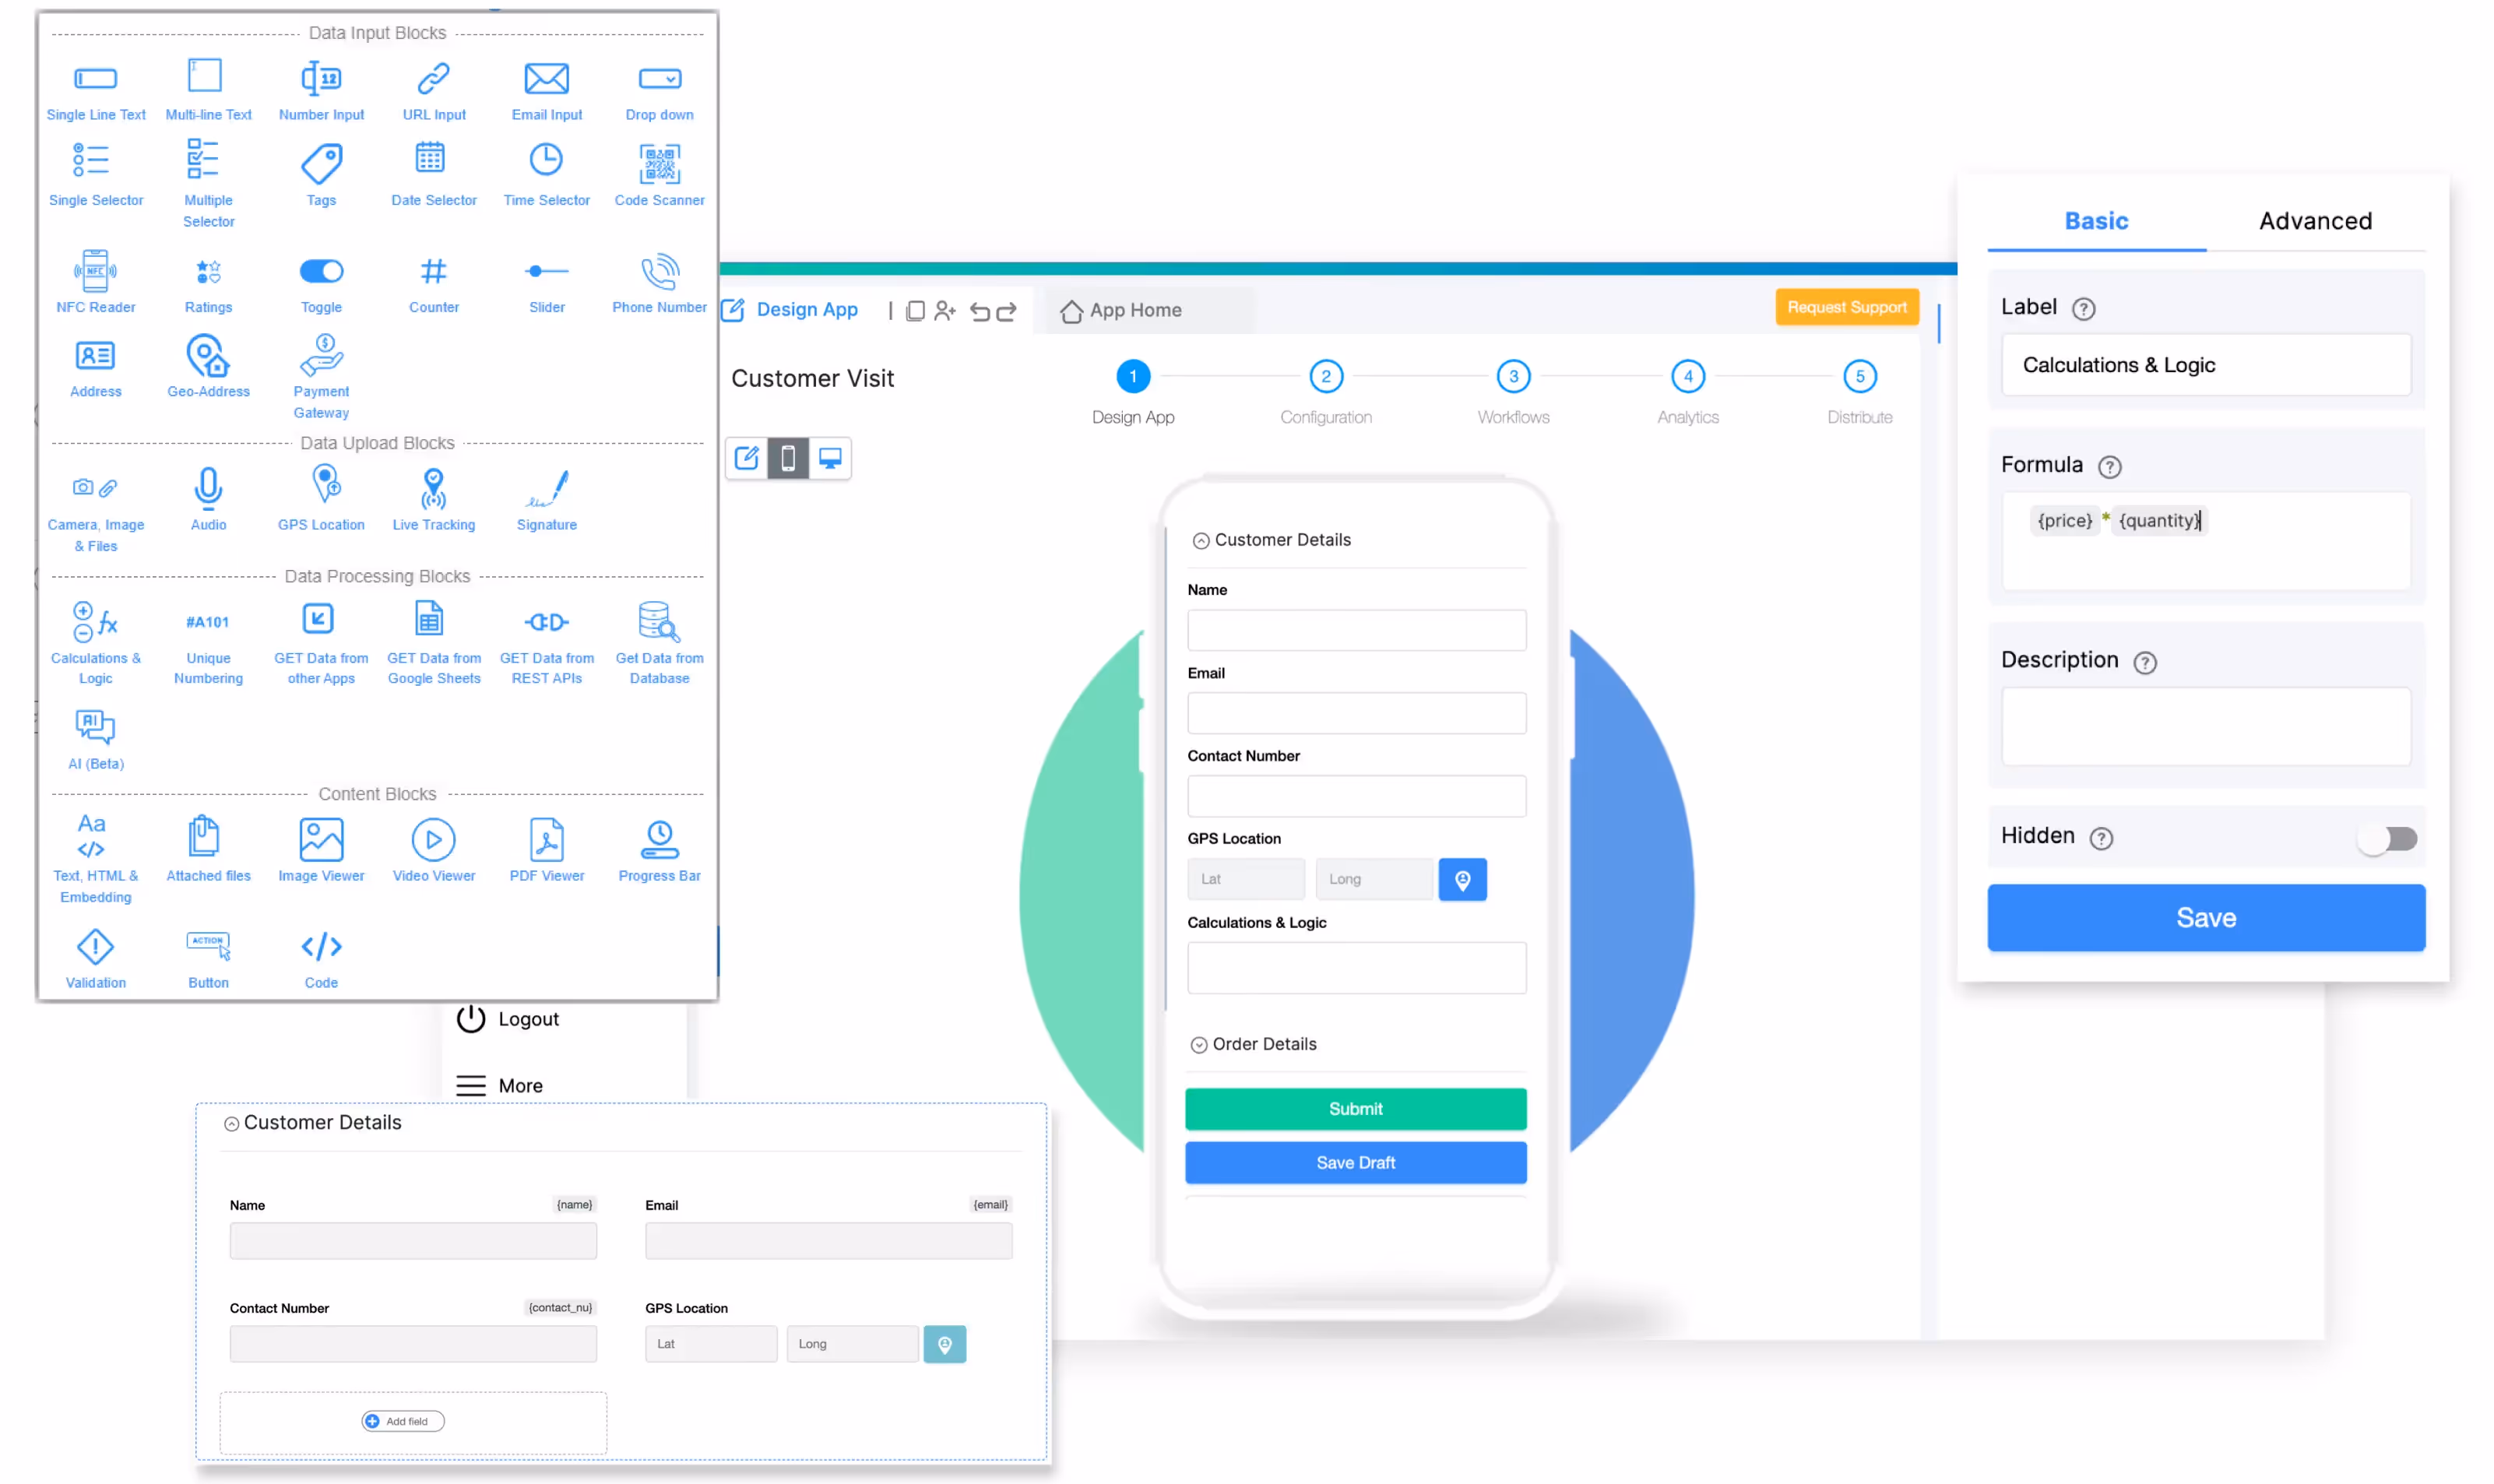
What Tool We Are Going to Use
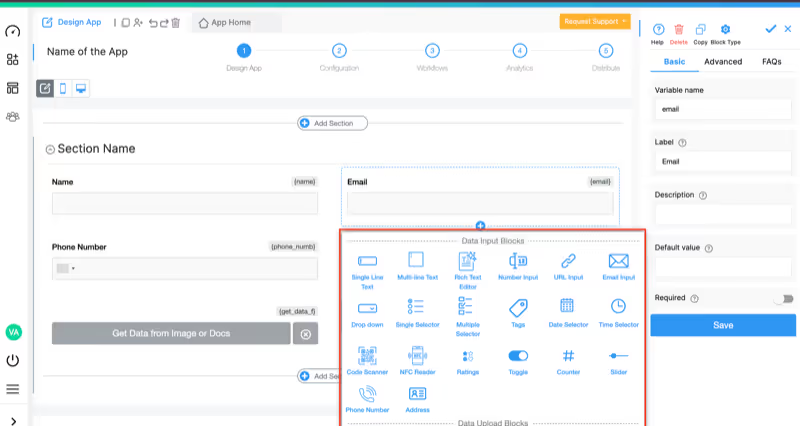
To build this AI-powered expense management app, we will use Clappia, a powerful no-code platform. Clappia allows businesses to create fully functional apps with just drag-and-drop components, eliminating the need for coding expertise.
With Clappia, you can create a custom app that includes form submissions, AI-powered data extraction, approval workflows, and integrations with external tools like Google Sheets and SharePoint.
Key Features of Your AI Expense Management App
To make our expense management app powerful and user-friendly, we will incorporate the following features:
They receive notifications about the status of their submission (approved/rejected/pending).
If approved, the reimbursement is processed, and they get a confirmation.
Admin Side
The manager or finance team logs into the app to review submitted expense claims.
They check extracted data and uploaded receipts.
Based on internal policies, they approve or reject the claim.
If approved, it moves to the finance team for processing.
The system updates the expense records and sends a final notification to the user.
Admins can generate reports for financial analysis and record-keeping.
This structured workflow ensures a smooth, transparent, and automated process for expense tracking and reimbursement.
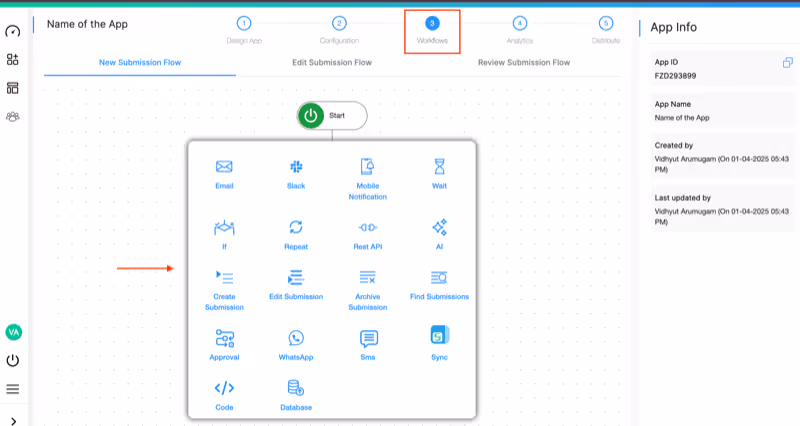
Automating Reimbursements in AI Expense Management Using API Integration
Instead of employees manually adding their approved reimbursement in a separate payroll or payment system, we can fully automate this step using Clappia’s REST API Block and JS Code Block. Here's how:
Employee Submission: Employees submit their expenses with receipts in the Clappia app.
AI Verification: The AI Block extracts data from receipts and verifies key details.
Approval Workflow: The finance team reviews and approves the expense claim.
Automated API Call on Approval:
When the claim is approved, Clappia triggers an API request to the payroll system.
If the payroll system has an API to add reimbursements, the claim amount gets automatically added to the employee’s salary.
Salary Processing: The employee receives the reimbursement along with their salary for that month, eliminating manual entry.
Employee Notification: The app sends a final confirmation notification.
Why This Approach is Better
No Manual Entries Needed: Employees don’t have to search for the reimbursement section in payroll software.
Faster Processing: Finance teams don’t need to manually transfer data between systems.
Reduces Errors: API automation ensures accurate processing.
Works with Any Payroll Provider: This method can be applied to any payroll system that supports API integration, not just specific platforms like Razorpay.
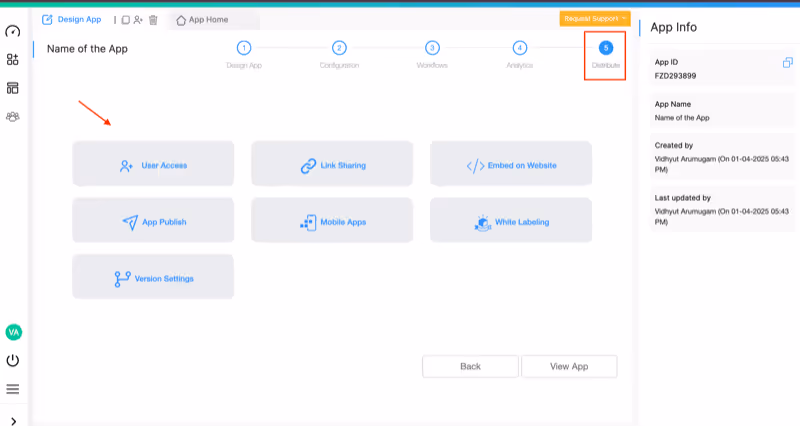
Step-by-Step Guide to Building the AI Expense Management App
Ensure smooth functionality before company-wide use.
Conclusion
With Clappia, you can build an AI-powered expense management app with full reimbursement automation—all without coding. This solution reduces manual work, ensures accuracy, and speeds up the expense approval and payment process. Start building your AI-powered expense management app today!
FAQ
Start building AI-powered expense management app with Clappia—no code needed.


 Get Started – It’s Free


.svg)


.avif)