

Still need help?

The Navigation Options setting is used to control what appears in the left-side navigation panel of your dashboard. From here, you can reorder existing items or add new items that link to specific apps or external sites.
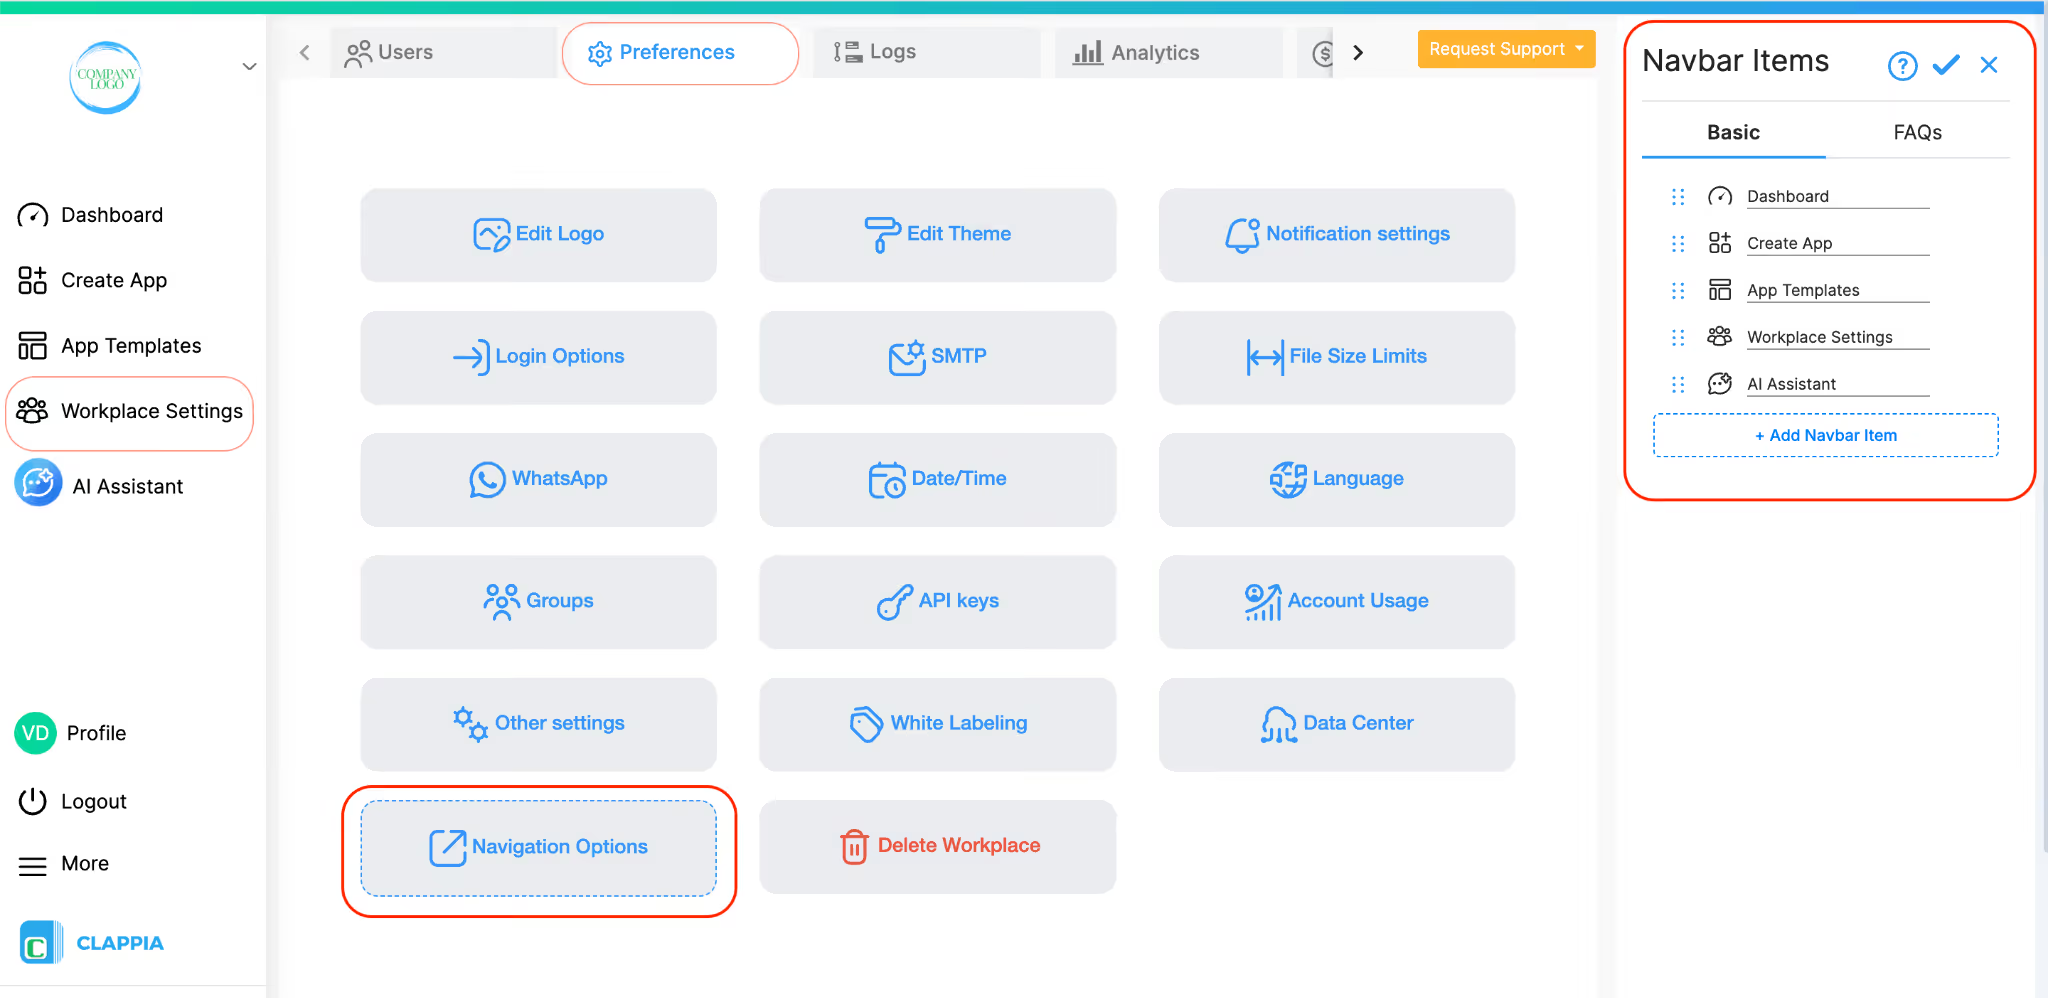
Go to Workplace Settings from the left panel of the dashboard. Under Preferences, click Navigation Options.
The Navbar Items panel will open on the right
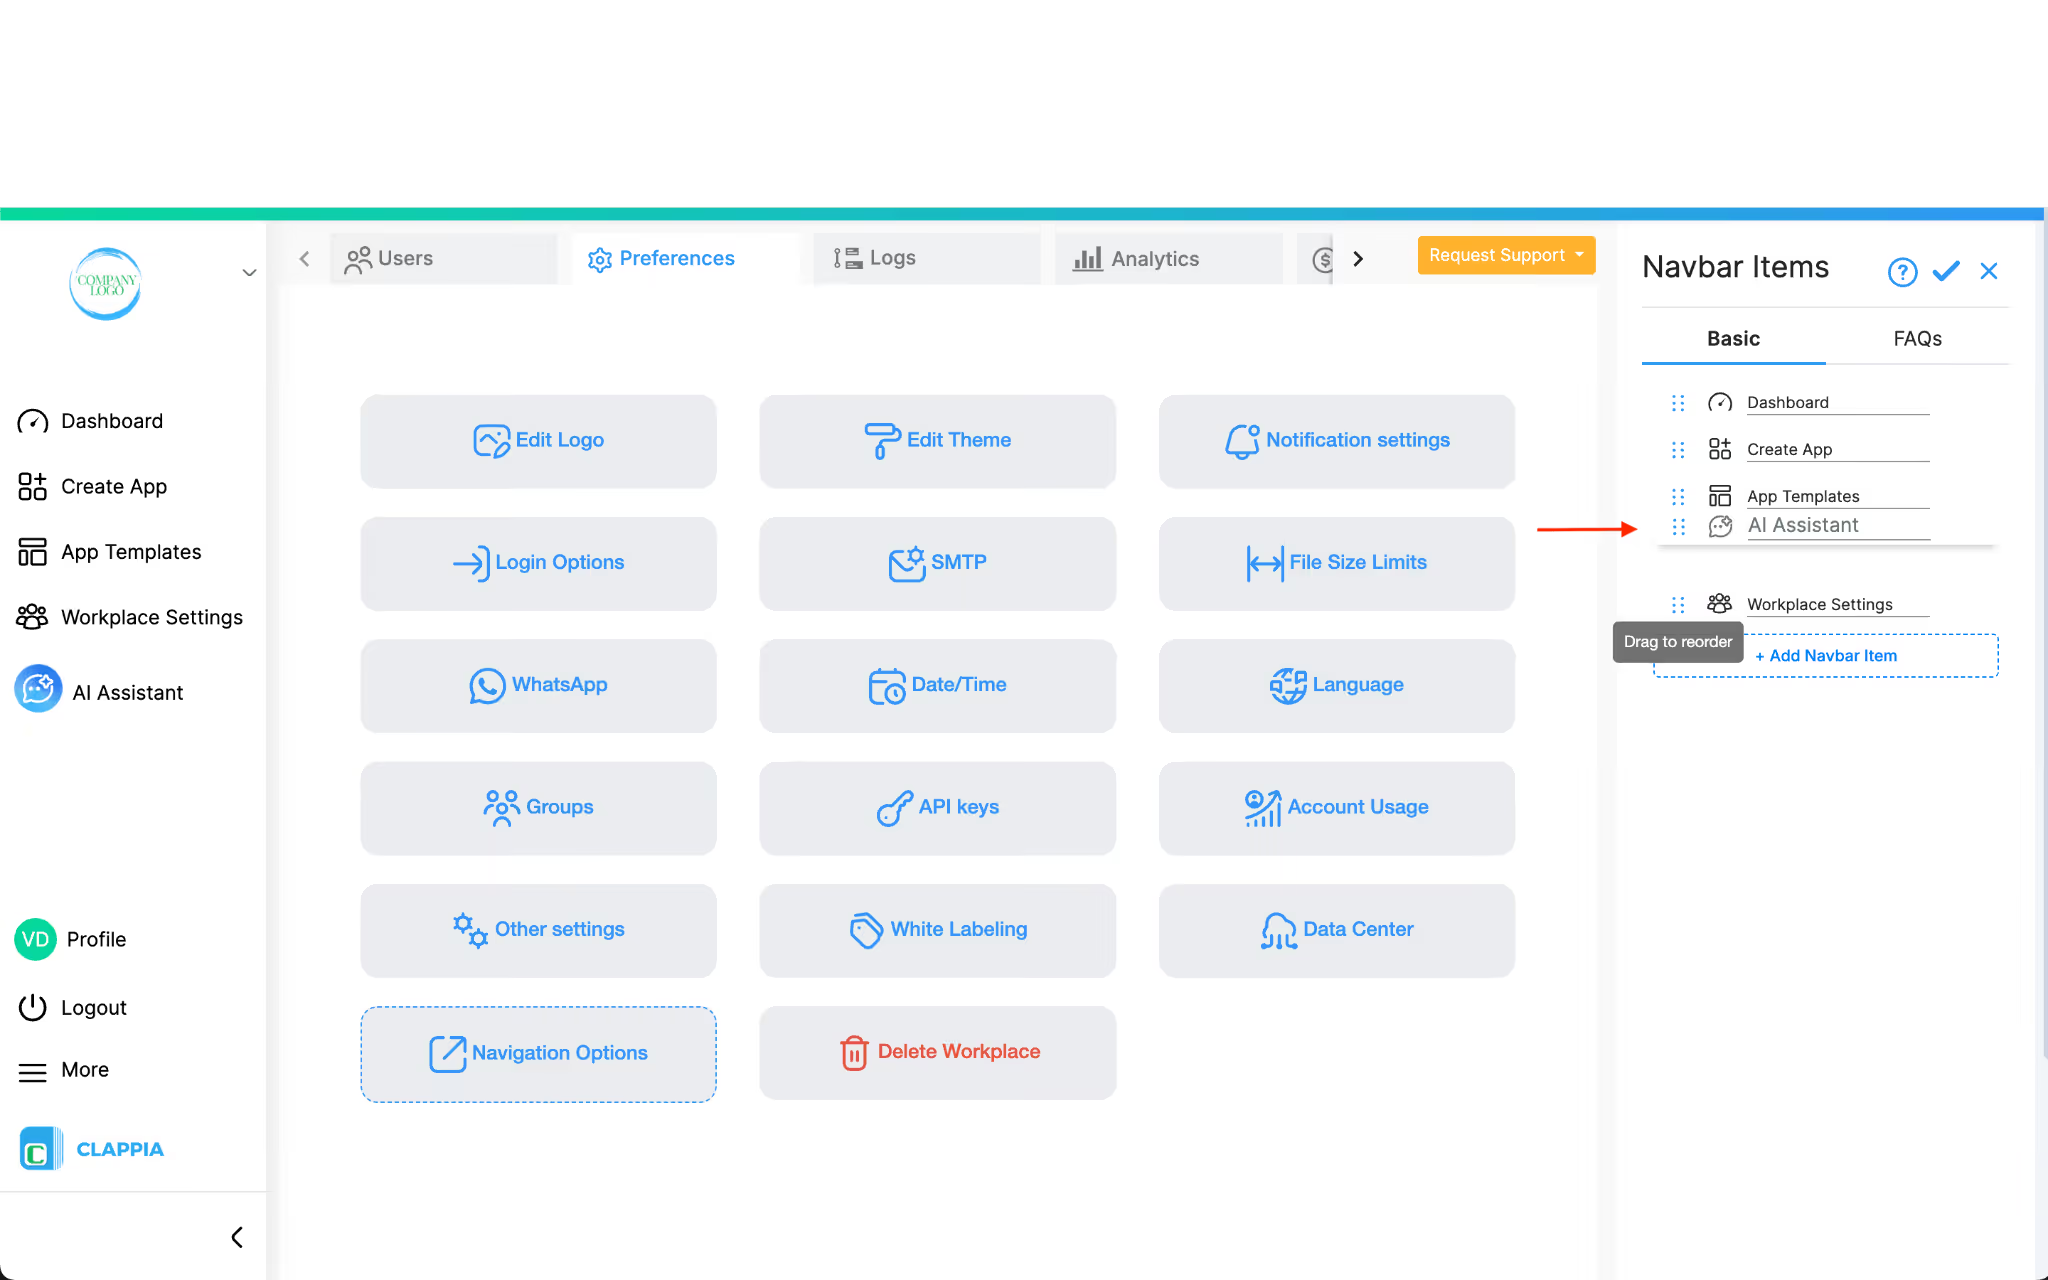
The Navbar Items list shows all items available in the left panel (such as Dashboard, Create App, etc.).
To reorder, use the drag handle (dot icon) next to it, drag and place it in the required position.
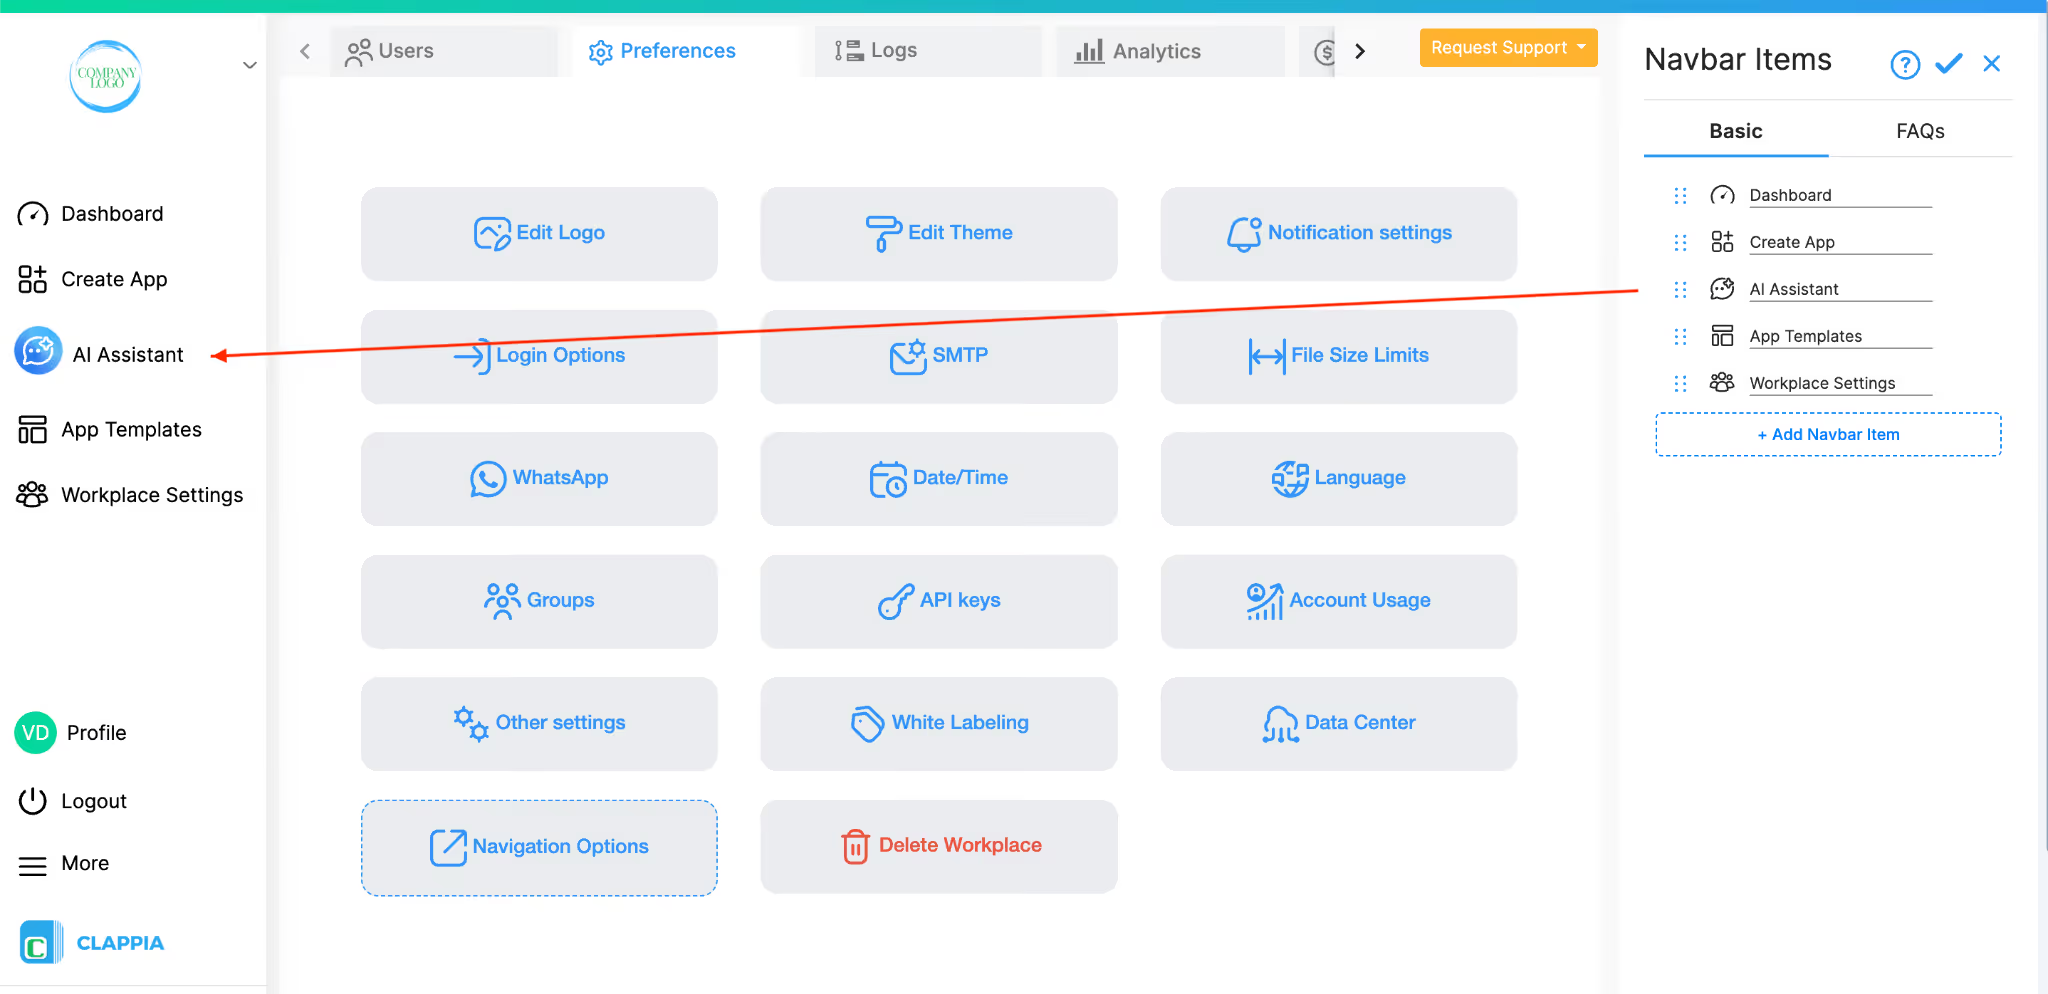
The updated order here will reflect immediately in the left navigation panel.
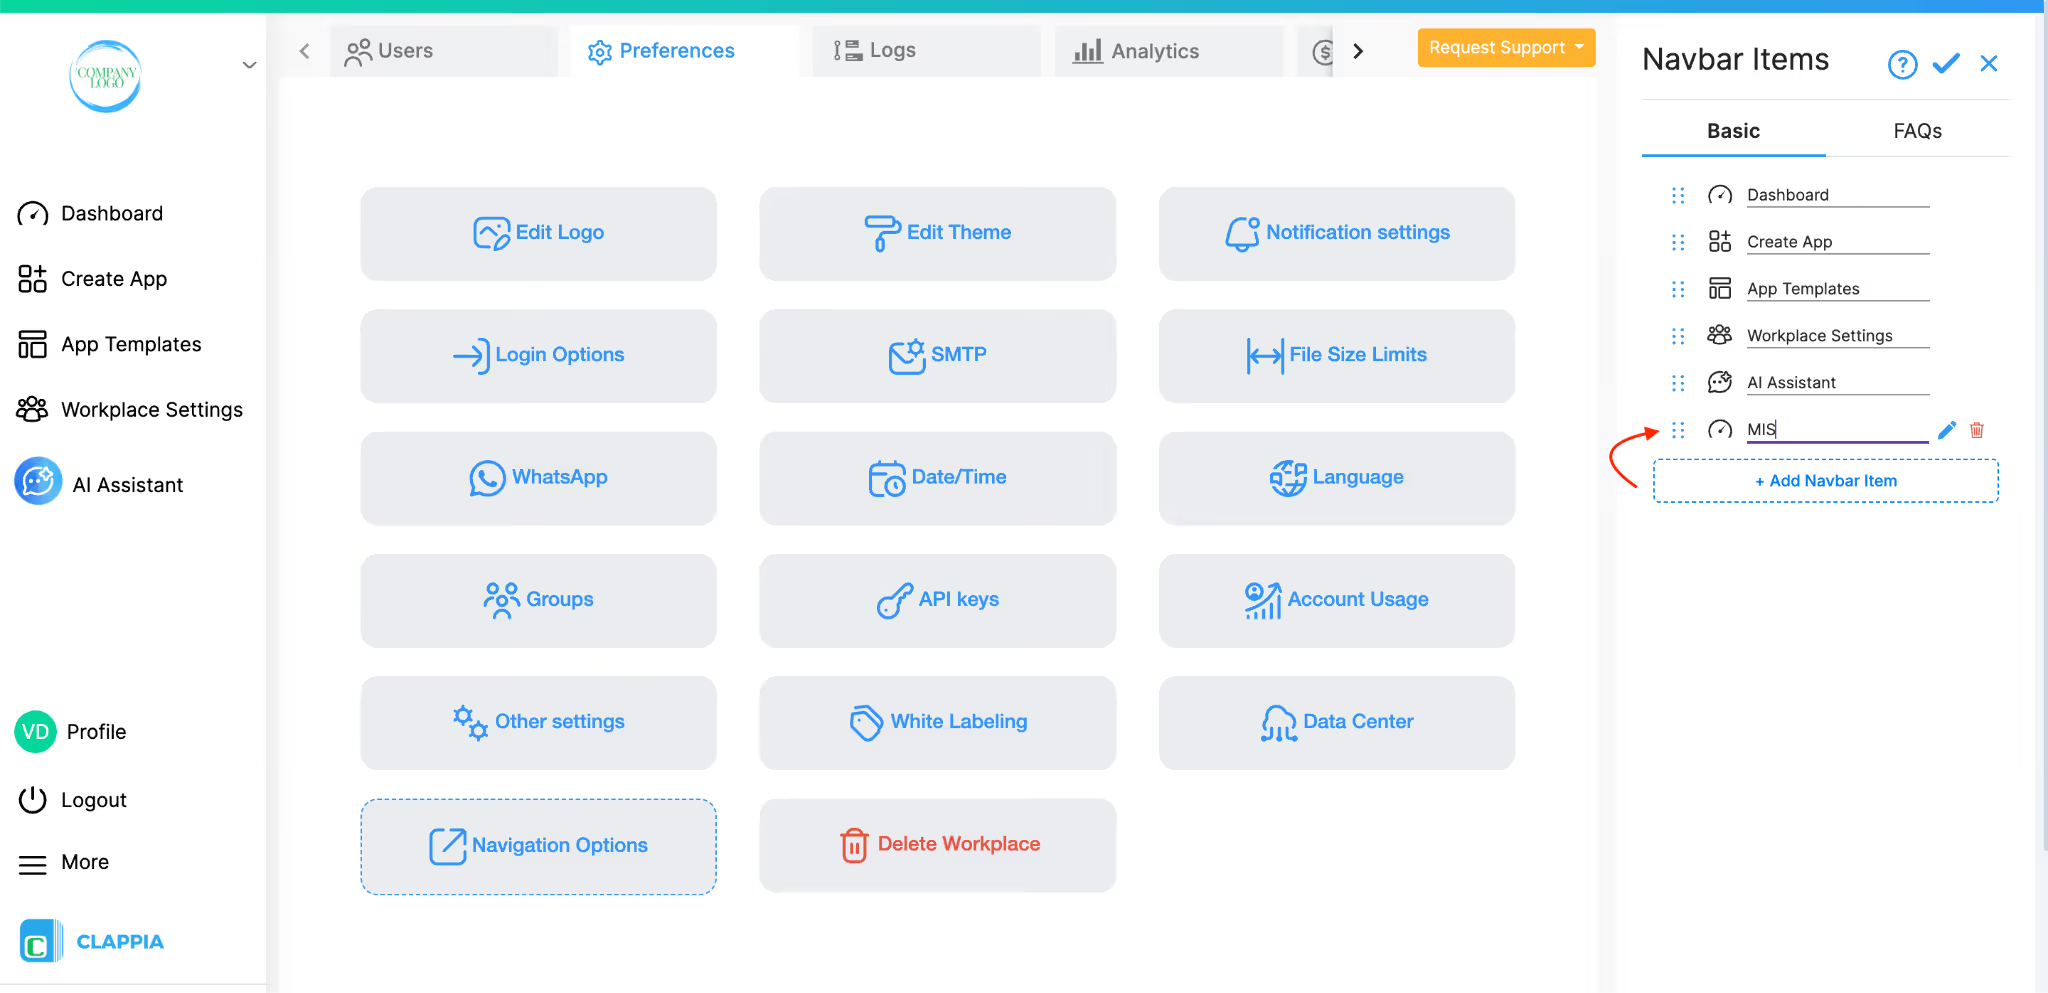
Click + Add Navbar Item to add a new item for the left panel. You can name it, reorder it, delete it and also edit this new item.
Note: System default options cannot be edited or deleted, only reordered.
To edit a new item, click on the edit icon (pencil icon). The Edit Navbar Item panel will open.

This is the name displayed in the left panel. Example: Inventory App, if the purpose of the item is to navigate to that specific app. You can always rename it later.
Select an icon for the item. This appears alongside the label in the sidebar. You can either select an icon from the available icon library or upload your own icon for custom navigation items. This is applicable only to newly added navigation items and not the default navigation items.
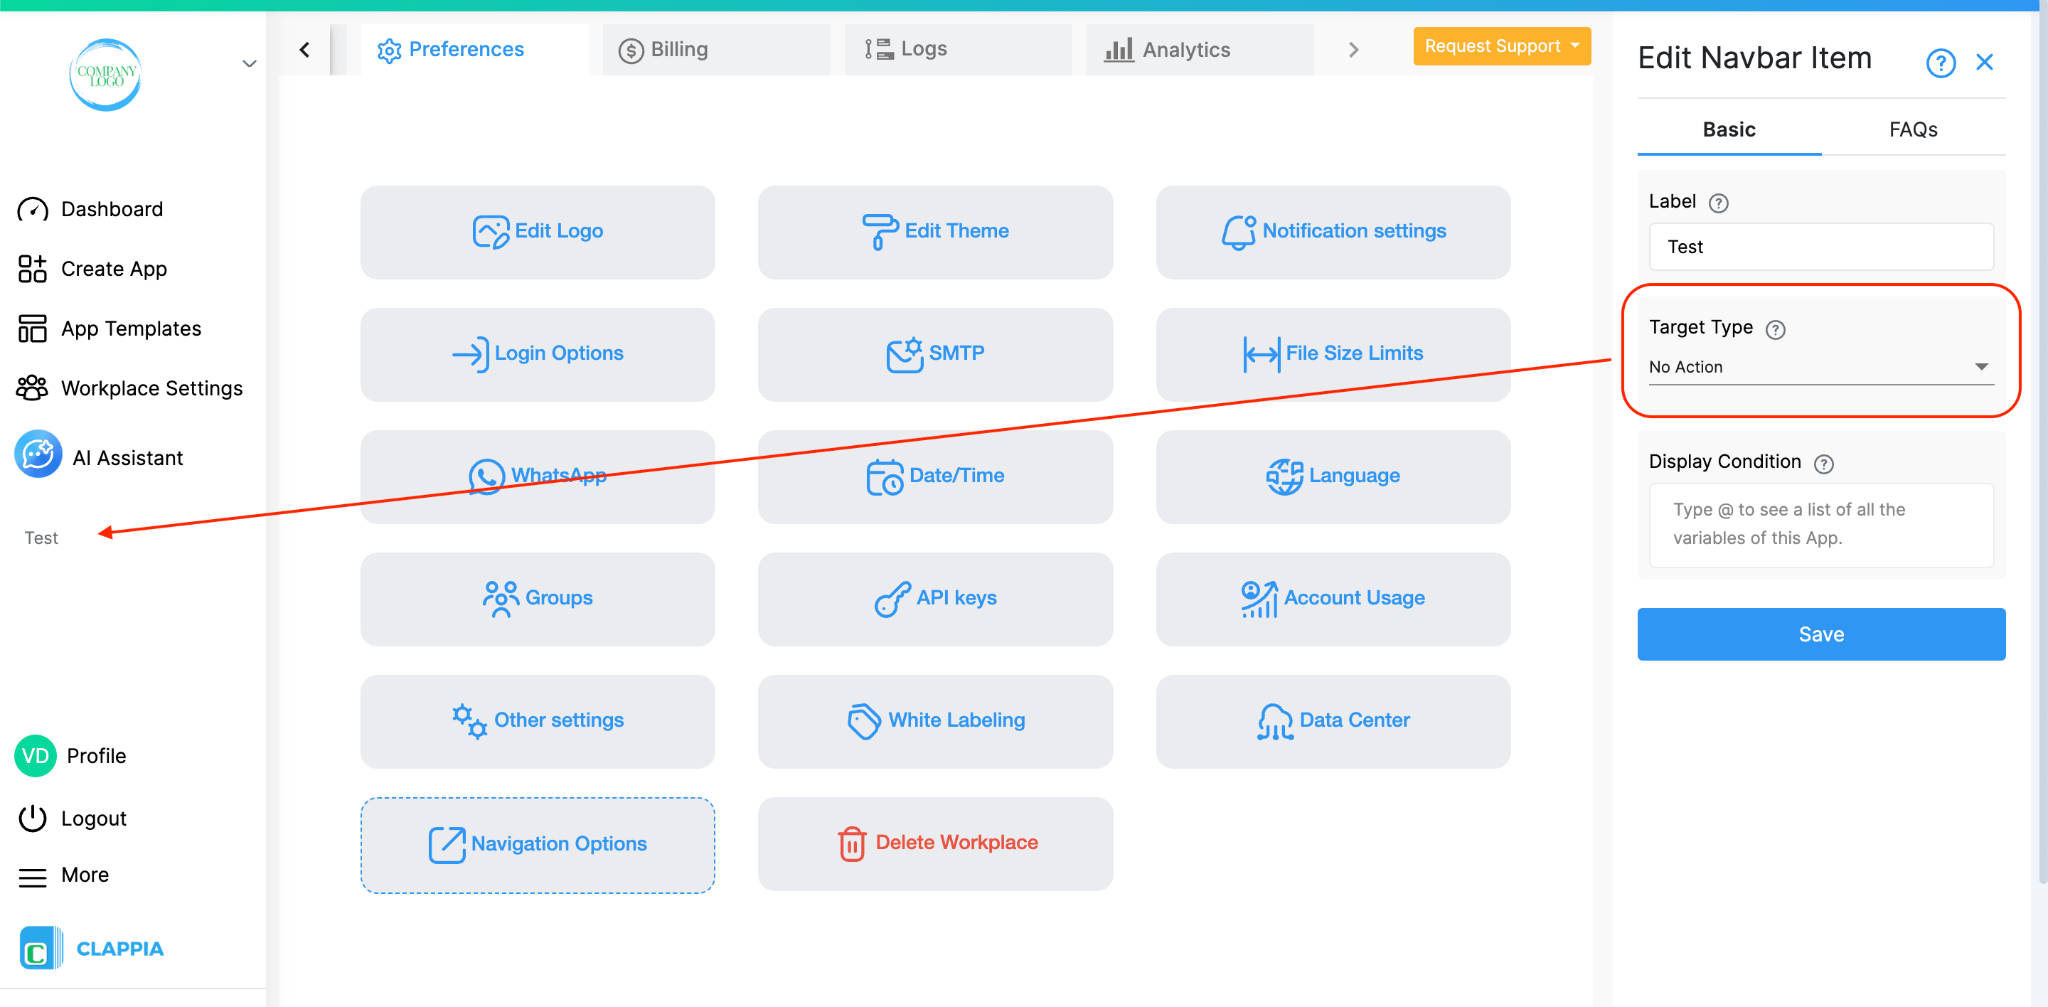
If the Target Type is set to No Action, you will not be able to add an icon for that navigation item. It will appear as plain text in the left navigation panel.
Upload Your Own Icon:

To switch back to the default icon library, click Select Icon and choose an icon.
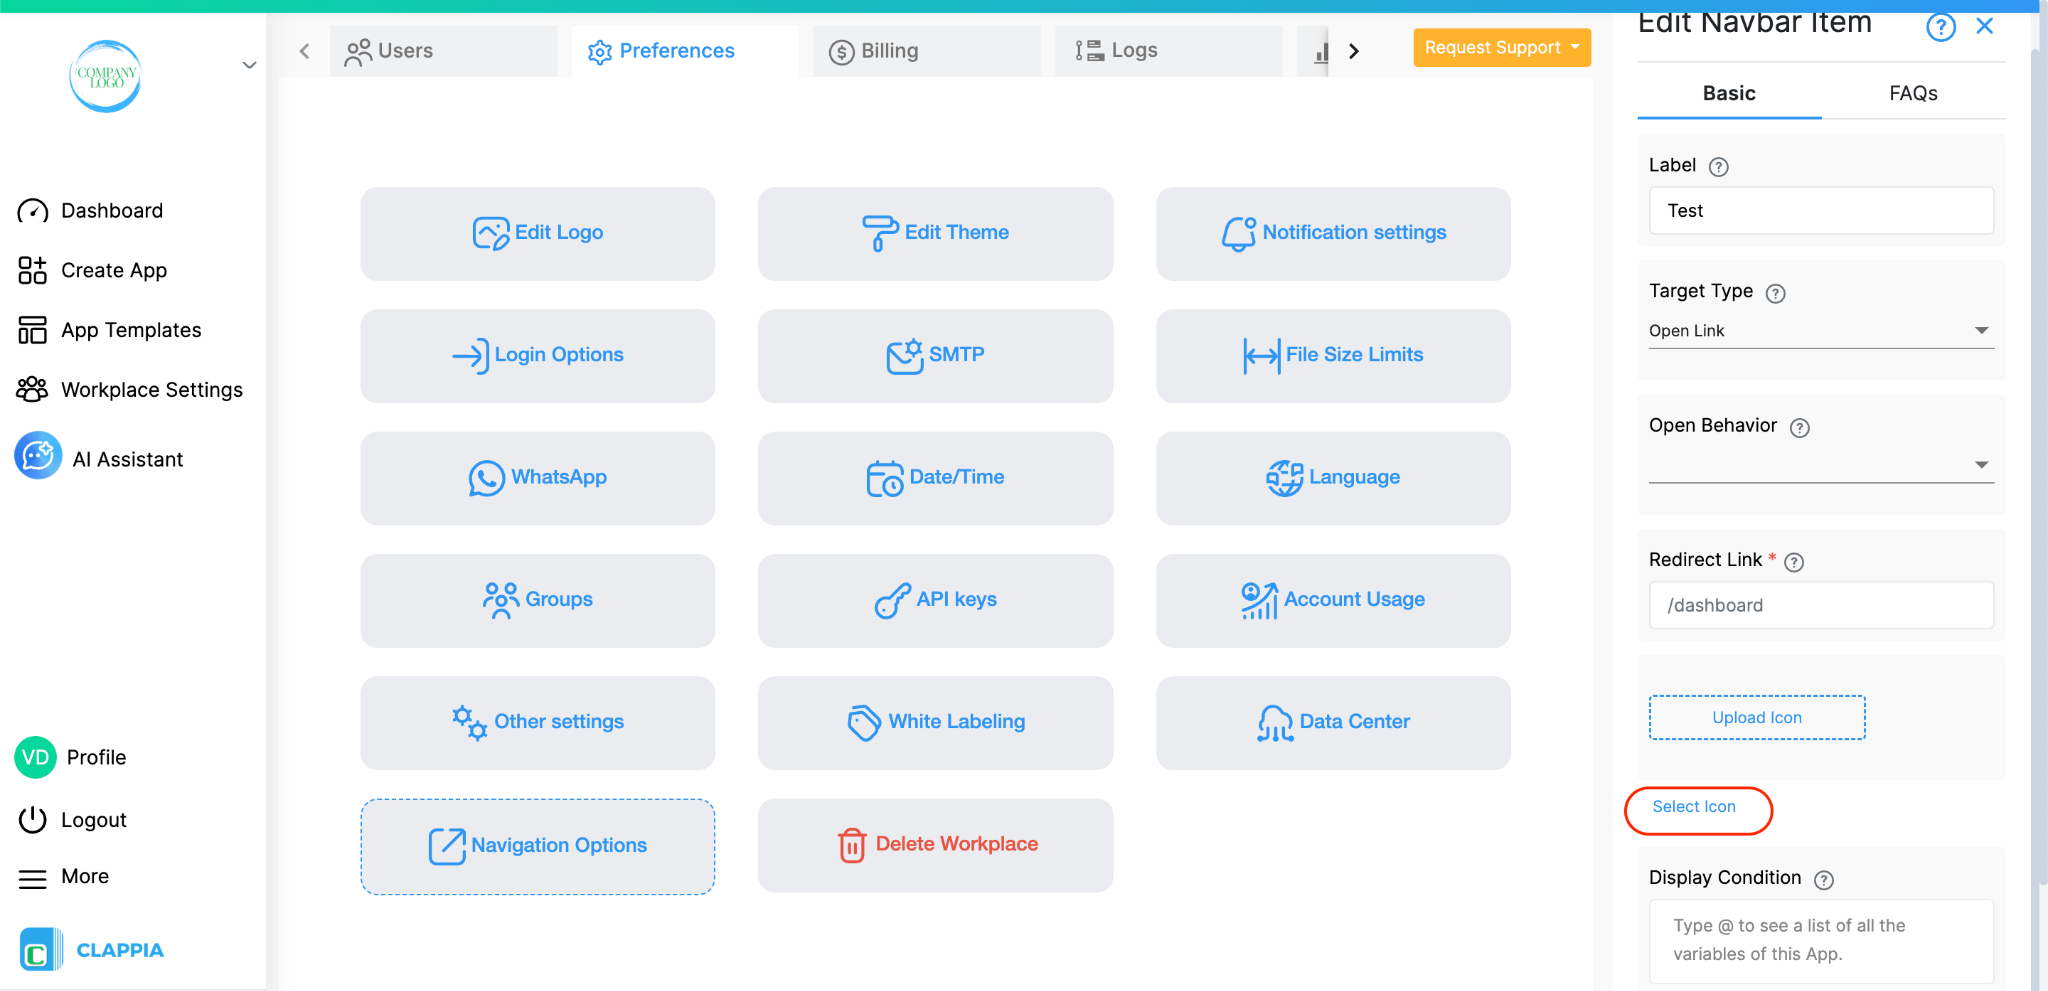
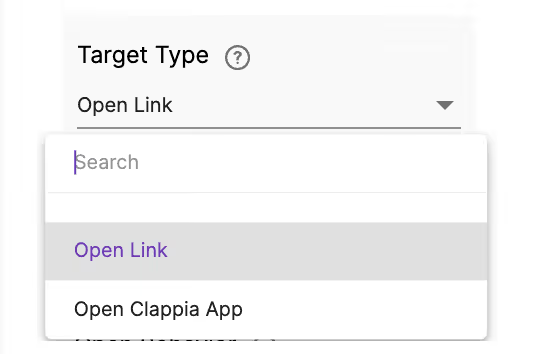
Open Link: This option controls which site to navigate to. Once selected, another option appears ‘Open Behavior’.
Open Clappia App: This option allows the user to navigate to a Clappia app within the same workplace directly. This is useful if you have multiple apps on your dashboard or within folders that make it difficult to search for the app or just need immediate access.
No Action: Select this option if you want to add a non-clickable label to the navigation panel. This can be used as a section header to organize and group related navigation items.
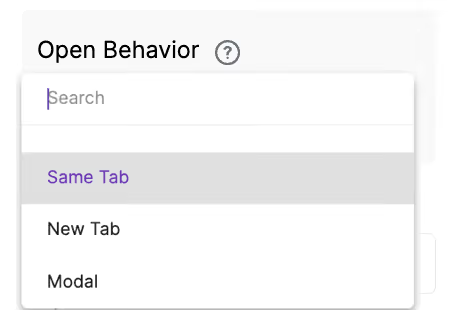
You can open the link in 3 ways;
Same Tab: Redirects the user to the site on the same tab.
New Tab: Redirects the user to the site on a different tab.
Modal: Opens the site in a separate window.
Redirect Link
This option appears if you select the target type as ‘Open Link’. This is where you paste the link to the site to redirect the user. You have to paste a valid url.
App
This option appears if the target type is selected as ‘Open Clappia App’. Select the app to be opened from the left panel navigation.
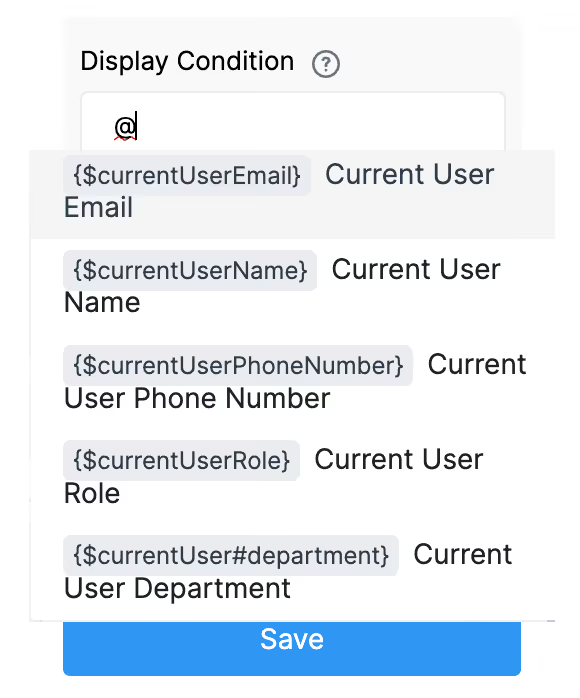
This field controls when the navigation item should be visible to the user. You can use spreadsheet type logic to implement these conditions. You can make use of workplace attributes to determine who can view these items.
Just type @ to insert variables. Only system (workplace-level) variables are supported here, not app variables.
Examples: {$currentUserName}, {$currentUserEmail}.
You can also get workplace attribute variables that you may have added. If you want to know more about using workplace attributes, click here.
Click the ✔ (check icon) to save the configuration.
The item will be added to the Navbar Items list.

Enable this option to allow users to switch between workplaces from the left navigation panel.
Normally, if a user is part of multiple workplaces, they can click the arrow next to the workplace logo at the top of the navigation panel and select another workplace from the dropdown list to switch to it.
Disable this option to prevent users from switching workplaces. The workplace switcher will no longer be displayed in the navigation panel.
Enable this option to allow users to collapse the left navigation panel. When enabled, an arrow icon appears at the bottom of the navigation panel. Clicking this icon collapses or expands the navigation panel as needed.
Disable this option to keep the navigation panel permanently expanded. Users will not be able to collapse it.
L374, 1st Floor, 5th Main Rd, Sector 6, HSR Layout, Bengaluru, Karnataka 560102, India
3500 S DuPont Hwy, Dover,
Kent 19901, Delaware, USA


.svg)




3500 S DuPont Hwy, Dover,
Kent 19901, Delaware, USA
L374, 1st Floor, 5th Main Rd, Sector 6, HSR Layout, Bengaluru, Karnataka 560102, India