
Still need help?

The Trigger Email workflow lets your app react to incoming emails, without any user action in the app. Unlike the New Submission, Edit Submission, or Review Submission flows (which depend on a user creating, editing, or reviewing a submission), this Trigger Email resides under Trigger Based Flows and runs independently of user activity. Click here to know more about the different flows.
Once set up, any email sent to the address generated for this workflow will trigger the steps you connect below it.
Who can send emails to this address?
Anyone. The generated address is not restricted and you decide where to share it.

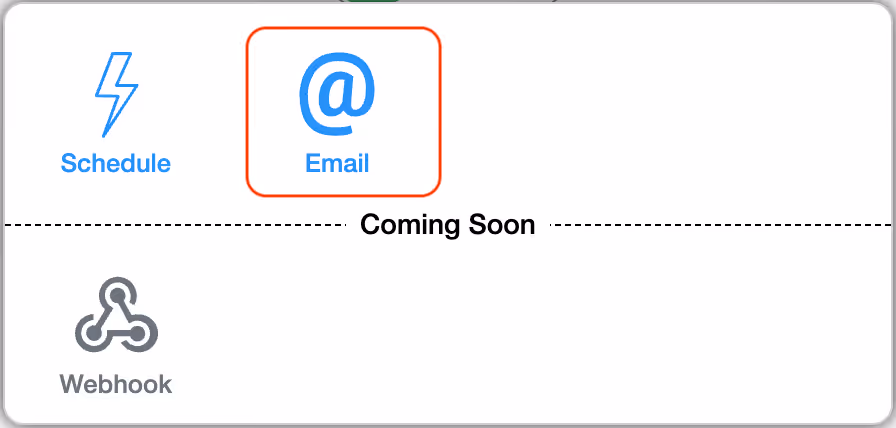
Go to Design App → Workflows → Trigger Based Flows. Click Start and choose Email.
When you add the Trigger Email to a Trigger Based Flow, you can configure it using the panel on the right.
Give a clear name so you can identify it later (for example, “Leads Inbox”, “Vendor Quotes”).
This is a required field.
Each Trigger Email shows a generated workflow email address under the input (e.g., abc123@workflow.clappia.com).

Enter a prefix to make the address meaningful, e.g., report-abc123@workflow.clappia.com.

The base part is unique per app and the same across multiple Trigger Emails in the same app; the prefix helps you (and your team) tell addresses apart.
You can add multiple Trigger Emails in one app. Even if you reuse the same prefix, they act as separate triggers; best practice is to use distinct prefixes so it’s clear which trigger is receiving which emails.
Use the copy icon to copy the full address and share it with senders.
Turn this on to start listening for incoming emails. Turn it off to pause this trigger and all steps beneath it (you won’t lose your configuration).
When an email is sent to the address you set up in the Trigger Email, Clappia automatically creates a set of ready-to-use variables containing different parts of that email.
These variables can be used to fill fields in the next step of your workflow. For example, in a Create Submission step, to store the email’s sender, subject, body, attachments, and more.
To see and use these variables, type @ while setting up the next step. A list will appear with all available email details, such as:


Tip for email bodies: If you map {EmailTrigger#text} or {EmailTrigger#html} into a Single Line Text field and the body is long, it can get truncated due to that field’s character limit. For email content, use a Multi-line Text field to capture the full body.
You must add at least one step under Trigger Email for it to do anything.
Map the email variables into the target app’s fields. For example,

You can add multiple Create Submission steps under a single Trigger Email if you want one incoming email to create multiple submissions (for example, in different apps).
Example:
Let’s say you maintain a “Leads MIS” app. Vendors/customers email leads-abc123@workflow.clappia.com. Each email automatically creates a submission in the MIS with fields filled from the email’s From, Subject, Body, and Attachments.
To stop processing emails:
Clappia workflows allow you to maintain a continuous email thread when sending replies through the regular Email Workflow. This is done by capturing the Message ID of the incoming email and using it when generating outgoing emails. By reusing this Message ID, the system ensures that responses appear in the same email thread instead of creating new, separate conversations.
How it works
When an email triggers a workflow, Clappia provides several system-generated variables about the incoming message. One of these is the Message ID {EmailTrigger#messageId}, which uniquely identifies the email. This value can be stored inside the submission and later mapped to the Email Workflow so that replies continue the same thread.
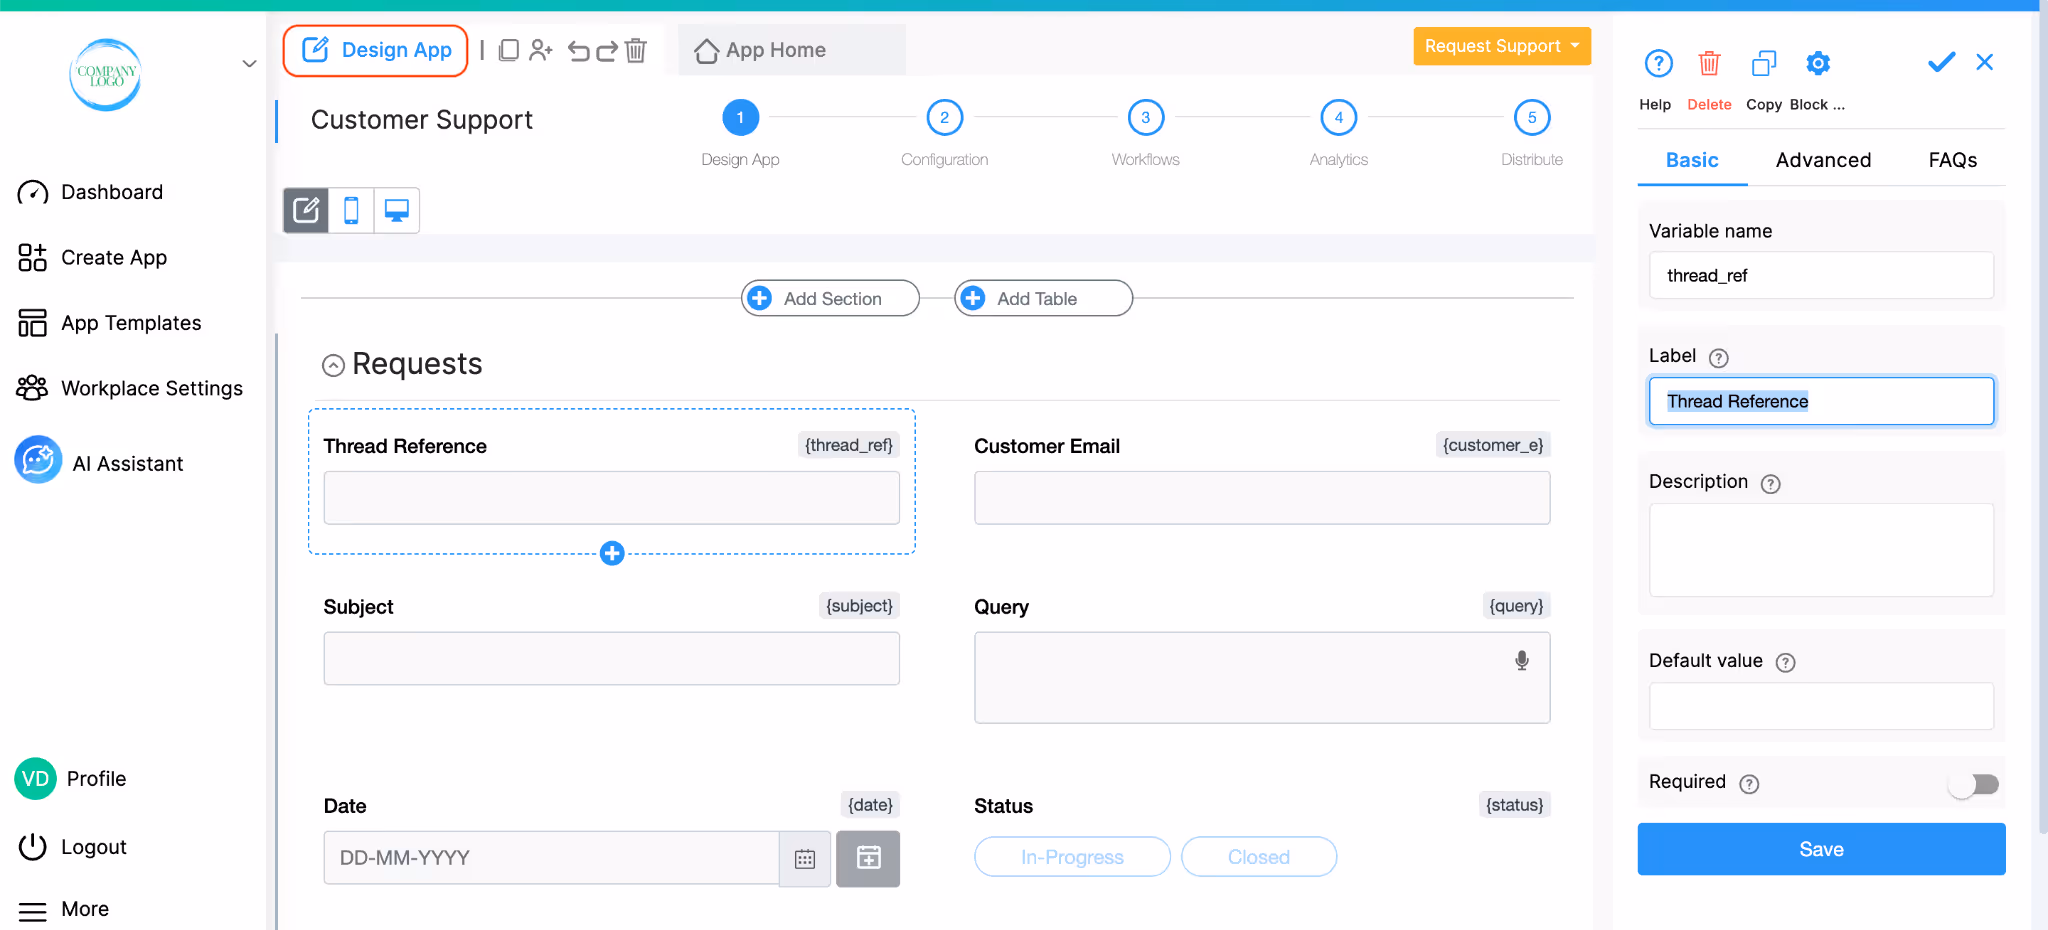
Suppose a Trigger Email is followed by a Create Submission, which automatically creates a new record in the selected app. As part of this setup, you can map the Message ID to a field in the app. For example, in a customer support app, you may have a field named “Thread Reference” to store the Message ID associated with the conversation.
Step 1: Capturing the Message ID in Create Submission
Let’s say your workflow begins with a Trigger Email that receives an incoming email such as a customer query. If you have added a Create Submission, then each incoming email automatically creates a new support ticket (new submission) in the app.
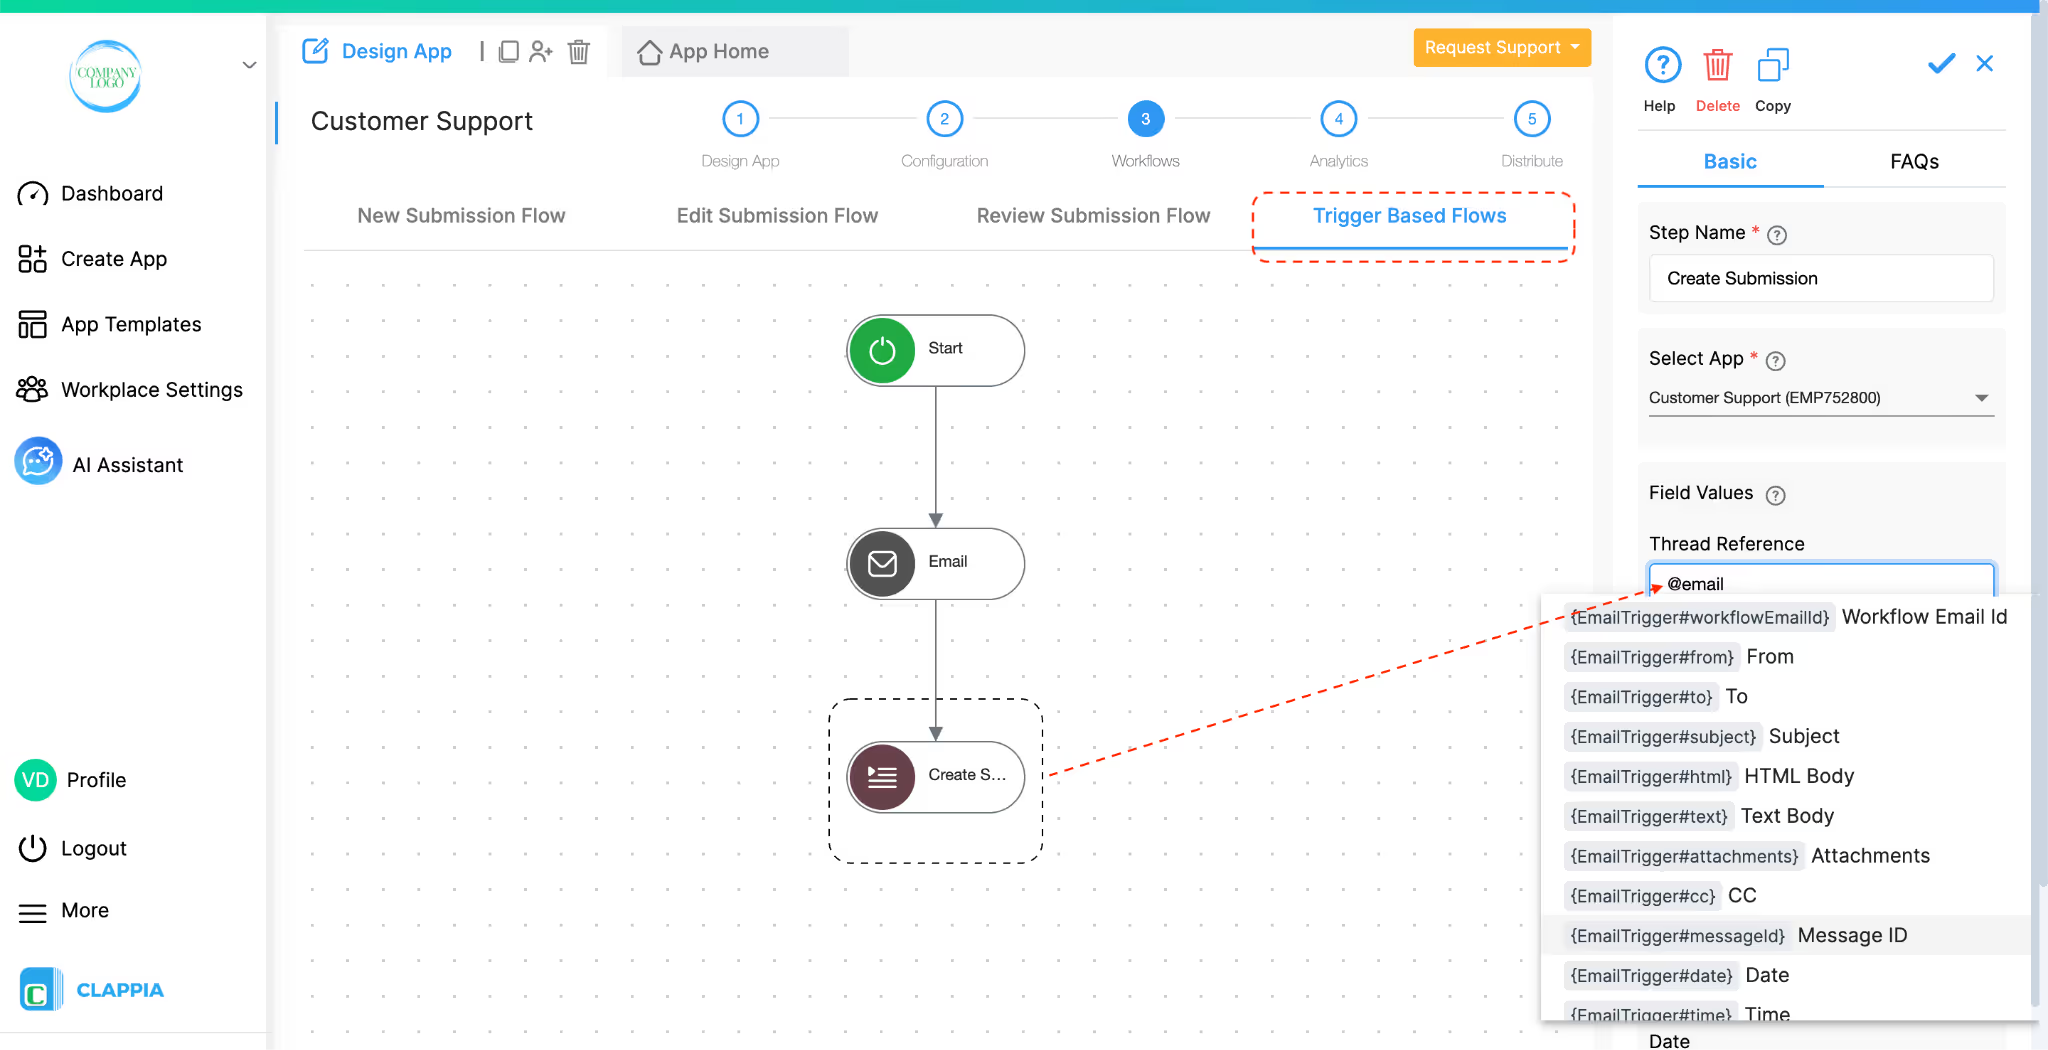
In the Create Submission's set up, for the field mapping, map the system-generated {EmailTrigger#messageId} into the Thread Reference field. This ensures that every submission created from an incoming email stores the Message ID for that conversation. Just type @ to pull a list of variables and select this message id variable.

Step 2: Using the Message ID to Reply in the Same Thread
After the submission has been created and the Message ID is stored in the Thread Reference field, the next part of the workflow involves sending replies.
For example, if a user has to update the submission (for example, adding a response or changing the status) and an email needs to be sent automatically, then an Email Workflow can be placed in the Edit Submission Flow.
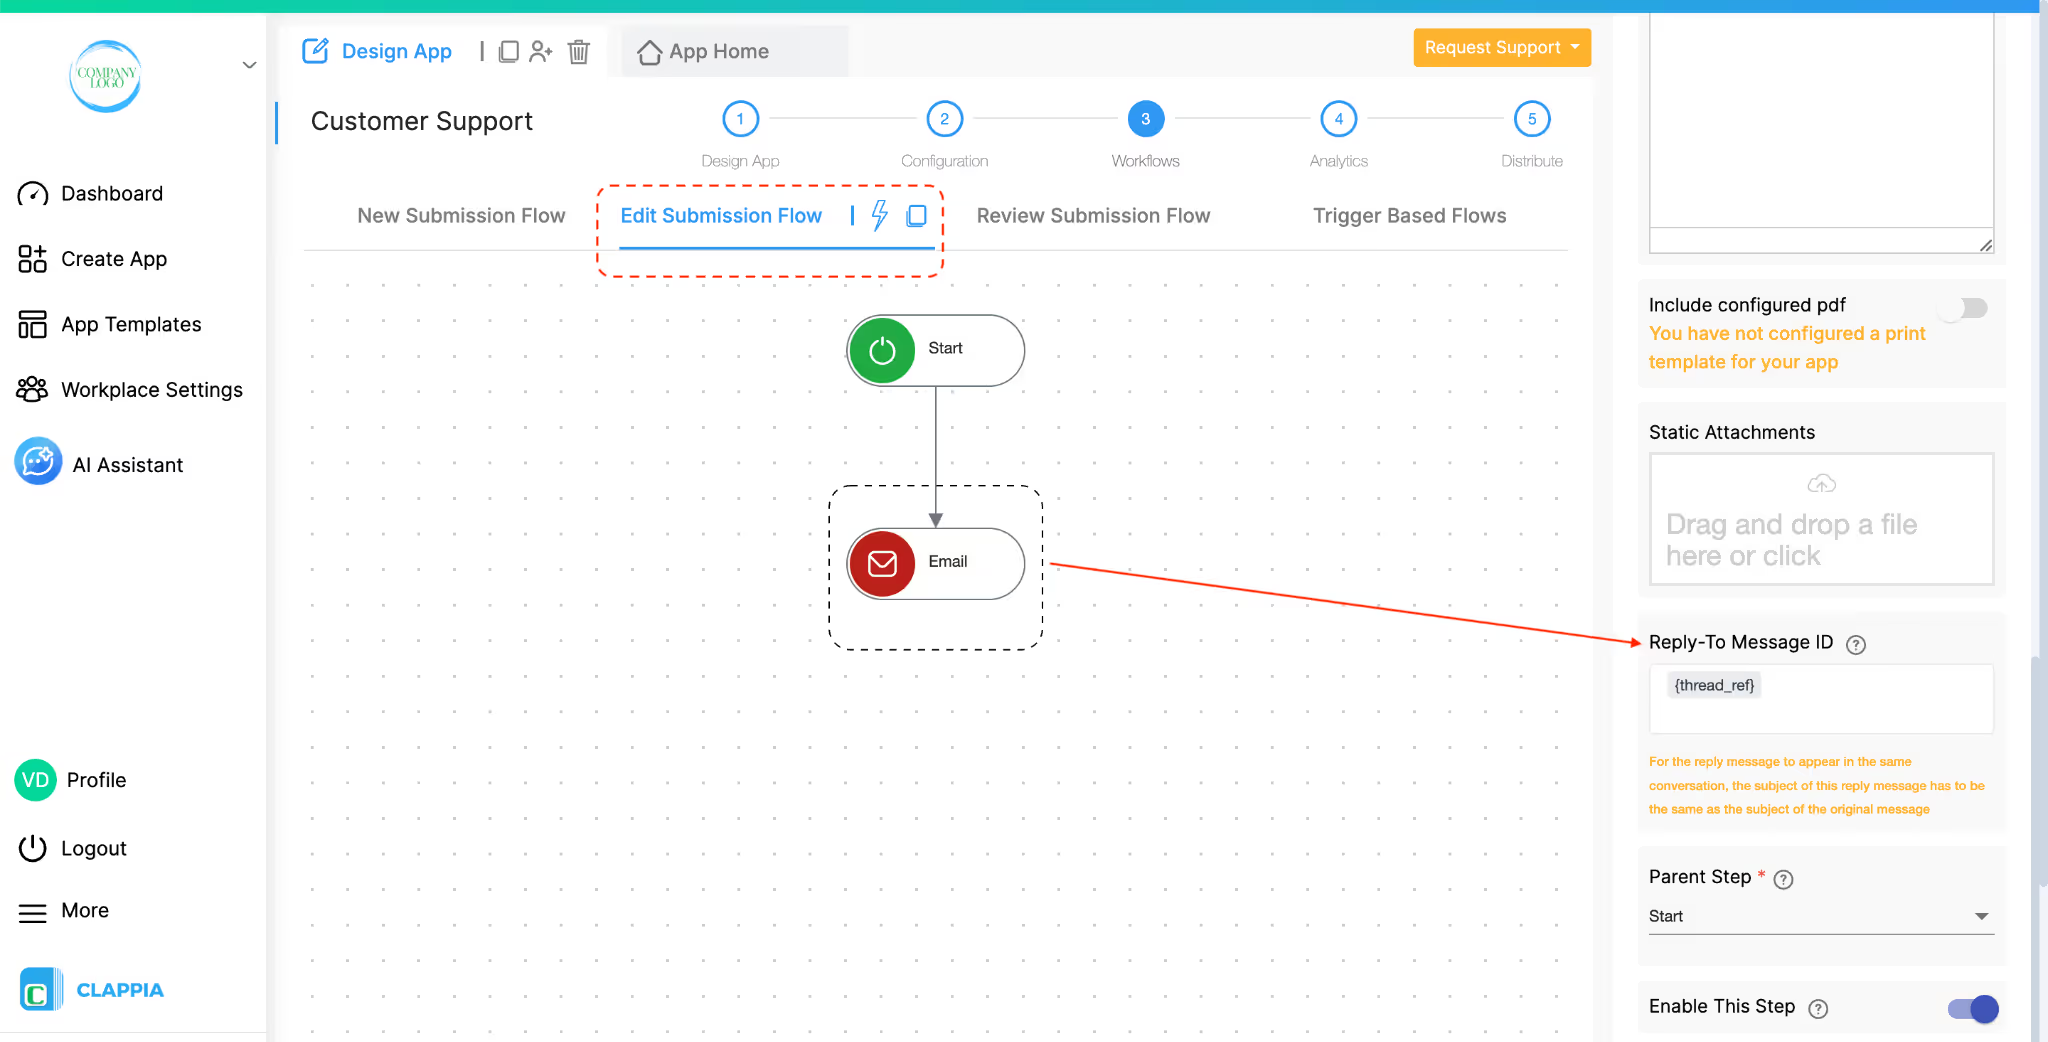
When configuring this Email, you will see an option called Reply-To Message ID. This is where you specify which Message ID the outgoing email should refer to. You simply map the Thread Reference field into this option. Type @ followed by the field name to get the right variable. By doing this, the Email workflow uses the Message ID from the original incoming email, allowing the reply to continue the same thread.
As a result, each time the submission is updated and the Email workflow runs, the outgoing message is sent as part of the existing conversation rather than starting a new email chain. This keeps all communication related to the submission grouped together in a single thread.

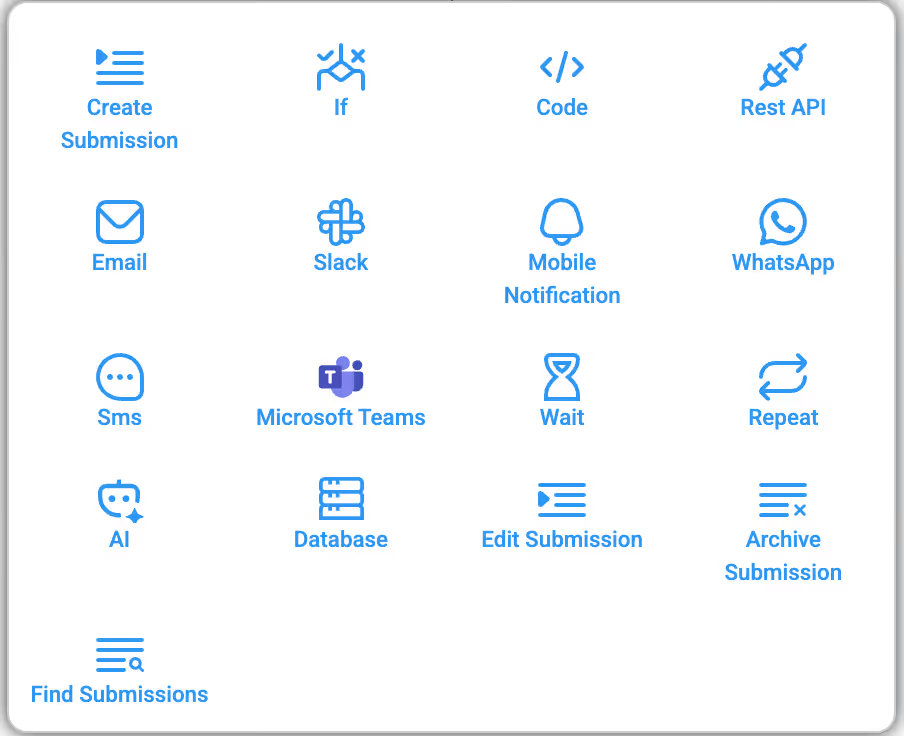
The following workflow steps can be used after the Trigger Email step:
Create Submission
If
Code
Rest API
Email
Slack
Mobile Notification
WhatsApp
Sms
Microsoft Teams
Wait
Repeat
AI
Database
Edit Submission
Archive Submission
Find Submissions
You can check this using the Workflow Logs. Go to your app and open the App Home section. Then click on the Logs tab. By default, you'll see the Workflow Logs tab open. Click on any log entry to see a panel on the right showing the execution status. If there's an error, the panel will indicate where it occurred.
L374, 1st Floor, 5th Main Rd, Sector 6, HSR Layout, Bengaluru, Karnataka 560102, India
3500 S DuPont Hwy, Dover,
Kent 19901, Delaware, USA


3500 S DuPont Hwy, Dover,
Kent 19901, Delaware, USA
L374, 1st Floor, 5th Main Rd, Sector 6, HSR Layout, Bengaluru, Karnataka 560102, India
.svg)
