
Still need help?

The Twilio workflow allows you to integrate your Clappia apps with your own Twilio account. This lets you trigger Twilio actions directly from Clappia workflows using your existing Twilio subscription.
This step is useful when you want to manage messaging or communication through Twilio while controlling usage and billing directly from your Twilio account.
Whatsapp:
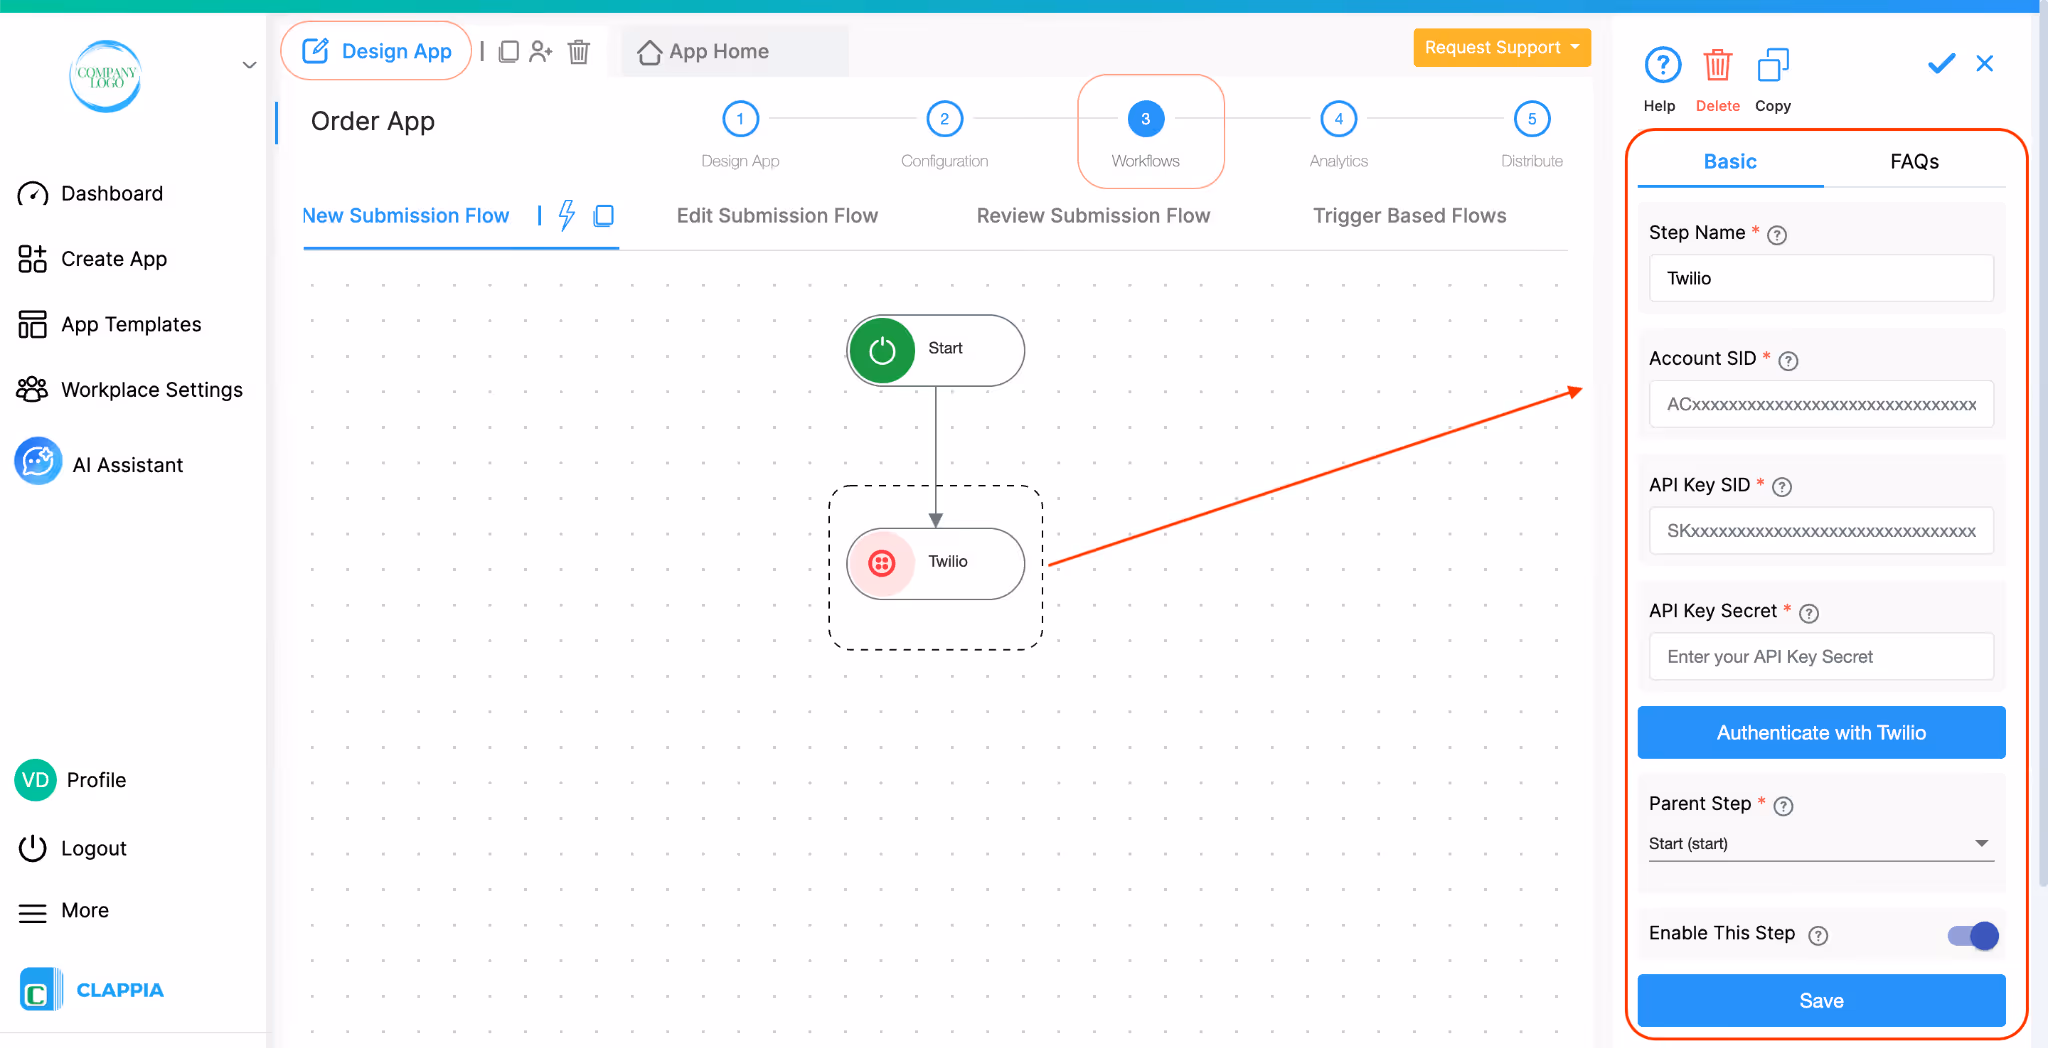
Once added, select Twilio to configure it using the right-hand panel.
You can provide a name for this workflow step.
By default, it will be named Twilio, but you can rename it for easier identification (for example, Send message via Twilio).
The Account SID identifies your Twilio account.
To find it:
These credentials allow Clappia to securely authenticate with your Twilio account.
To generate them:
Important Note:
Enter both values into the API Key SID and API Key Secret fields in Clappia.
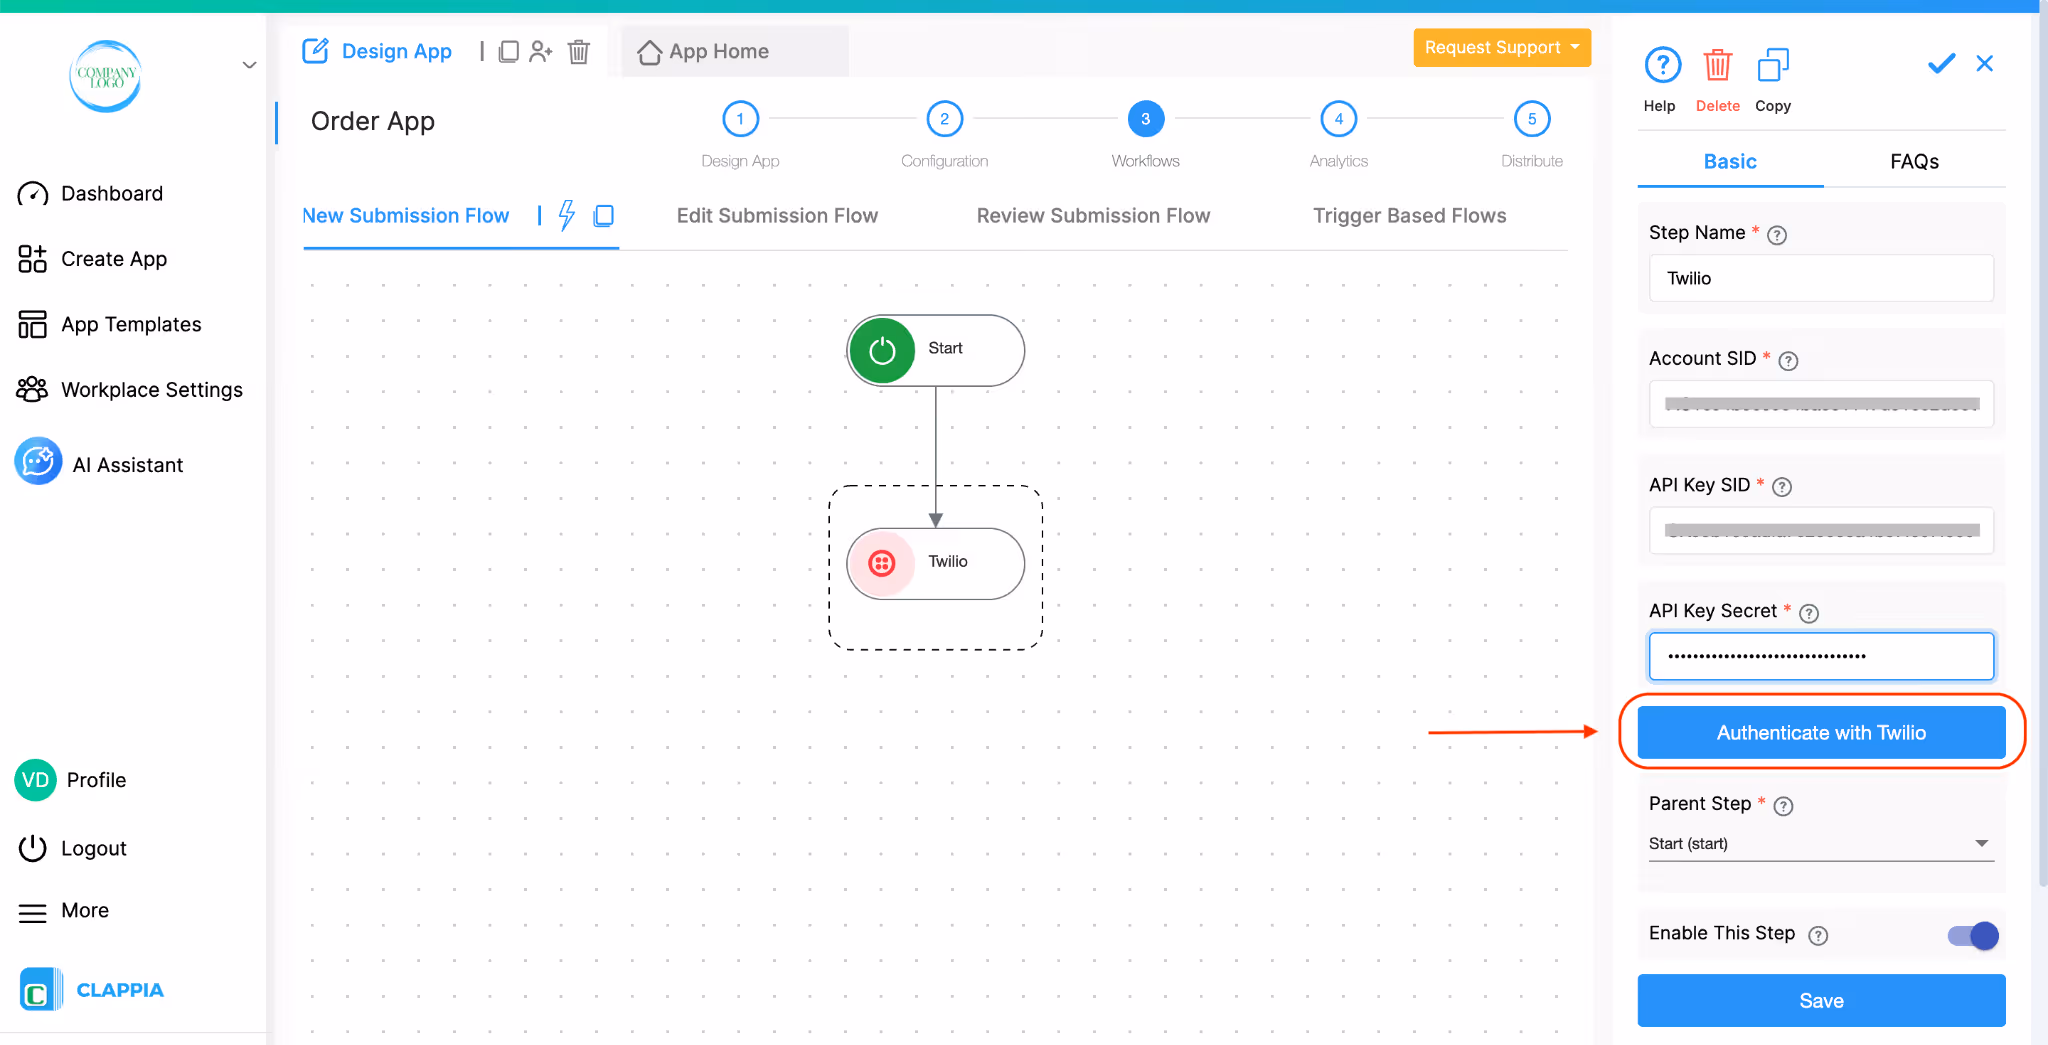
After entering the Account SID, API Key SID, and API Key Secret, click Authenticate with Twilio.
This verifies the credentials with Twilio.
Authentication must succeed before the workflow step can be saved and executed.
Once you click Authenticate with Twilio and the authentication is successful:
You can use Re-authenticate with Twilio if you later update your Twilio credentials or need to reconnect the account.
After successful authentication, additional configuration options become available in the Twilio workflow step.
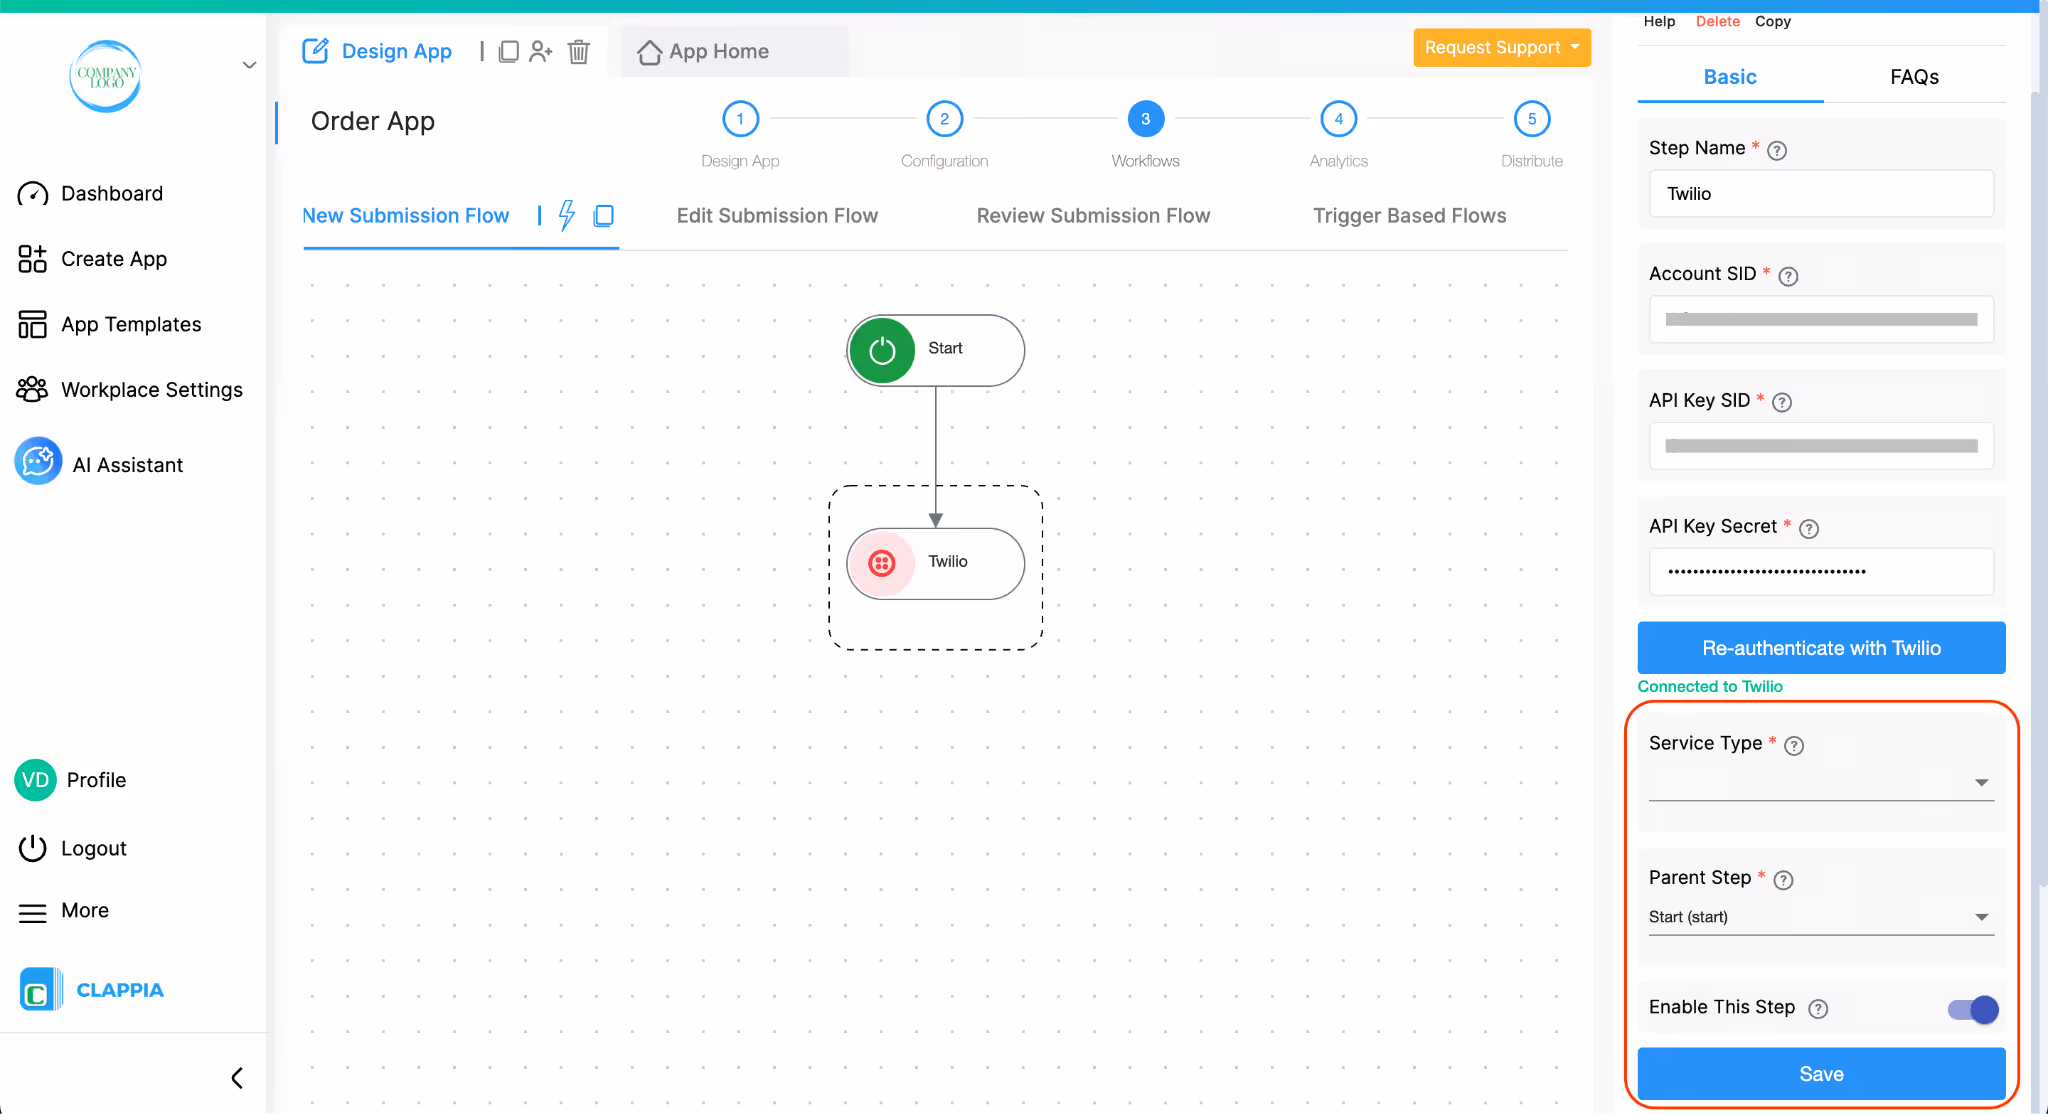
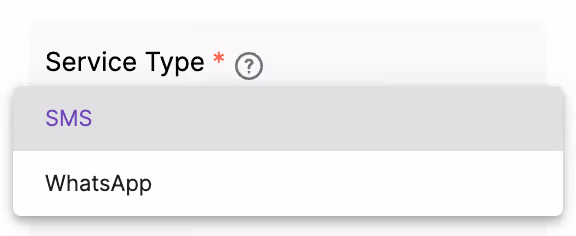
After authentication, you will see a new required field called Service Type.
From the Service Type dropdown, select how you want to send messages using Twilio.
The available options are:
Depending on the service type you select, you get additional options to configure.
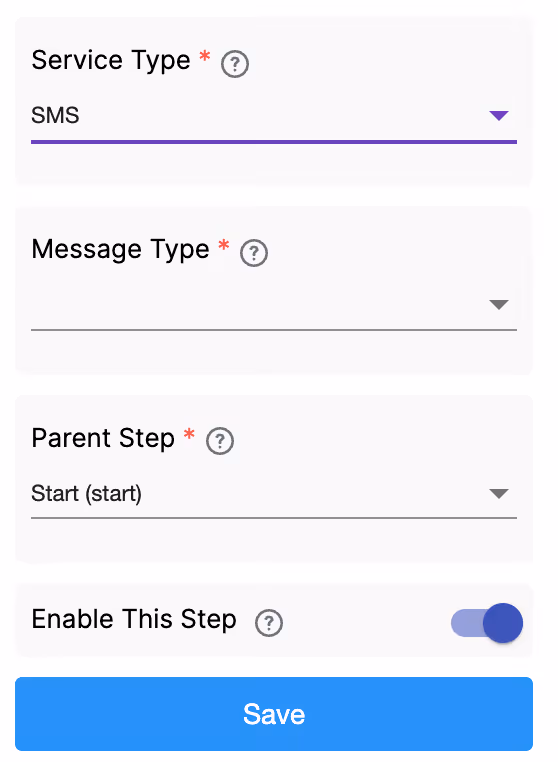
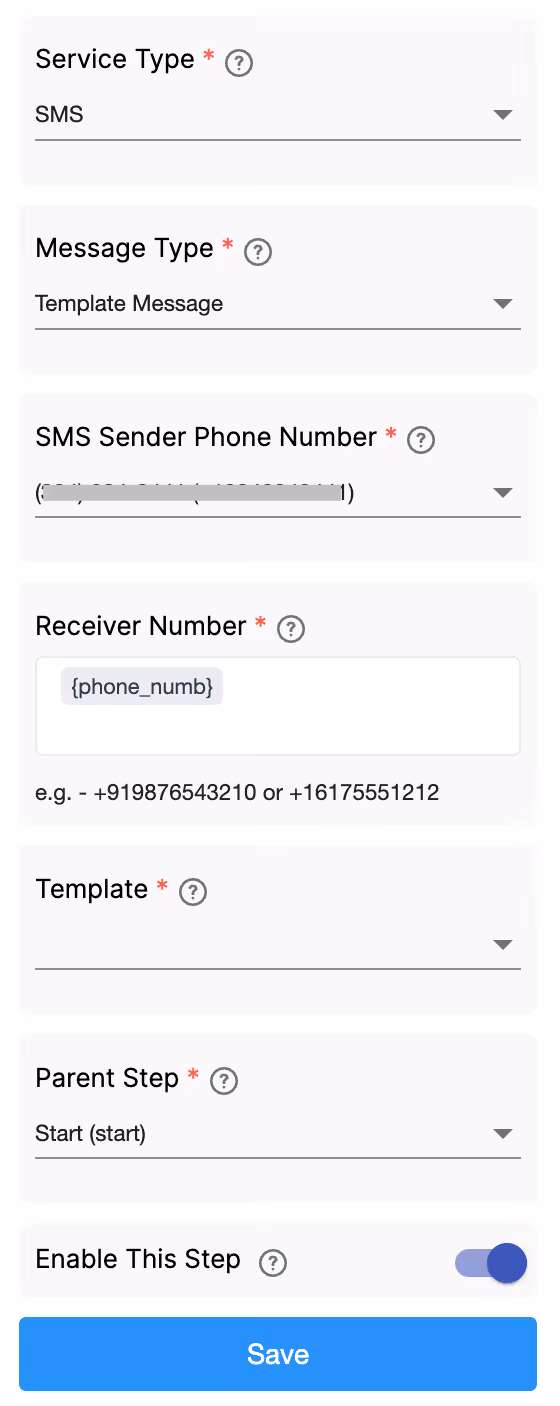
When Service Type is set to SMS, additional message configuration options are displayed.
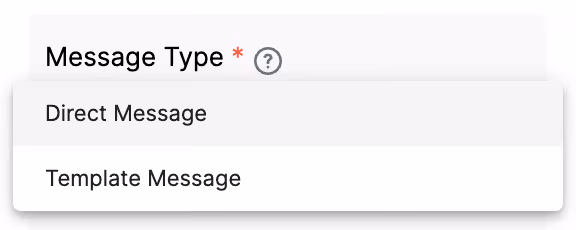
Select the type of SMS you want to send:
Each message type shows a different set of options.
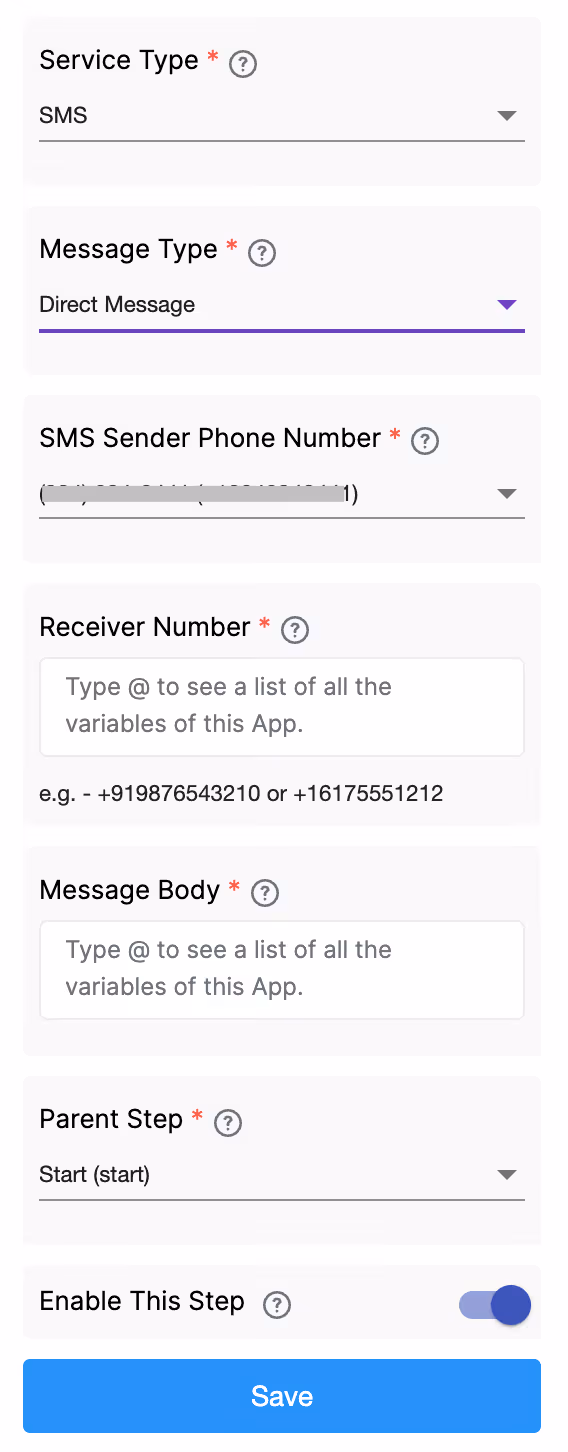
When Message Type is set to Direct Message, the following fields are available:
Select the Twilio phone number that will be used to send the SMS.
This list is populated from the phone numbers available in your connected Twilio account.
Specify the phone number to which the SMS should be sent.
You can insert values from your app submissions by typing @ and selecting a field variable.
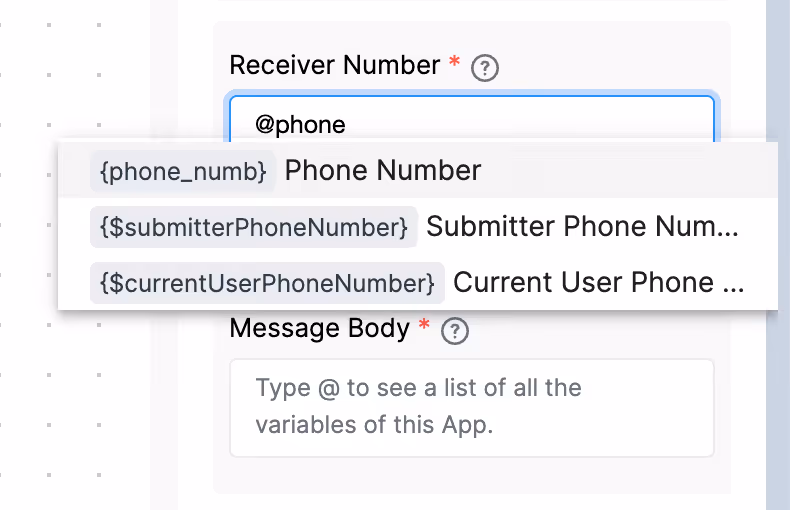
For example, if your app has a phone number field, you can insert that field’s variable here so the message is sent to the number provided in the submission.
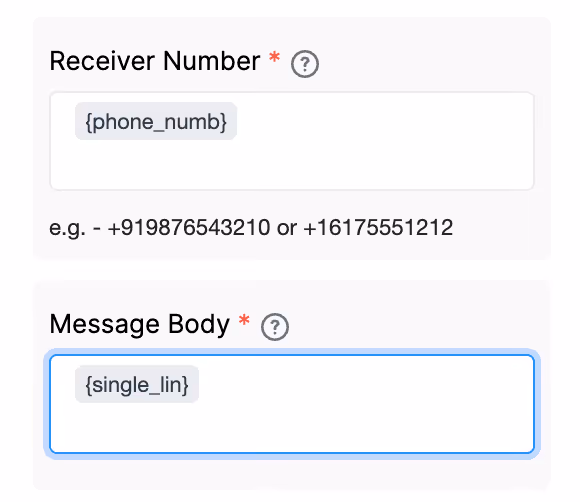
Enter the text content of the SMS.
This field also supports dynamic values.
You can type @ to insert variables from your app, such as names, submission IDs, or values from text or multiline text fields.
When Message Type is set to Template Message, the configuration changes to support Twilio message templates.
Select the Twilio phone number that will be used to send the message.
Specify the recipient’s phone number.
You can insert a field variable by typing @ and selecting the appropriate app field.
Select a message template created in your Twilio account.
Only templates available for SMS in your Twilio account are shown here.
If the selected template contains placeholders, corresponding input fields are shown.
You can map these placeholders to app field variables by typing @ and selecting the required fields.
If the selected template includes media support, you will see media configuration options:
For SMS, media attachments are attached with a link.
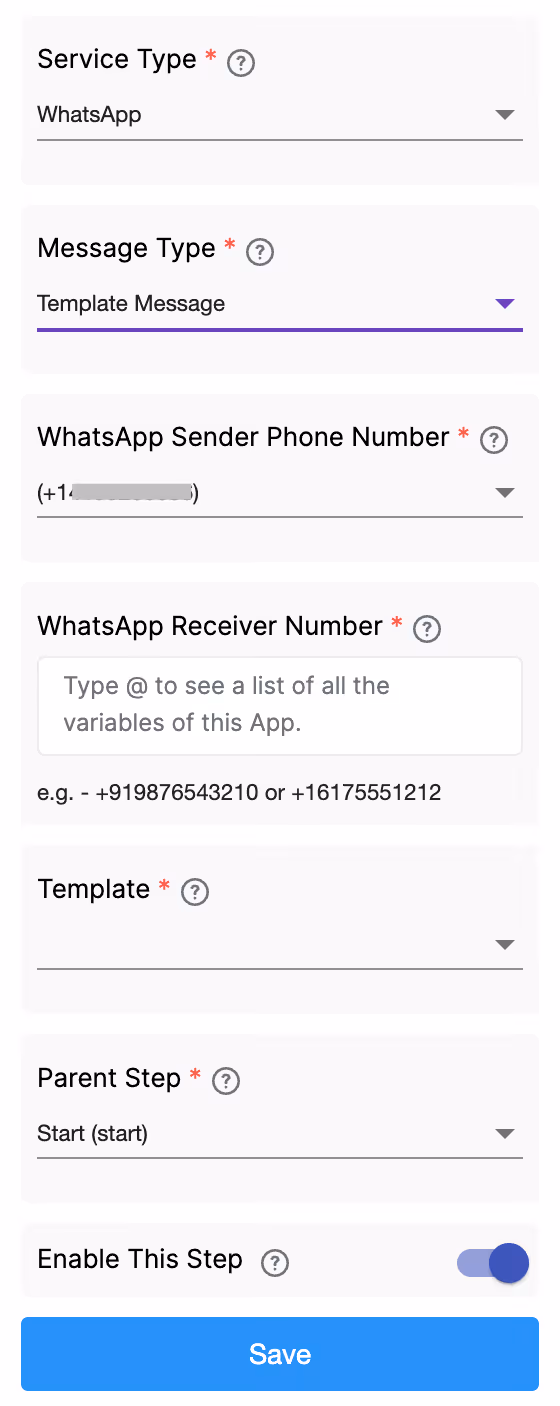
When Service Type is set to WhatsApp, the message type is fixed to Template Message. Direct messages are not available for WhatsApp.
The following fields are displayed:
Select the WhatsApp-enabled sender number from your Twilio account.
Specify the recipient’s WhatsApp number.
You can insert a dynamic value by typing @ and selecting a phone number field from your app.
Select a WhatsApp message template configured in your Twilio account.
Only approved WhatsApp templates are shown.
If the selected template contains placeholders, input fields are displayed for each placeholder.
You can map these to app fields by typing @ and selecting the relevant variables.
If the selected WhatsApp template supports media, you can attach files.
For WhatsApp templates, supported media types include:
Media can be provided in two ways:
The Parent Step determines when this Twilio step runs in the workflow.
This allows you to control the exact sequence in which actions are executed.
This toggle controls whether the Twilio step is active.
Clappia also provides built-in SMS and WhatsApp workflow nodes, which are subject to Clappia-managed limits and add-ons.
The Twilio integration is an alternative that allows you to:
Both options can be used independently based on your requirements.
L374, 1st Floor, 5th Main Rd, Sector 6, HSR Layout, Bengaluru, Karnataka 560102, India
3500 S DuPont Hwy, Dover,
Kent 19901, Delaware, USA


3500 S DuPont Hwy, Dover,
Kent 19901, Delaware, USA
L374, 1st Floor, 5th Main Rd, Sector 6, HSR Layout, Bengaluru, Karnataka 560102, India
.svg)
