The Bulk Edit Data feature allows you to update the details of multiple submissions in your Clappia app at once, instead of opening and editing them one by one in the Submissions tab. This is particularly useful in situations such as:
Normally, in the Submissions tab, each submission has to be opened and edited separately. With Bulk Edit, you can update hundreds or even thousands of rows of data in a single step.
Go to the Submissions tab of your app. Click on the Bulk Edit icon at the top.
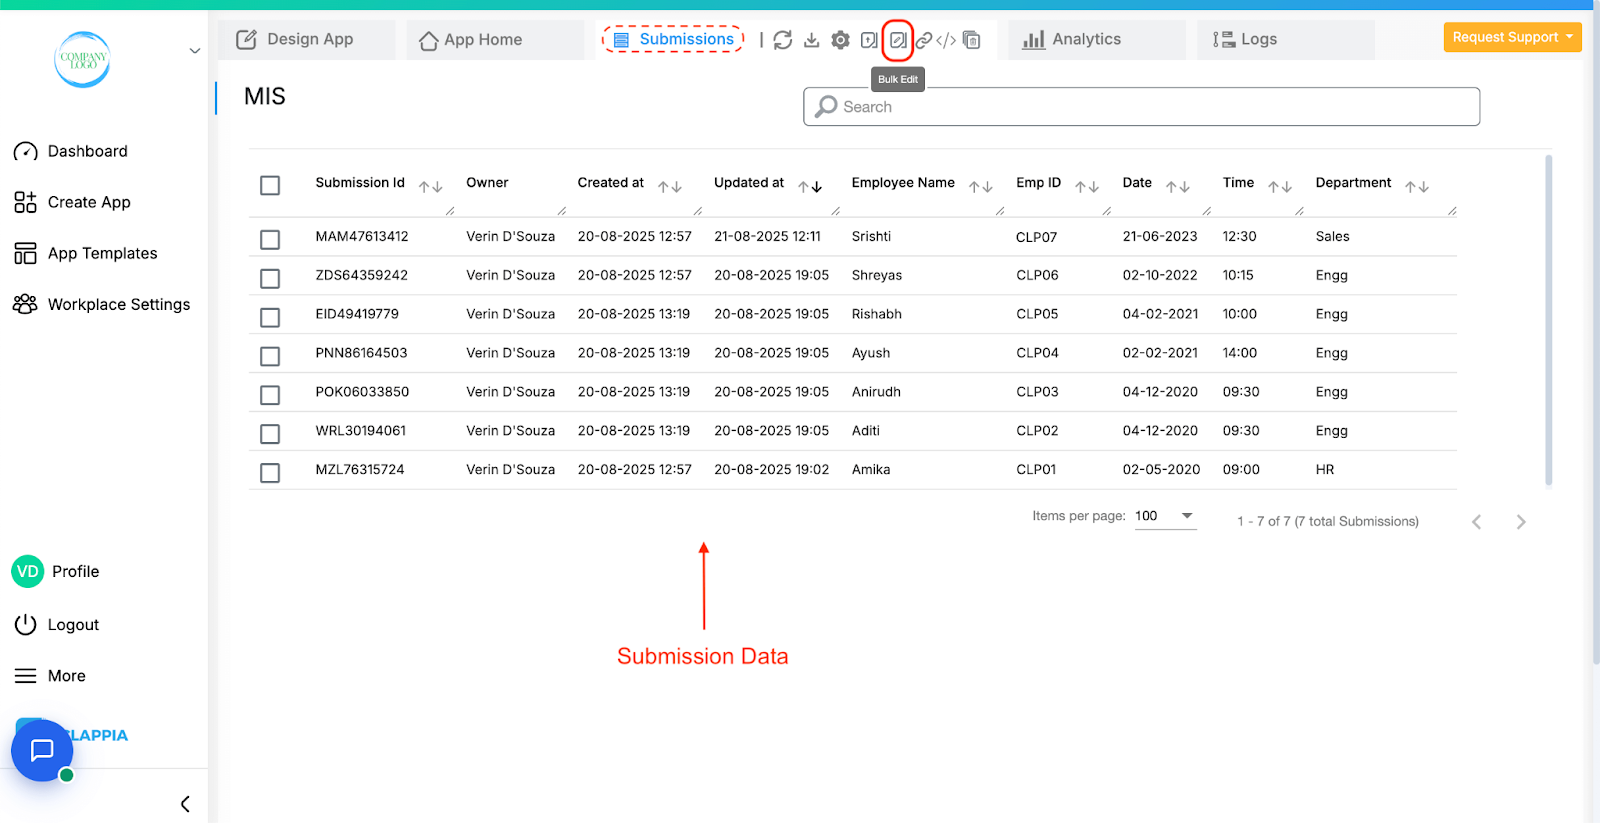
A right panel will appear with upload instructions and options.
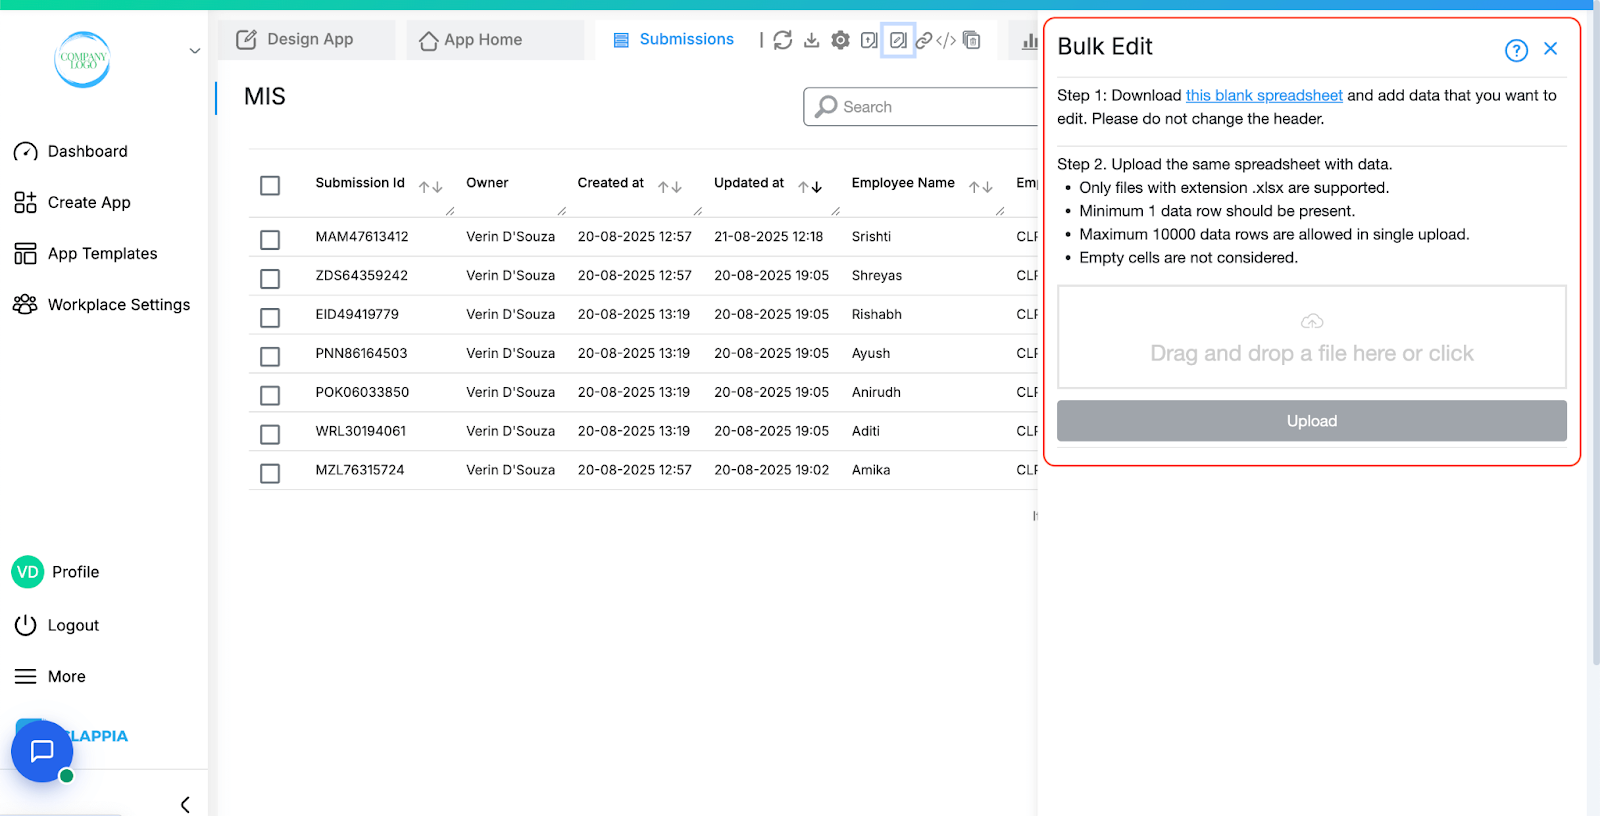
From this panel, you can download a blank spreadsheet, enter your updates, and upload the file back into the app.
Bulk Editing Data in Your App:
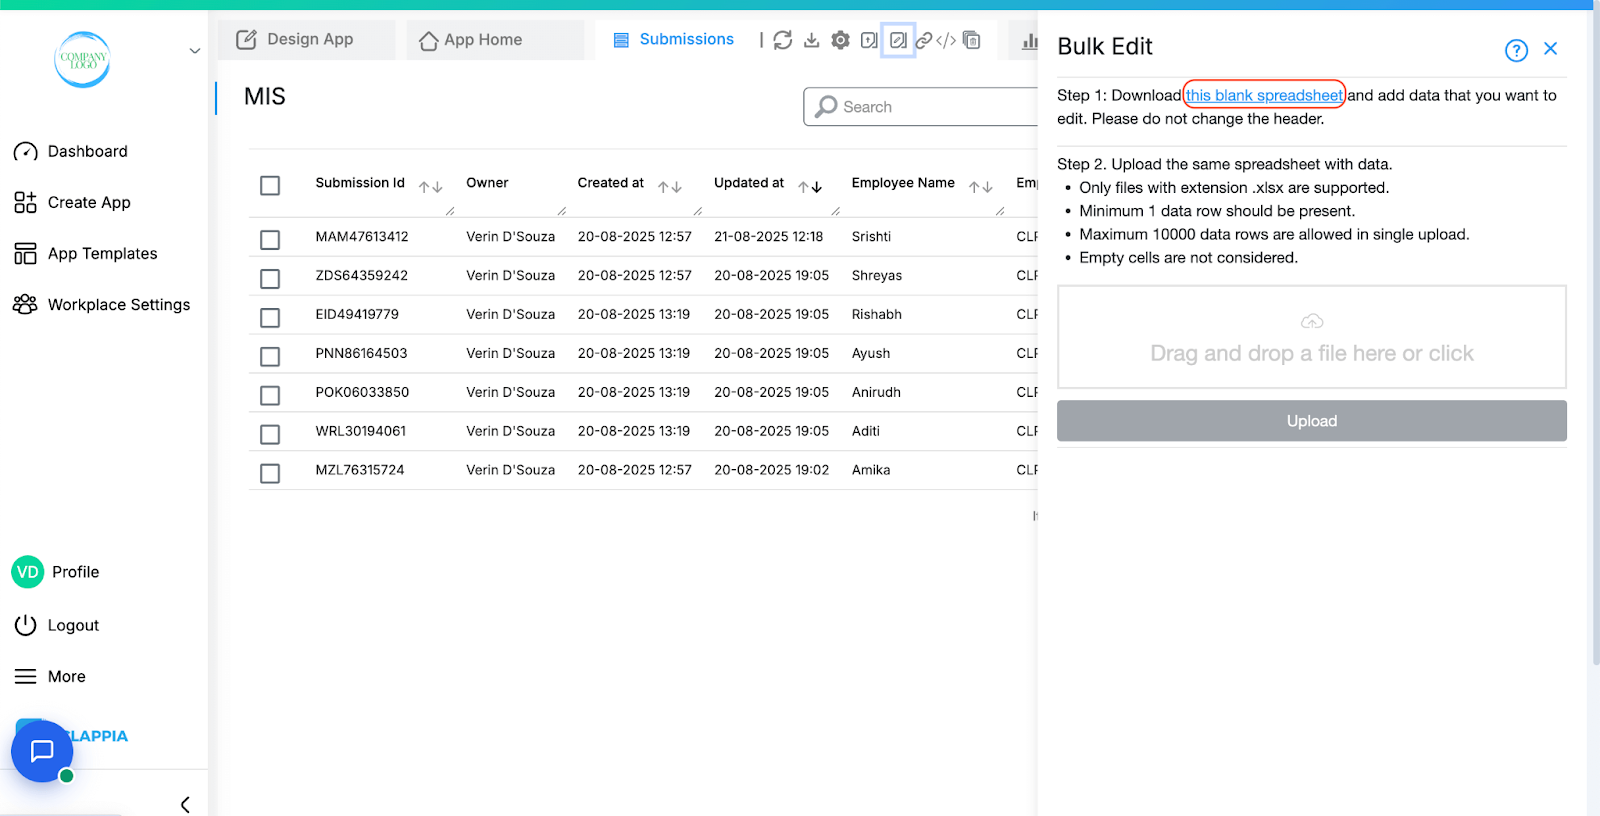
Click on the link in the right panel to download the blank spreadsheet.
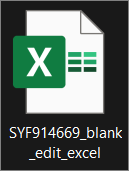
The file will have your App ID as its name and will include all the app fields as column headers.

The spreadsheet will also contain additional headers for Bulk Edit:
Note: Do not change the column headers. These headers map directly to your app fields, and modifying them will cause the edit to fail.
If you only need to bulk edit a specific type of data, you can first apply filters to your submissions table.
For example, you may want to update records belonging to a particular employee, department, or date range.
Once filtered, download the submissions. You can then use the Submission IDs from this filtered list when filling the blank spreadsheet for editing.
This helps you work only on the exact records you want to update, without touching unrelated submissions.
Open the downloaded spreadsheet and click Enable Editing if prompted.
Enter the Submission Id in the first column for each row you want to update. This is required for every record.
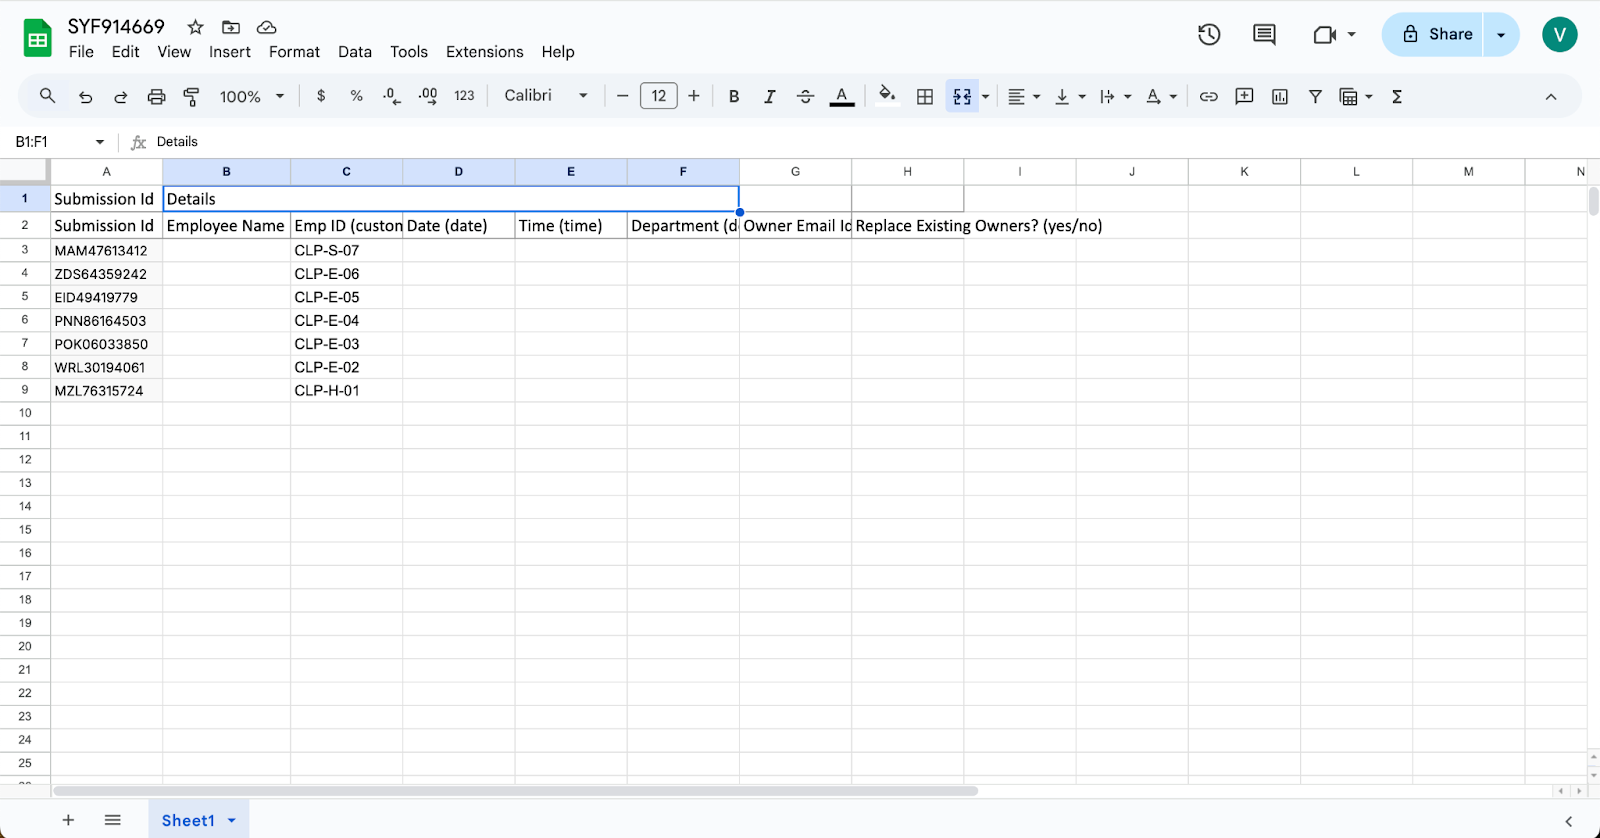
Update the relevant fields under the correct headers. Leave other fields blank if they do not need changes.
Optional:
Add or update the ‘Owner Email Ids’.
Set ‘Replace Existing Owners?’ to yes or no, depending on whether you want to overwrite or add to the current owners.
Once all data is updated, save the file in .xlsx format.
Return to the Bulk Edit panel. Upload the spreadsheet by either drag-and-dropping the file into the upload area or by clicking to select it from your computer.
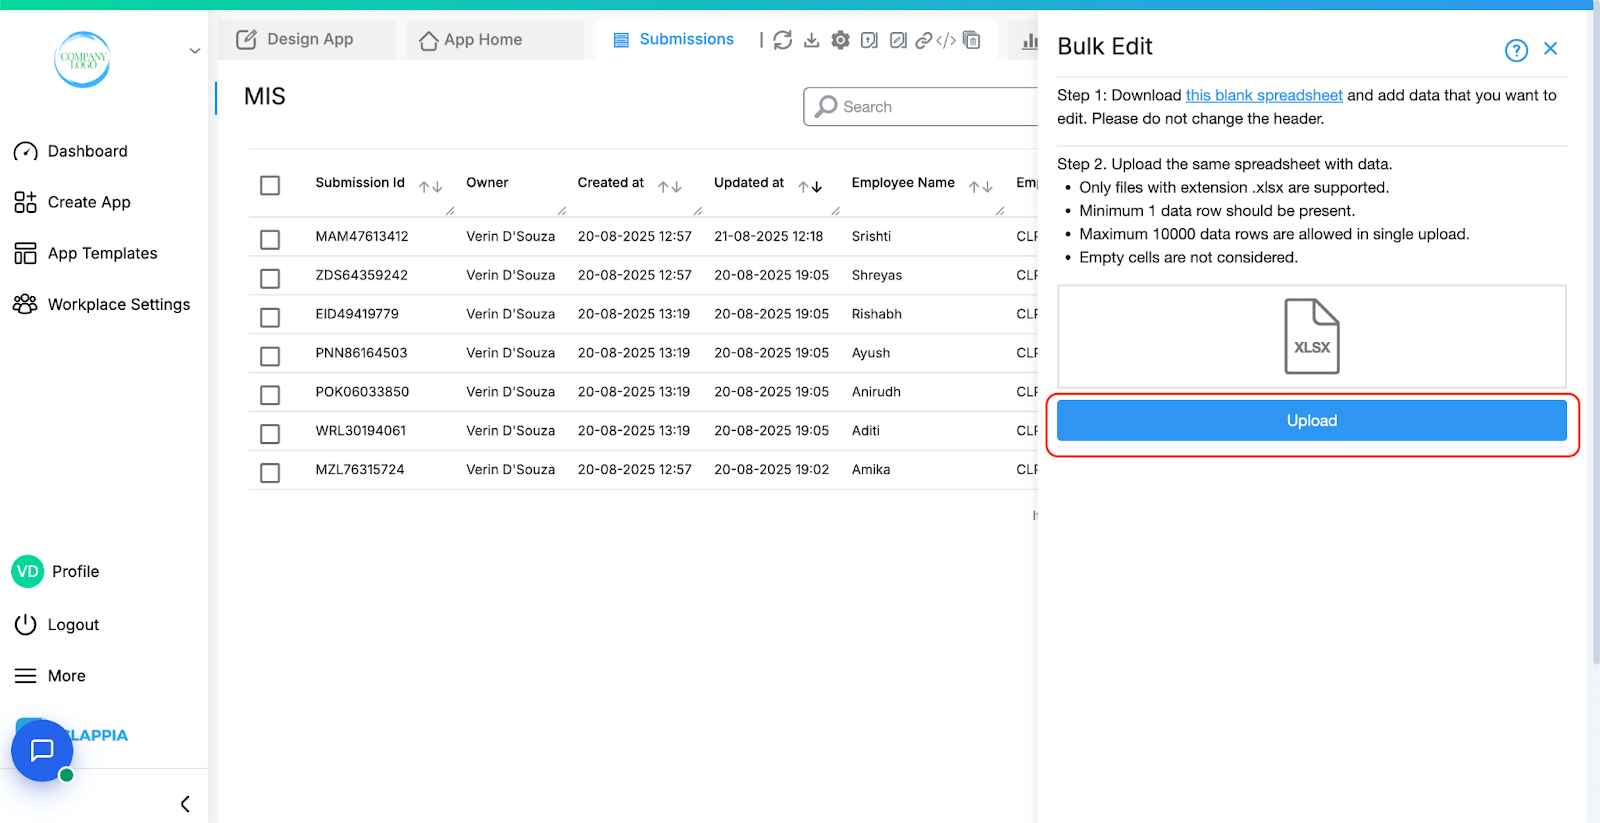
Once the file is selected, click Upload.
If you have uploaded an incorrect file then just hover over the file on the right panel, click on ‘Remove’ and re-upload the correct file.
When preparing your upload file, keep these rules in mind:
If you attempt to upload a file in an unsupported format, the system will reject it and show an error message like this:
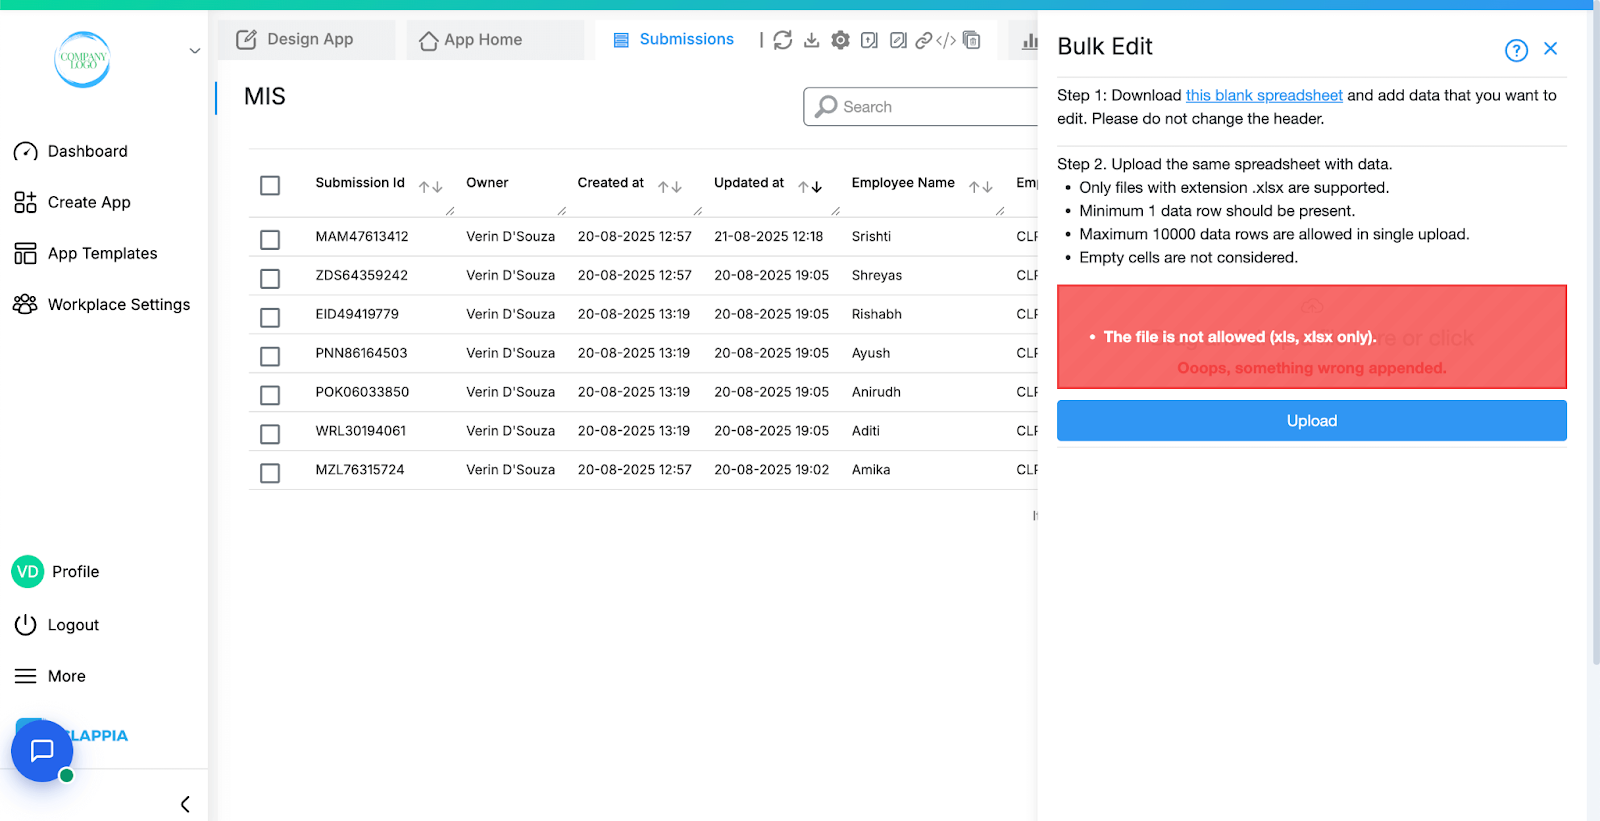
If this happens:
After clicking ‘Upload’, the system processes the file and displays the status at the bottom:
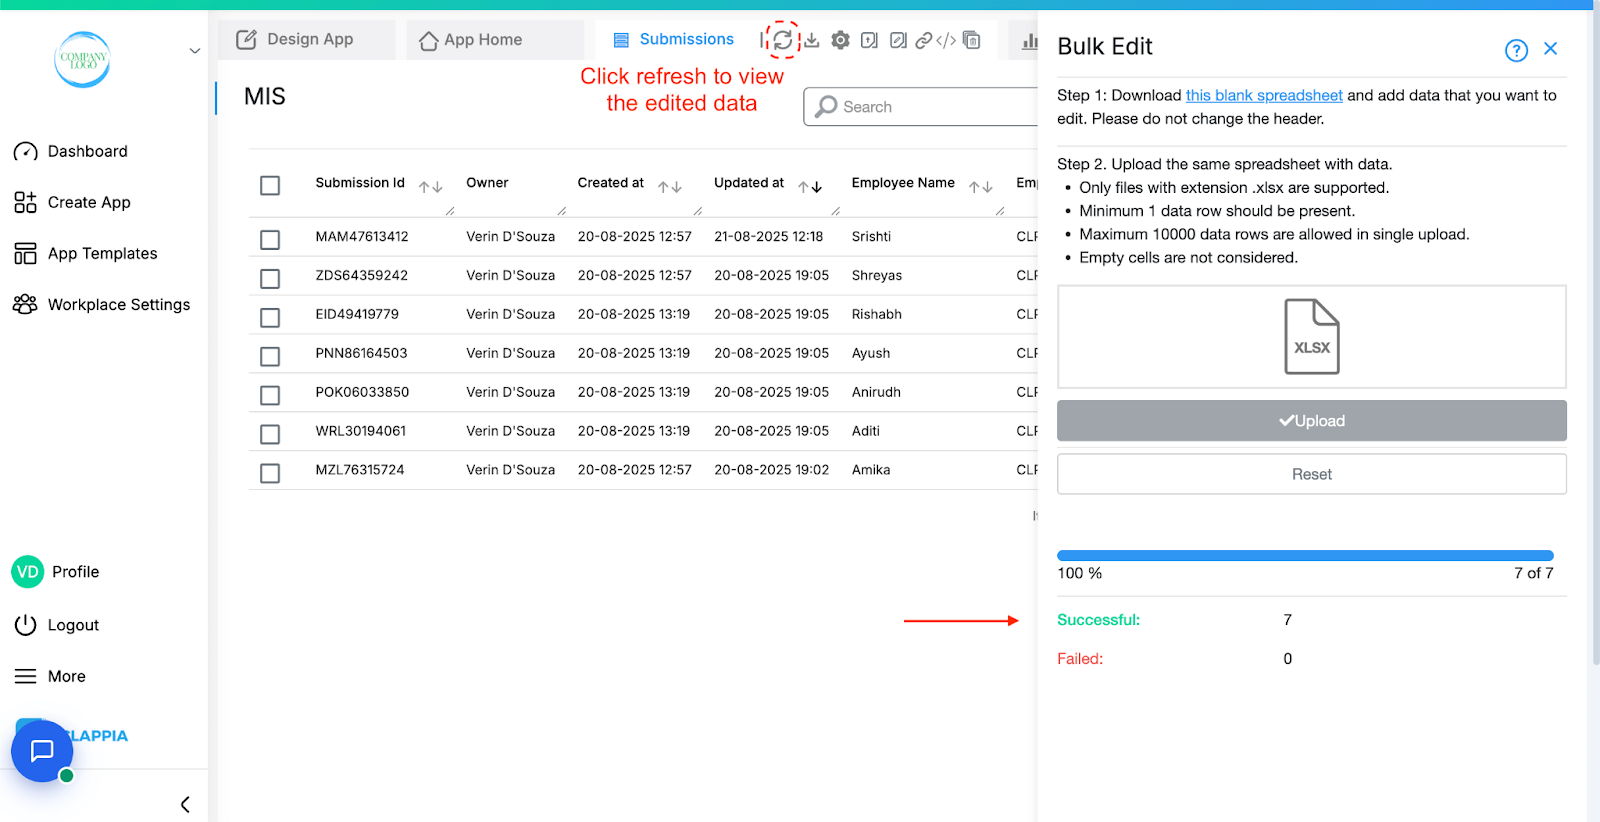
Submissions that are successful are immediately updated in your app. Refresh the Submissions table to view the changes.
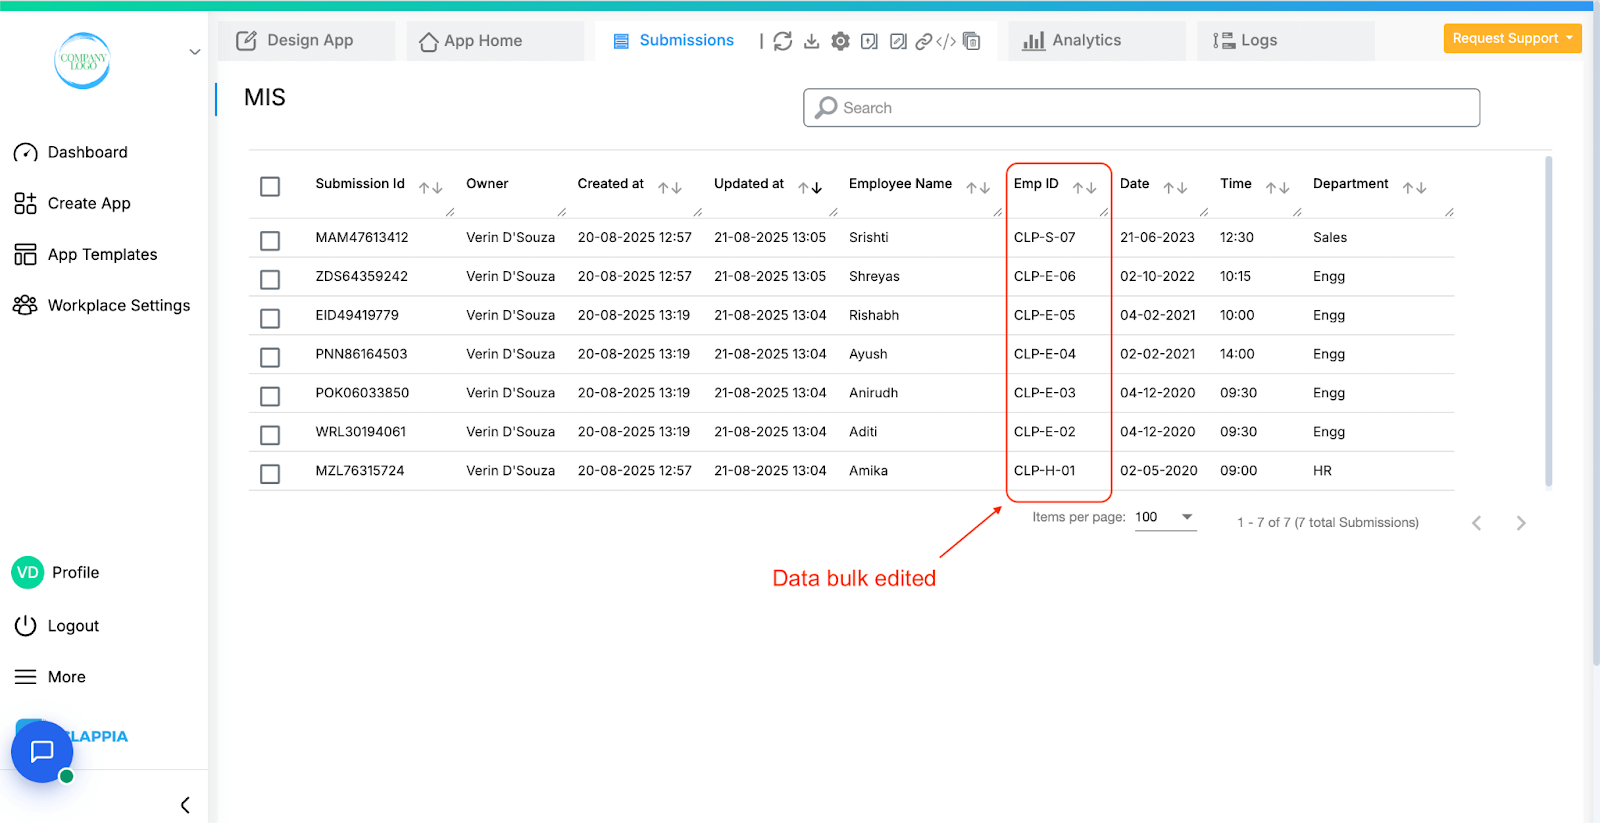
Let’s say this is the file that was uploaded to edit data.
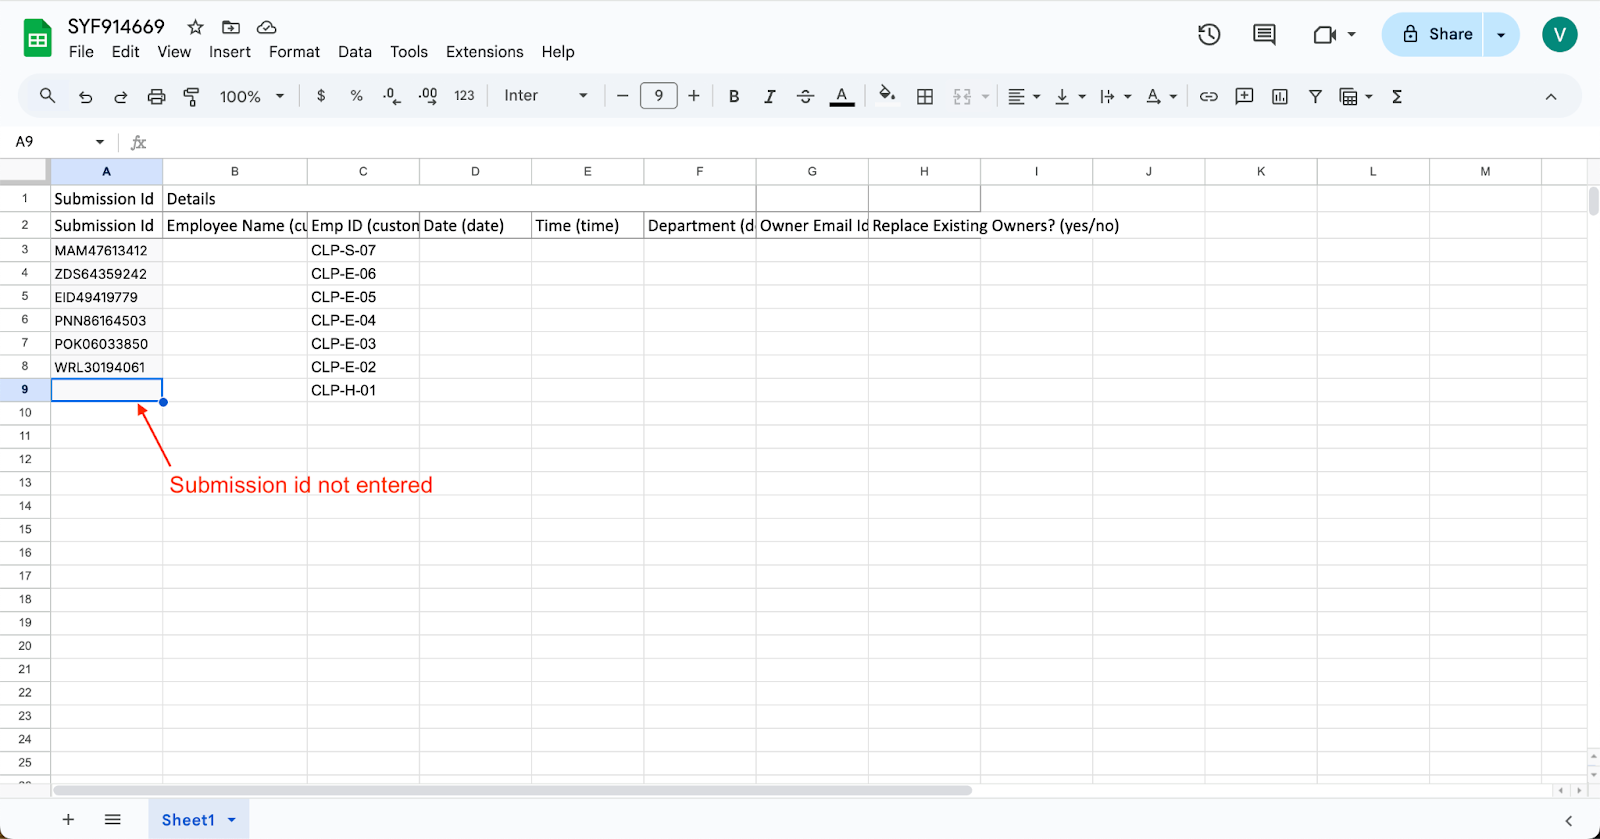
Submissions that fail will not be edited. However, this does not stop the successful rows from being processed i.e. partial edits are supported.
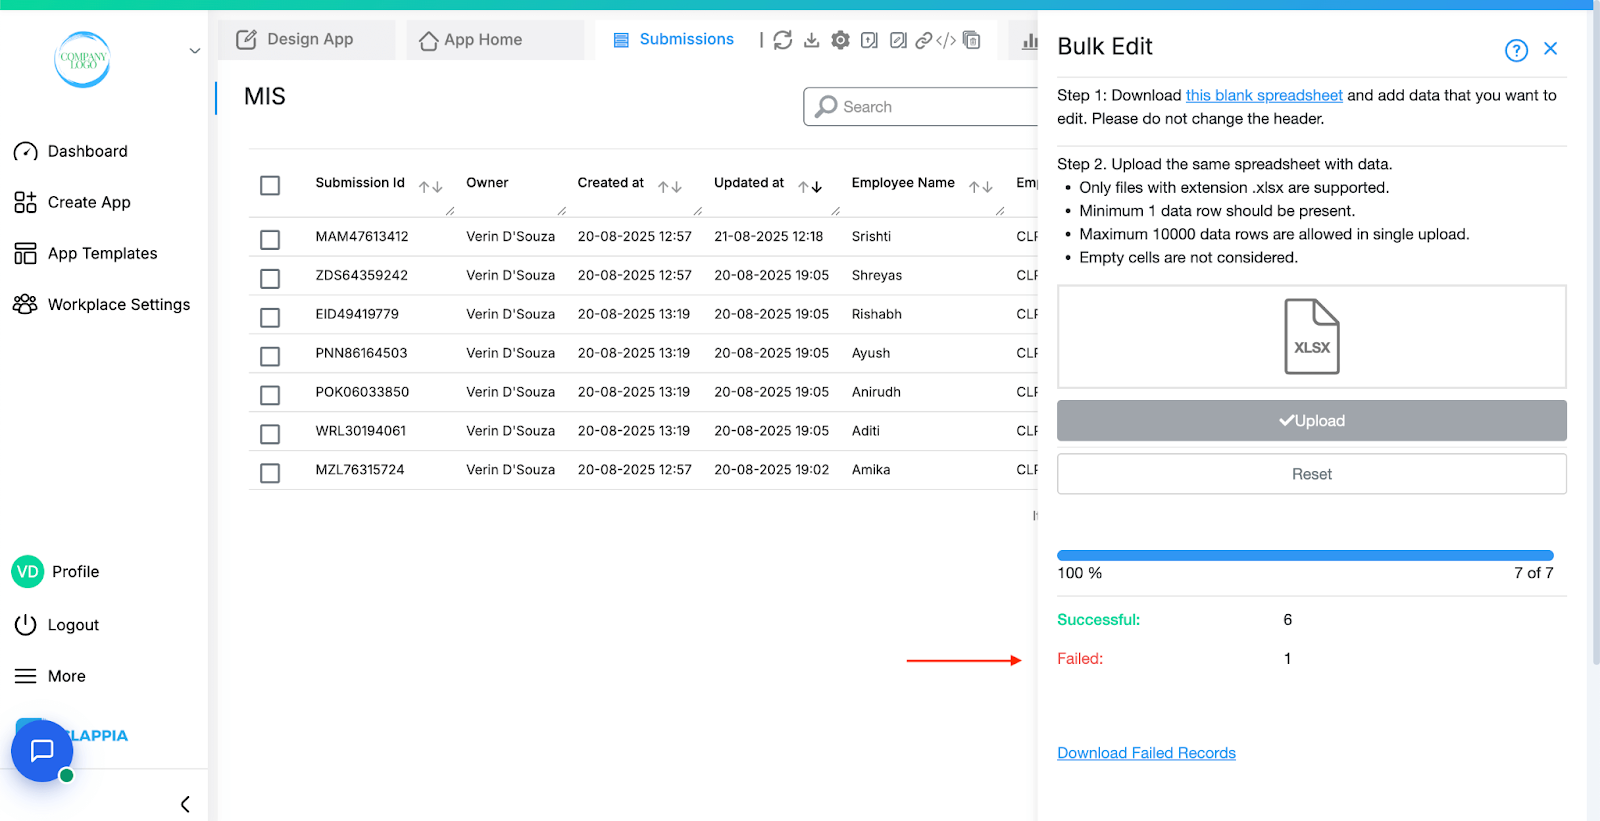
If any data fails to be edited during the upload:
You will see an option to Download Failed Records.
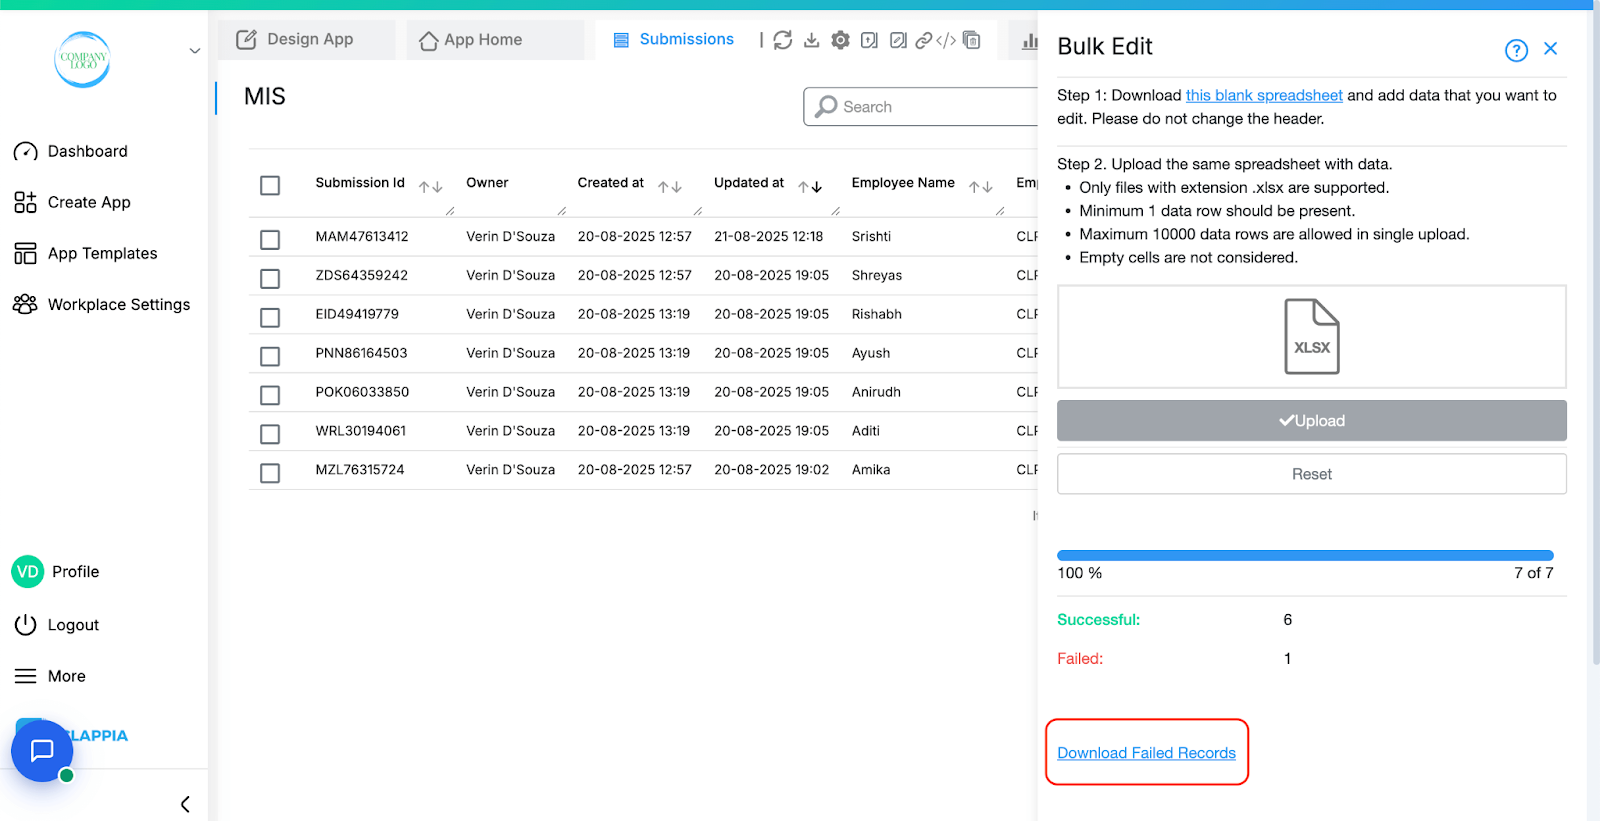
This file contains only the rows that failed, with an additional column called Error Reasons at the end. This column explains why each row could not be processed.

To fix failed rows:
Note: Always re-upload the failed records file instead of the original spreadsheet to avoid creating duplicate edits for rows that were already processed successfully.
Some typical issues that cause rows to fail include:
Once the upload completes, refresh the Submissions table to see your updated records.
Any owner changes you made will also reflect immediately.
You can also directly update a few submissions without downloading or uploading spreadsheets. This is useful when:
– You have only a small number of submissions to update.
– The same change needs to be applied across multiple records.
To do this:
Use filters if required to narrow down your submissions. Select the submissions you want to edit from the table.
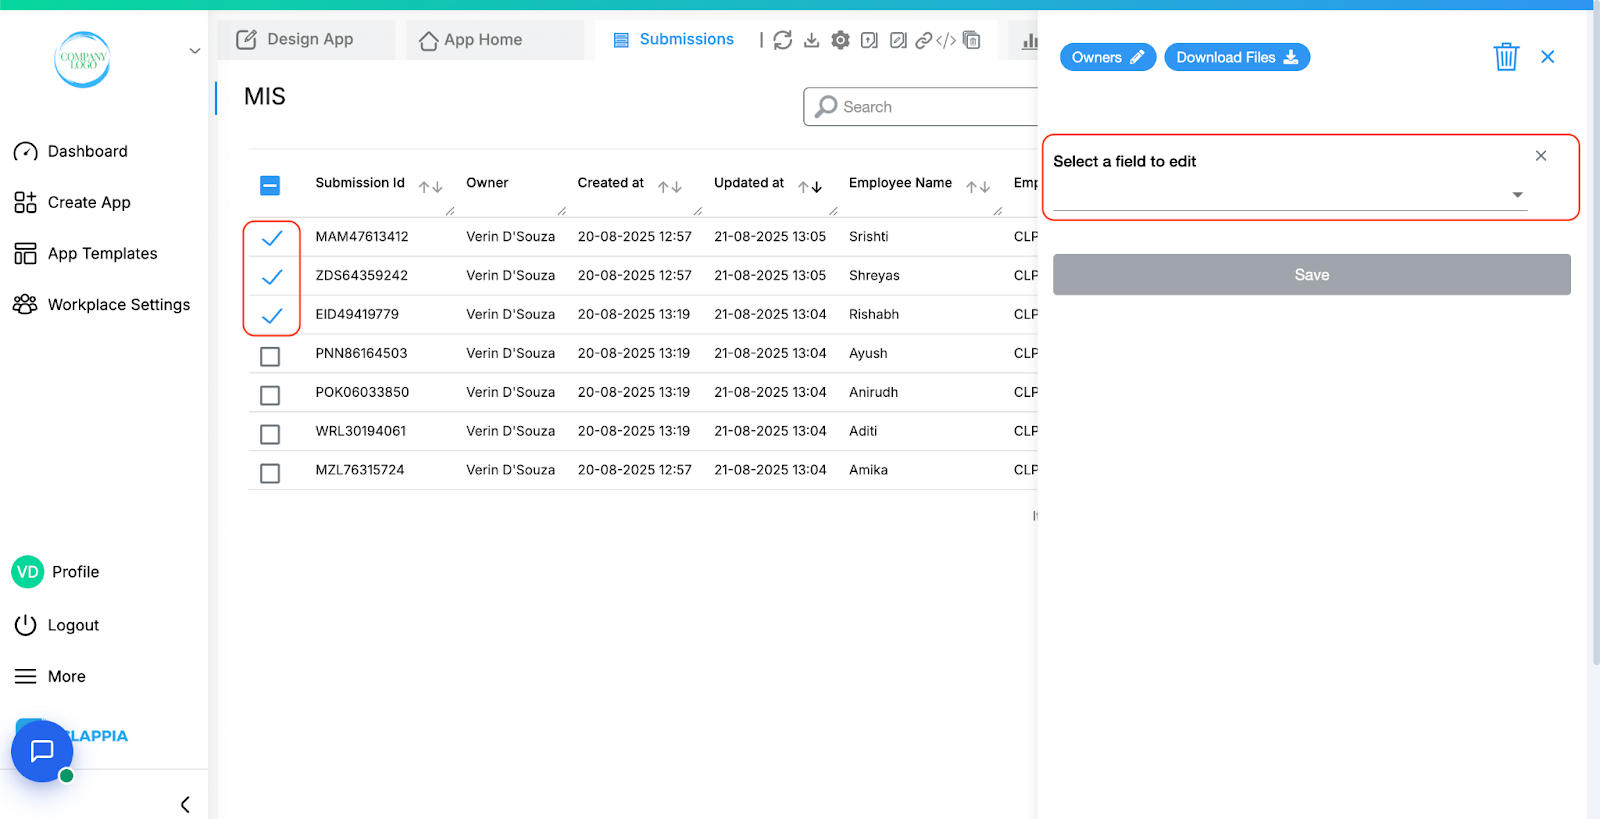
On the right panel, click Select a field to edit and enter the new value to be applied.
If you want to update more than one field, click + Add Field to add another field for editing.
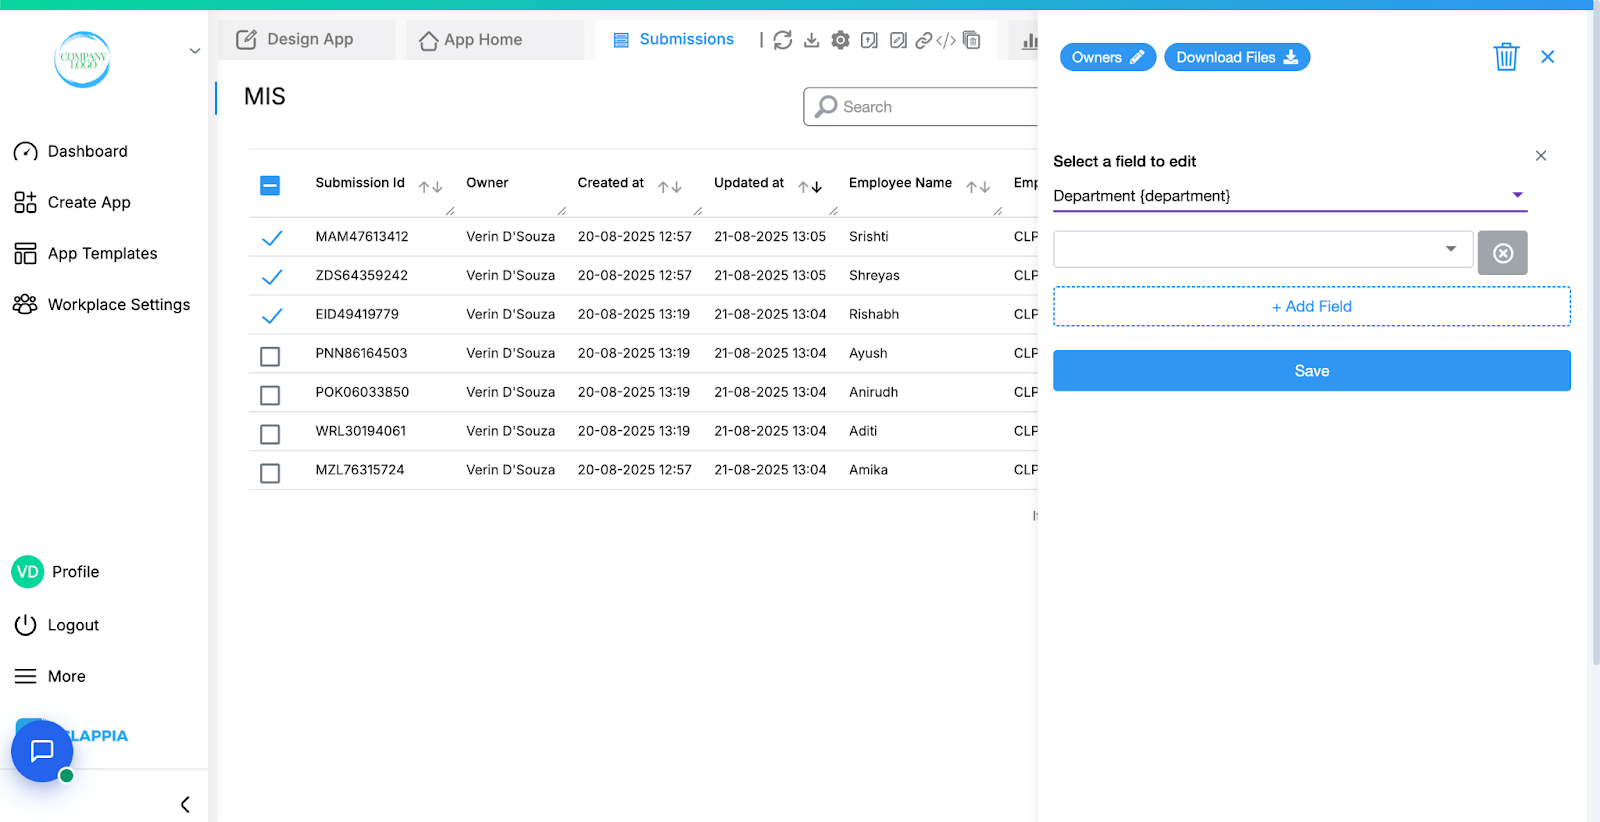
Once ready, click Save. Refresh the Submissions tab to view the updated values.
This method is best for quick edits without handling spreadsheets.
Bulk Edit supports most input fields, but some blocks are not supported. These fields will not appear in the downloaded spreadsheet:
Workflows in Clappia run on individual submissions, such as when a user submits or manually edits a record. However, when using Bulk Edit from the Submissions tab, workflows are not triggered, even though new submissions may be added or existing ones updated.
This is because workflows are designed to process one submission at a time. Triggering them for bulk operations can lead to incomplete or inconsistent results, especially for complex workflows.
If you need workflows to run after a bulk operation, currently you will need to open each submission manually and save it. This will count as an edit and trigger the workflow normally.

L374, 1st Floor, 5th Main Rd, Sector 6, HSR Layout, Bengaluru, Karnataka 560102, India

3500 S DuPont Hwy, Dover,
Kent 19901, Delaware, USA


3500 S DuPont Hwy, Dover,
Kent 19901, Delaware, USA

L374, 1st Floor, 5th Main Rd, Sector 6, HSR Layout, Bengaluru, Karnataka 560102, India

