The Bulk Upload Data feature allows you to upload multiple records (submissions) into your Clappia app at once, instead of adding them one by one through the mobile or web app. This is particularly useful in situations such as:
Normally, in App Home, submissions are created one at a time (submitted by users). With Bulk Upload, you can upload hundreds or even thousands of rows of data in one go.
Go to the Submissions tab of your app.
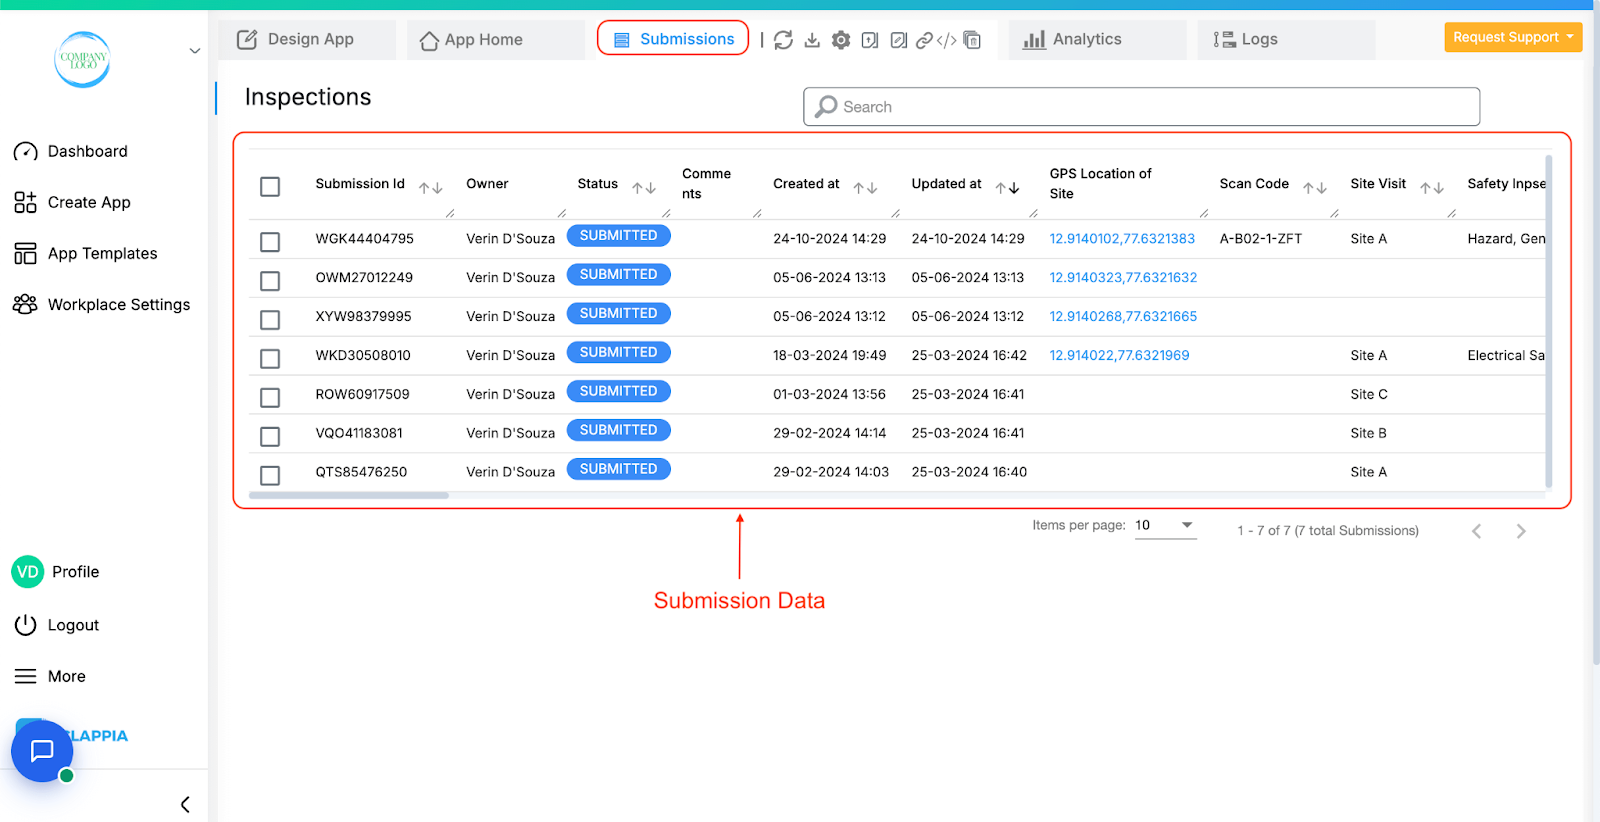
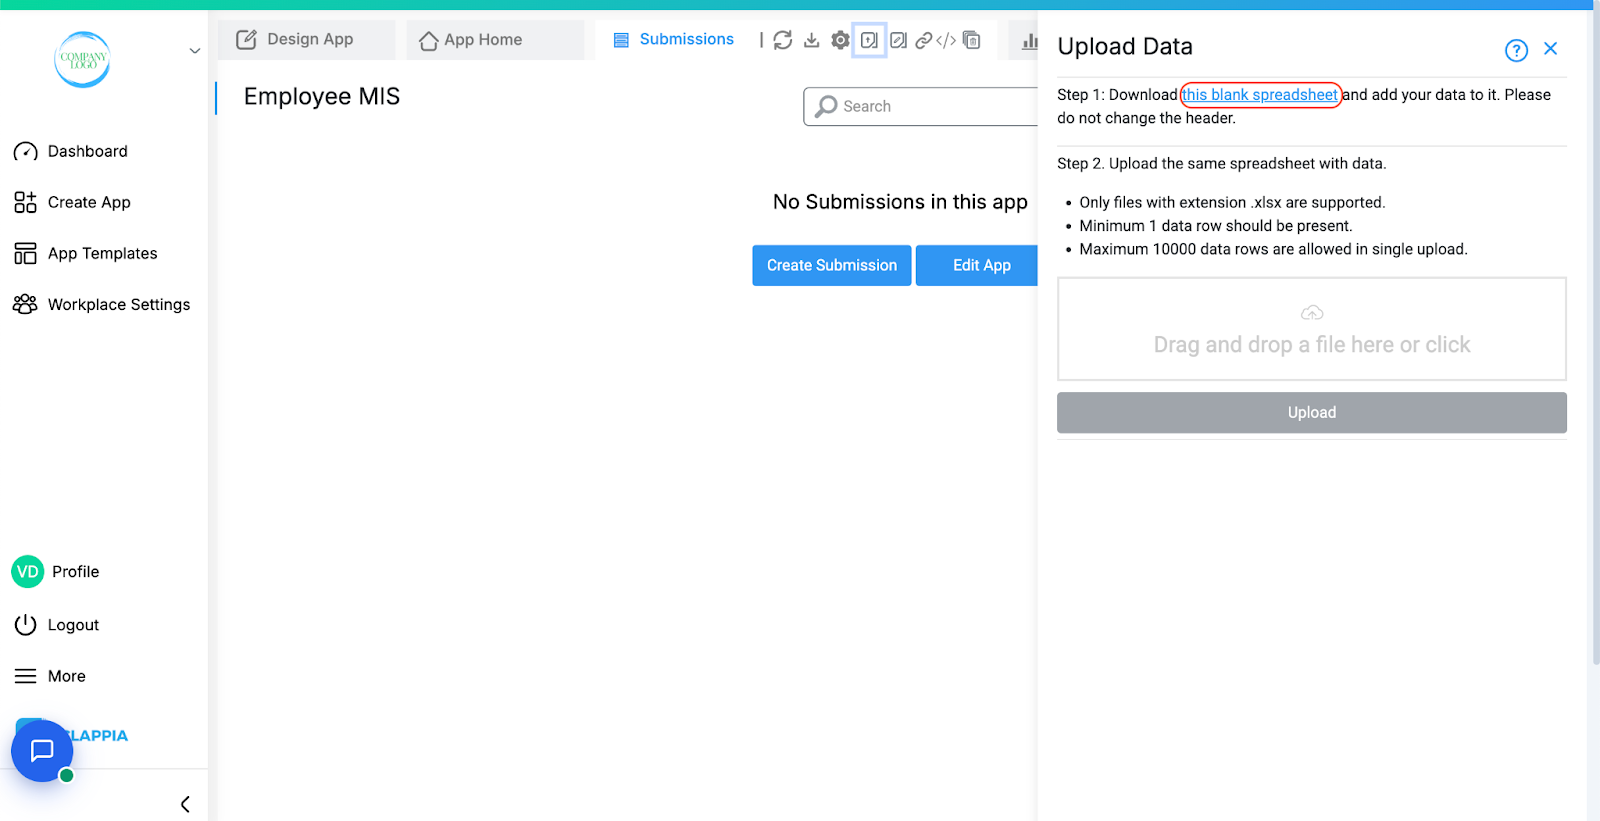
Click on the Bulk Upload icon at the top.
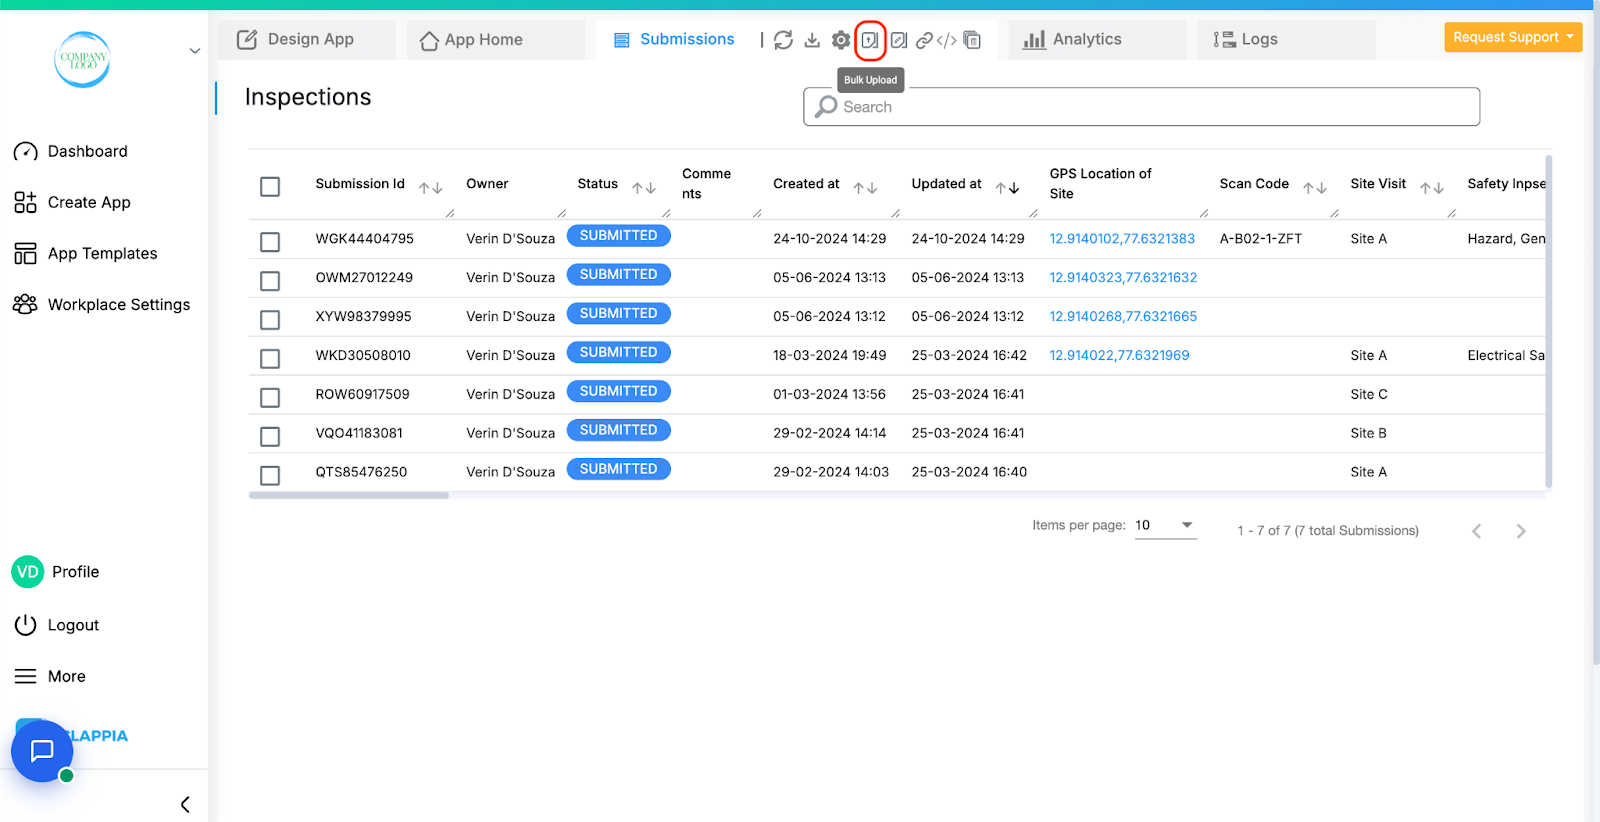
A right panel will appear with the upload instructions and options.
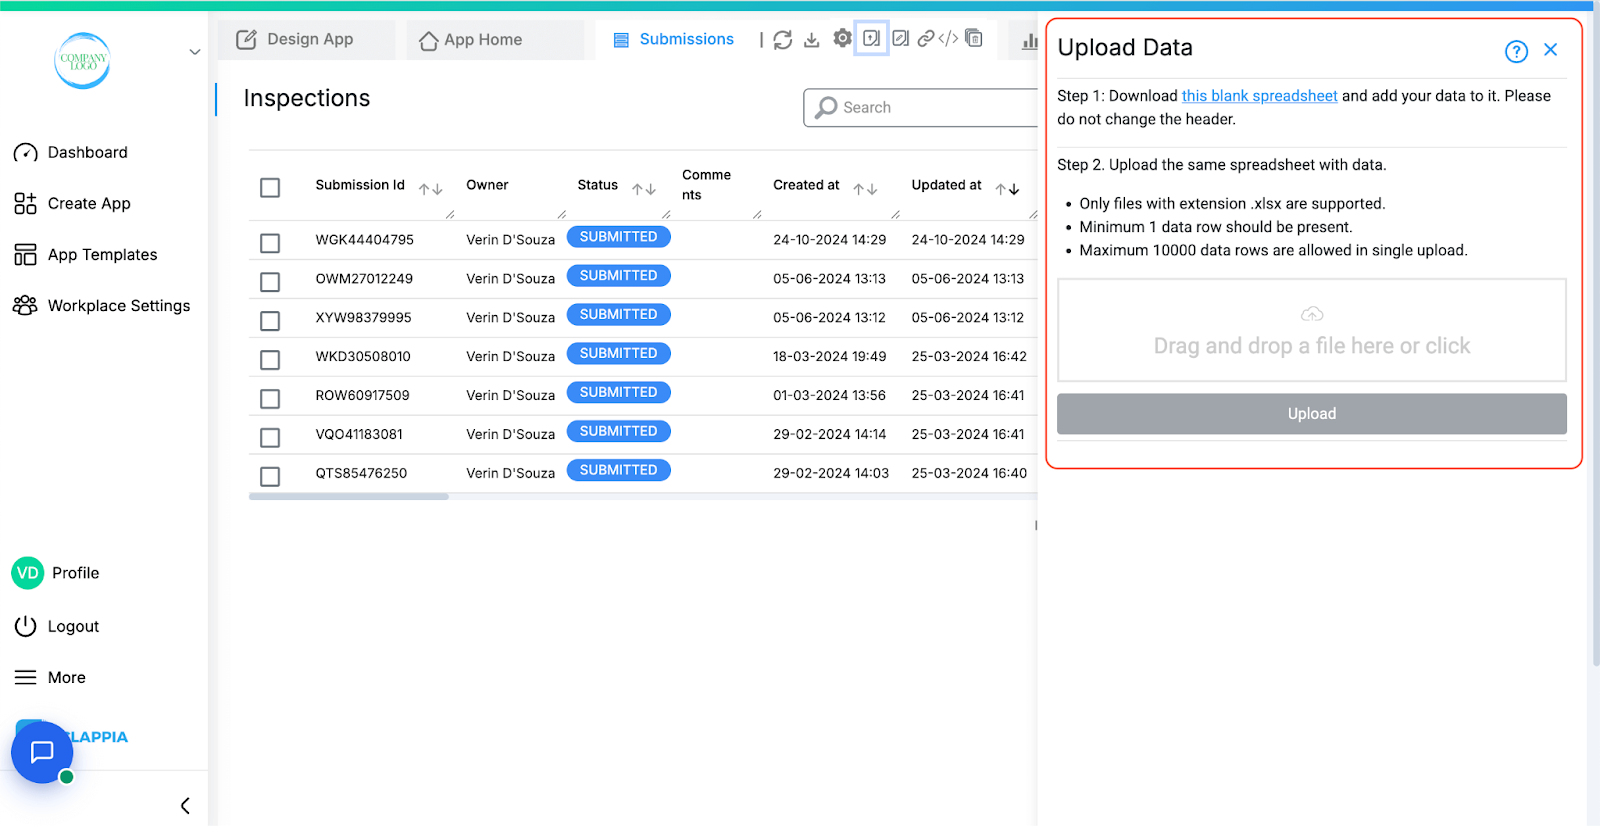
From this panel, you can download a blank spreadsheet, fill in your data, and then upload the file back into the app.
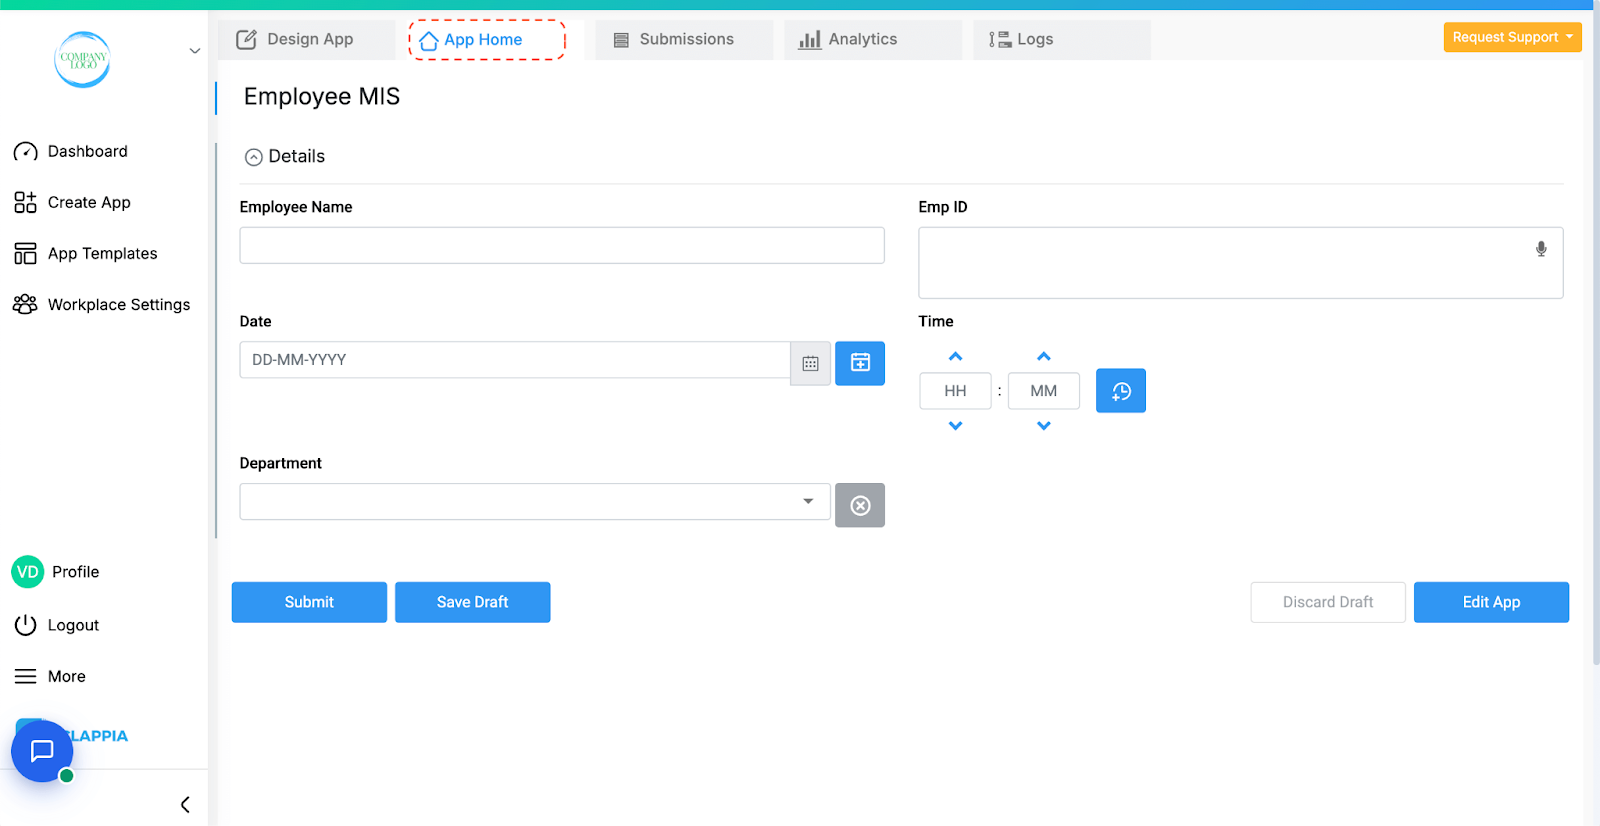
Consider the below app as an example. Notice the fields in the app.
Click on the link in the right panel to download the blank spreadsheet.
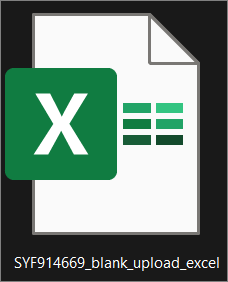
The file will have your App ID as its name and will include all the app fields as coloumn headers.

Important:
Do not change the column headers. These headers map directly to your app fields, and modifying them will cause the upload to fail.
Open the downloaded spreadsheet and click Enable Editing if prompted. Enter your data row by row under the correct columns. Each row corresponds to one submission in your Clappia app.
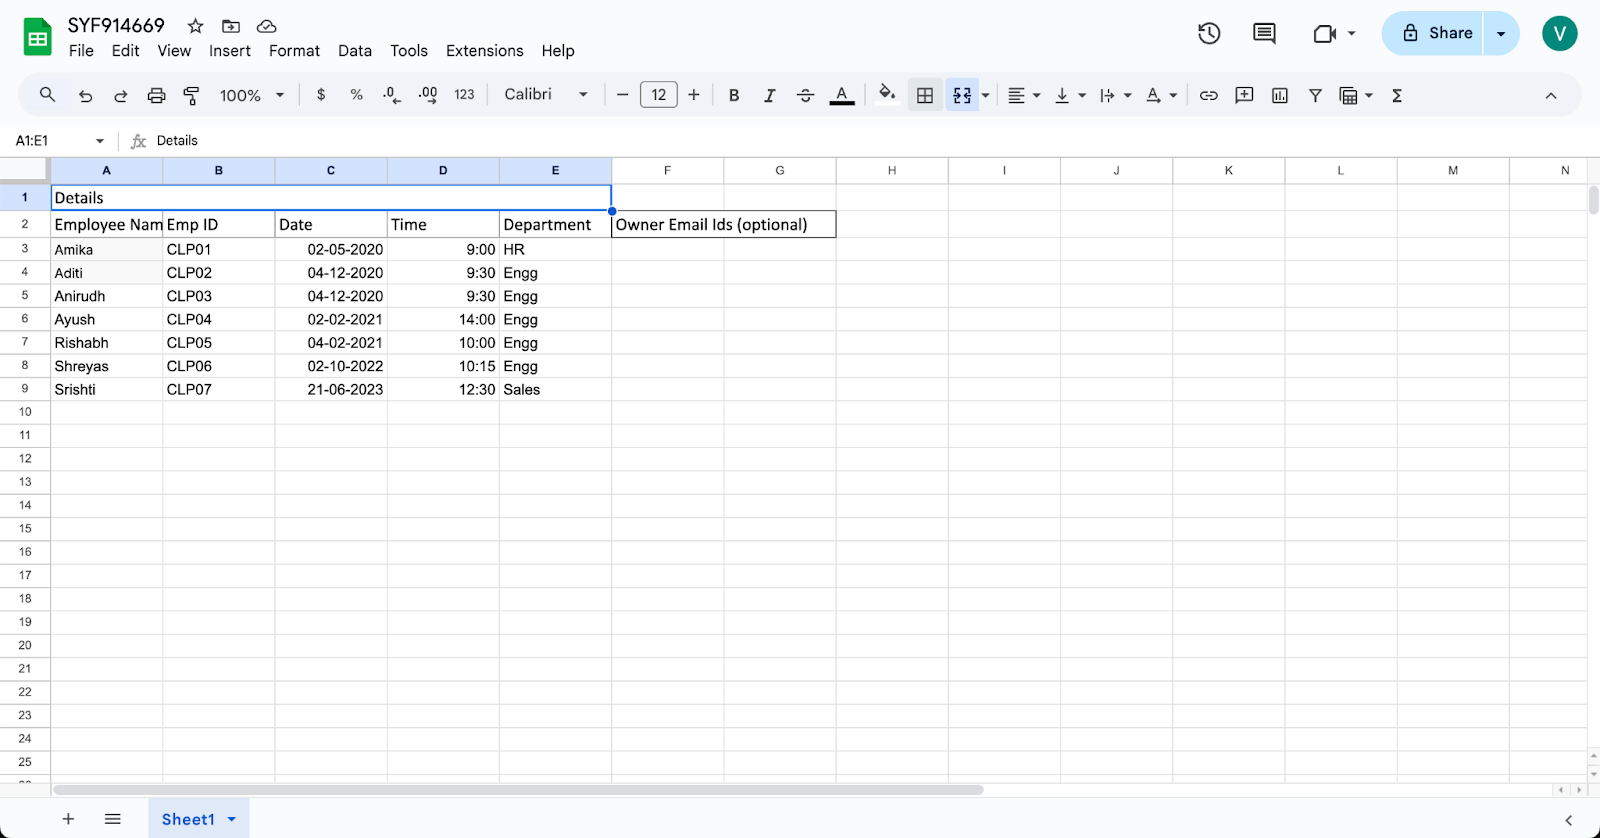
Once all data is added, save the file in .xlsx format.
Return to the Bulk Upload panel.
Upload the same spreadsheet by either drag-and-dropping the file into the upload area or by clicking to select the file from your computer.
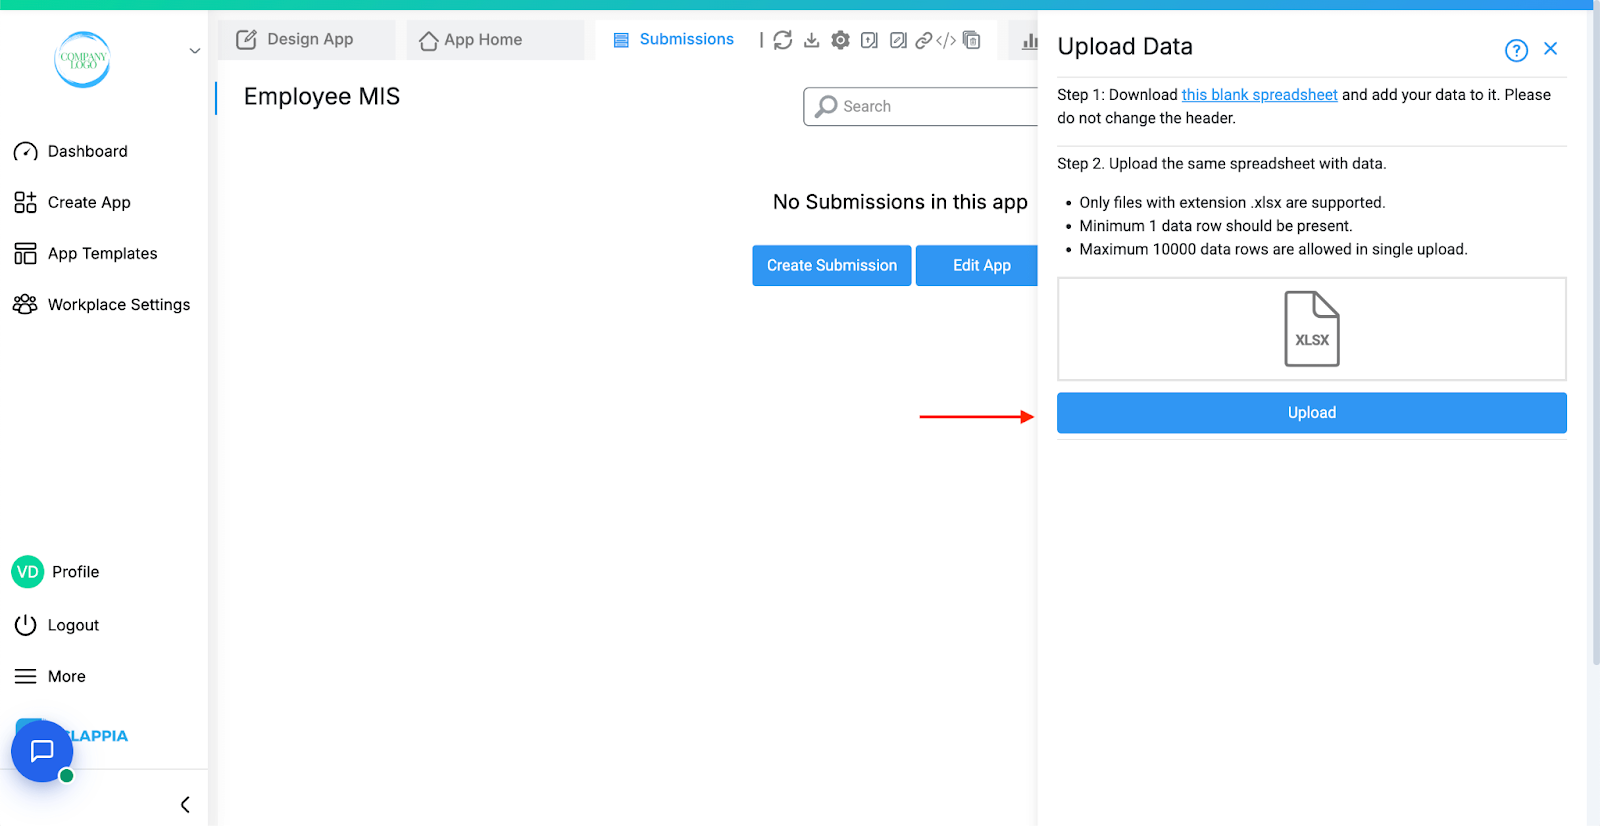
Once the file is selected, click Upload.
When preparing your upload file, keep these rules in mind:
After you click upload, the system will process the data and show you the status at the bottom:
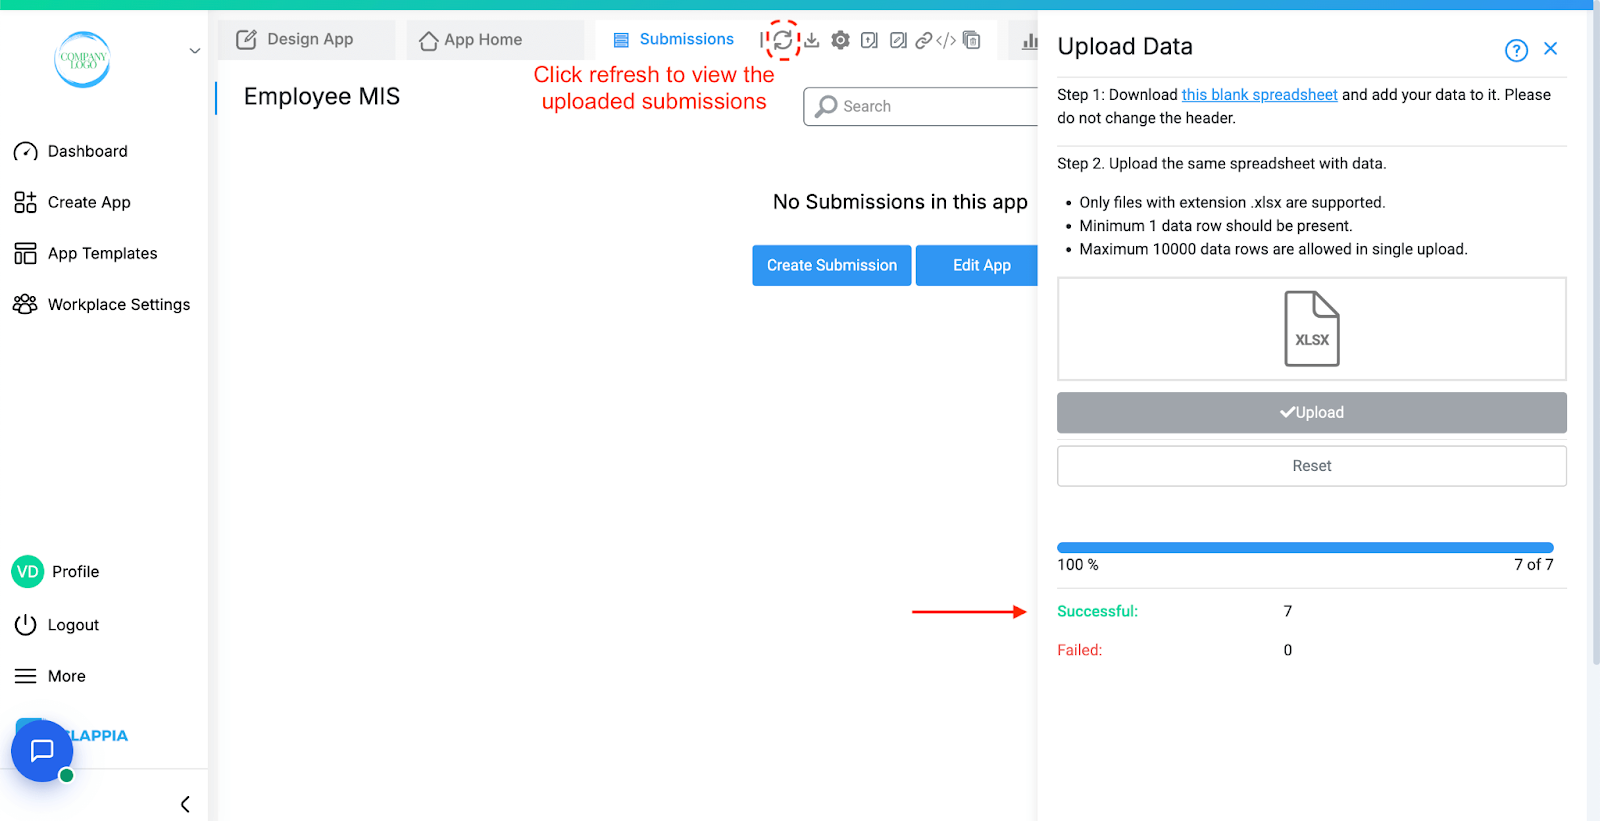
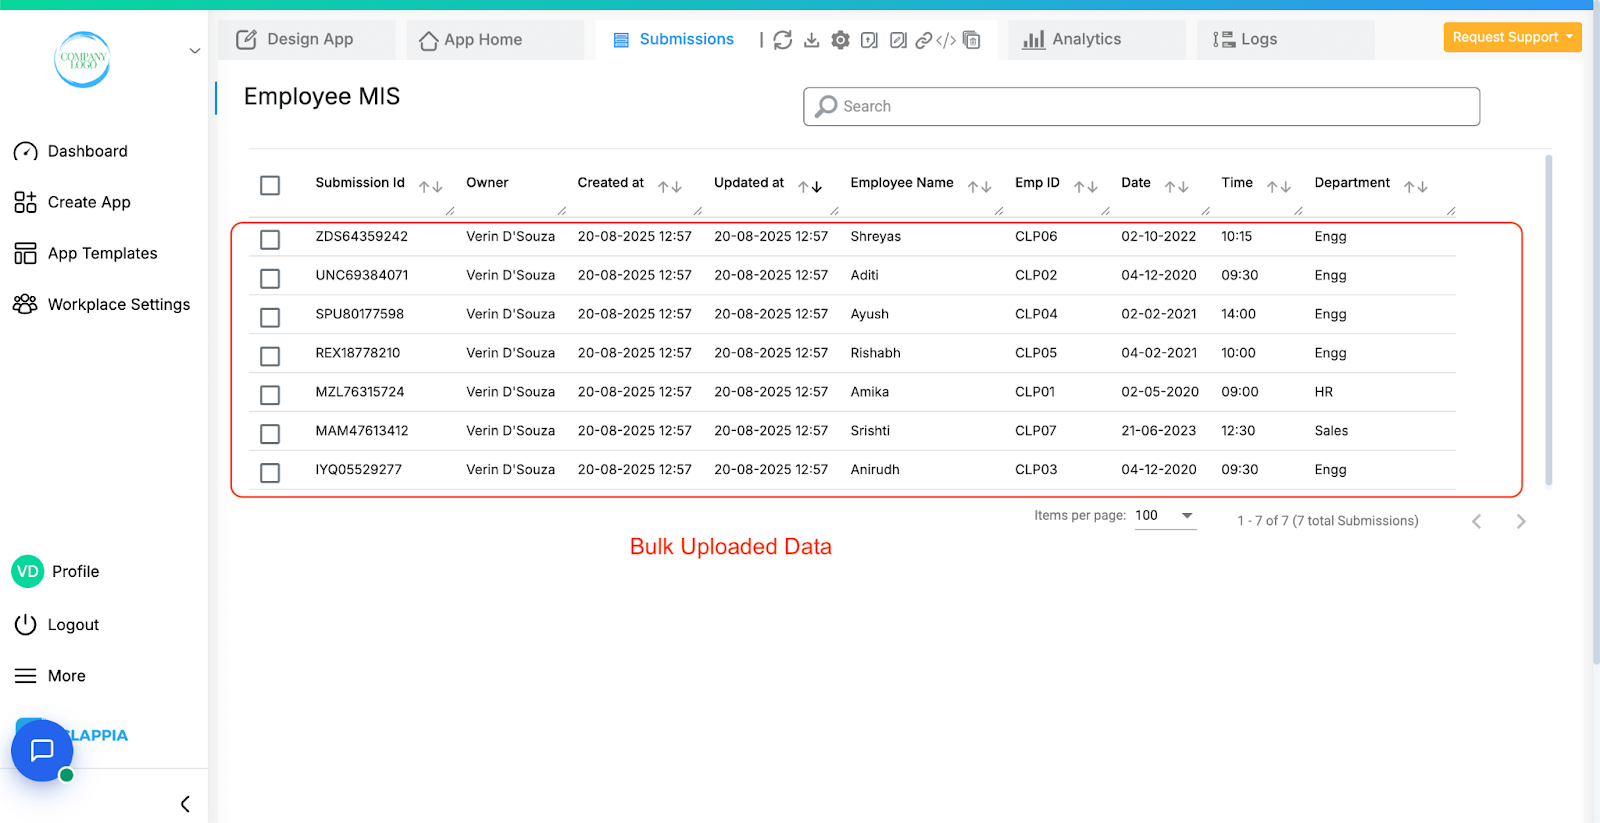
Submissions that succeed are immediately created in your app and can be seen in the Submissions table (refresh the page if needed). Each record is saved as a separate submission with a unique Submission ID.
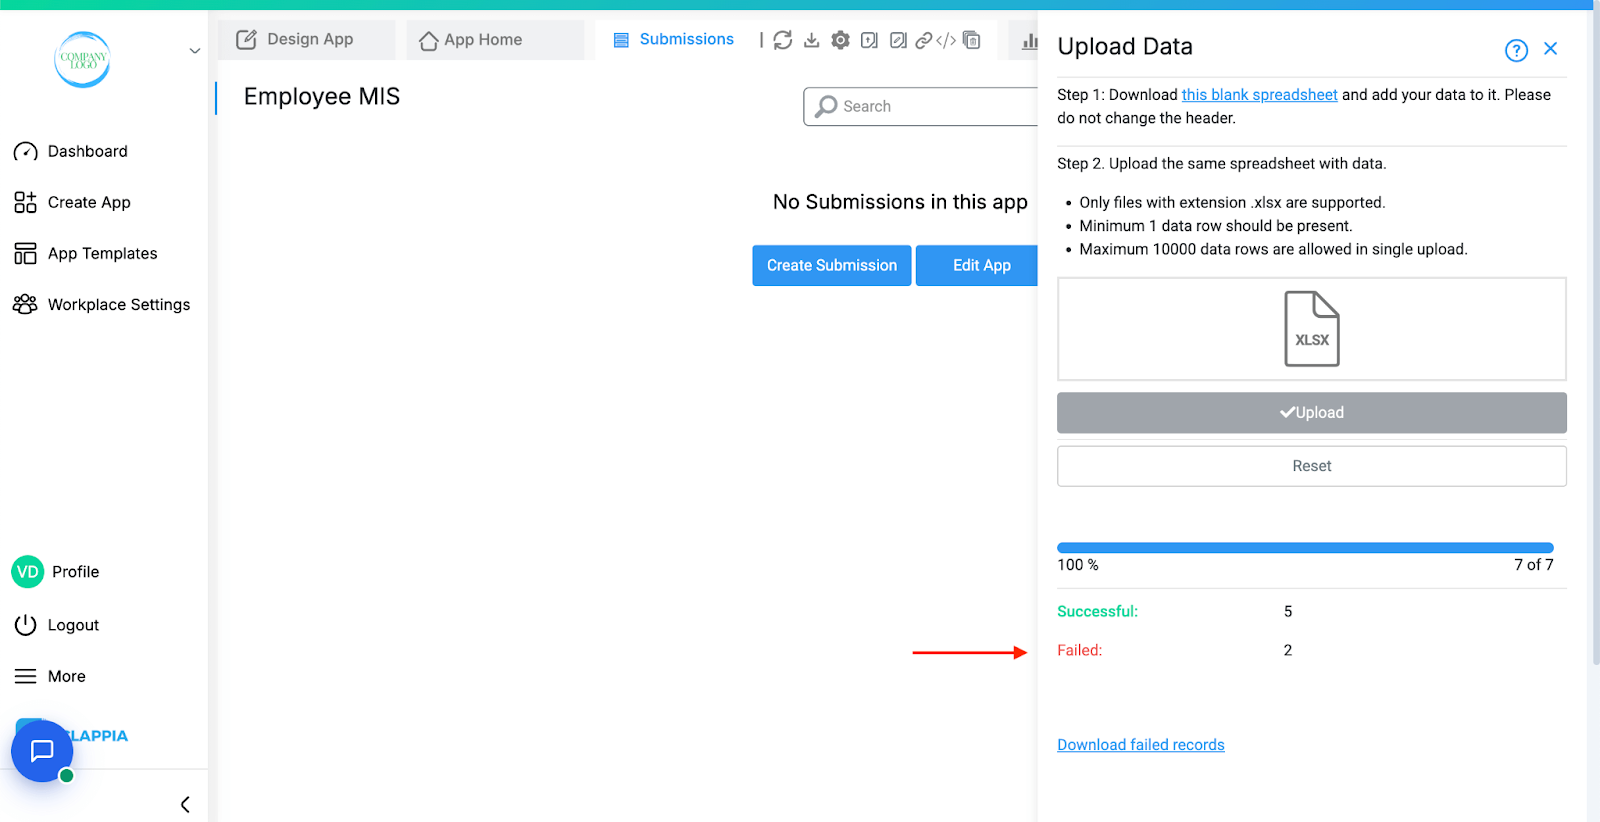
Submissions that fail will not be uploaded. However, this does not stop the successful rows from being processed i.e. partial uploads are supported.
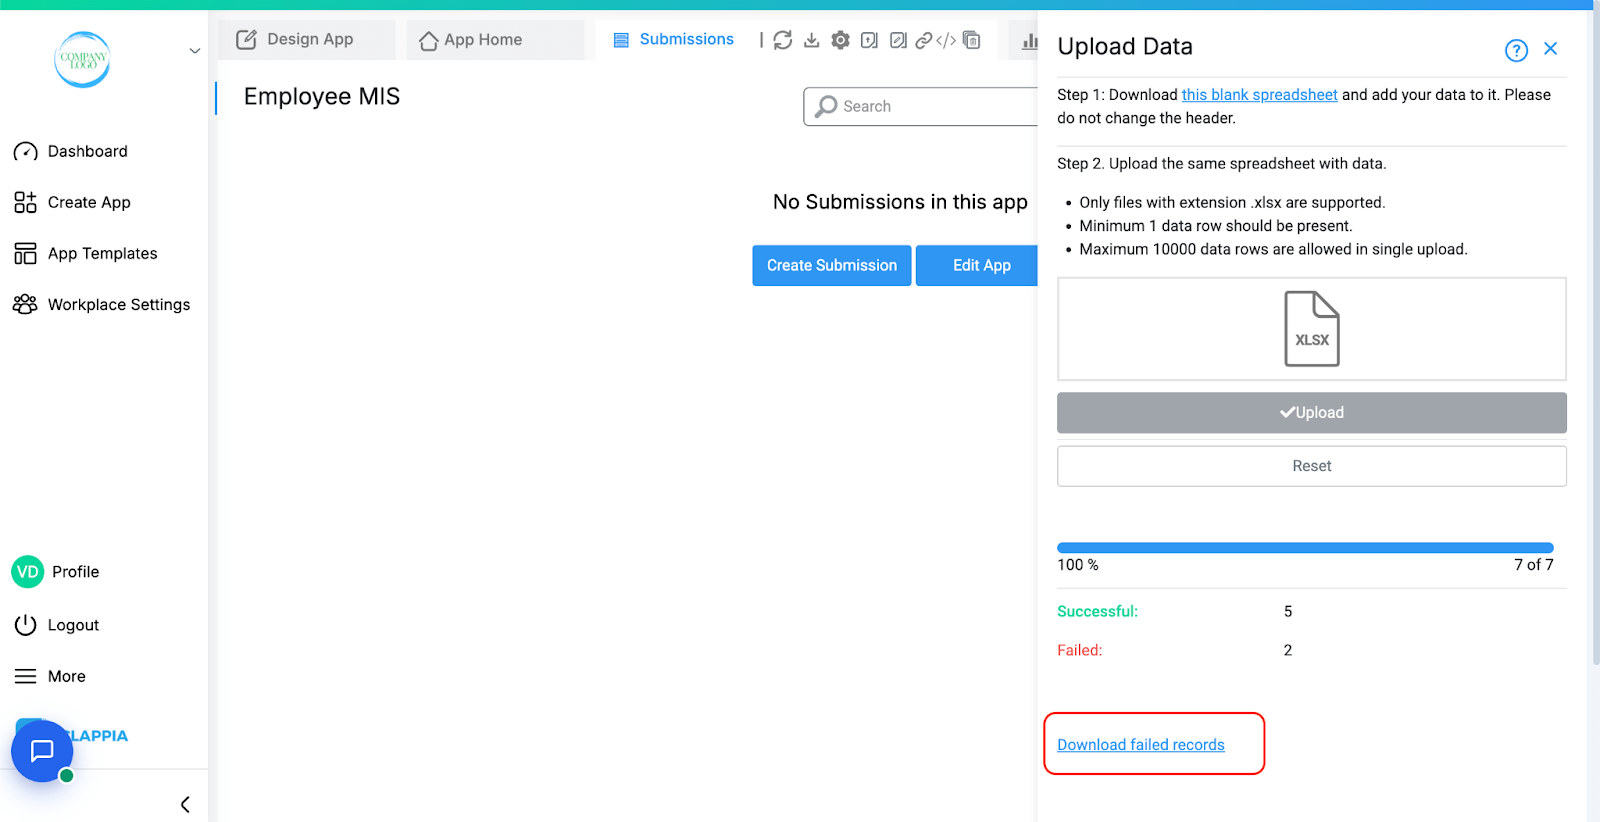
If any data fails to upload, you will see an option to Download Failed Records.

If the uploaded file is not in the correct format, it will not be accepted. Only Excel files (.xlsx) are supported. For example, if you try to upload a PDF, or any non-Excel file, you will see an error message like the one below:
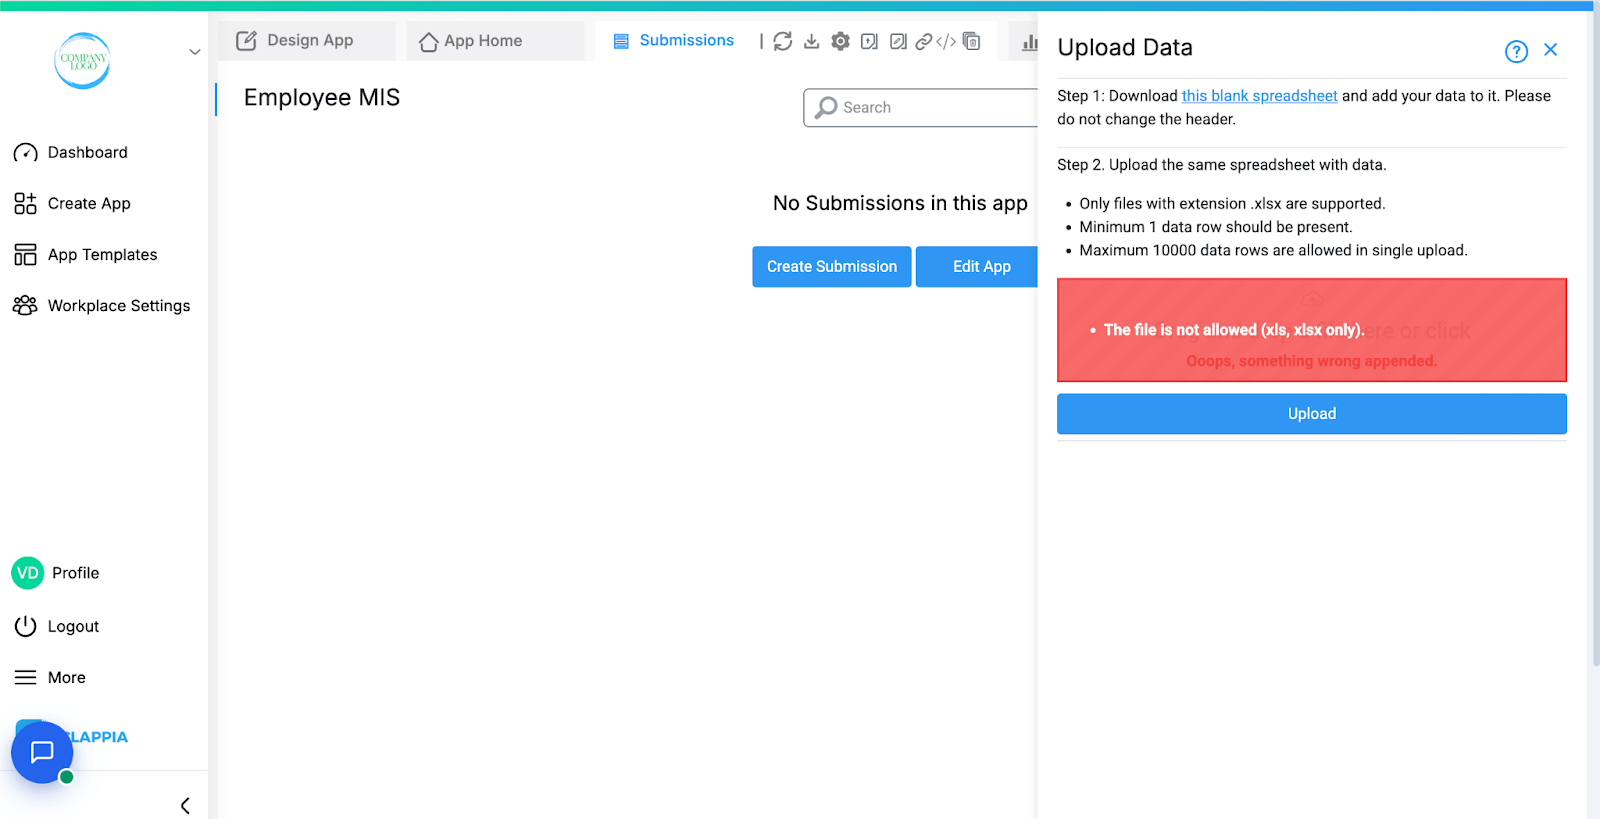
In such cases, you can drag and drop the correct file.
The Reset button will also appear when there are failed submissions. Click on it to reupload the file with corrected data to be uploaded.
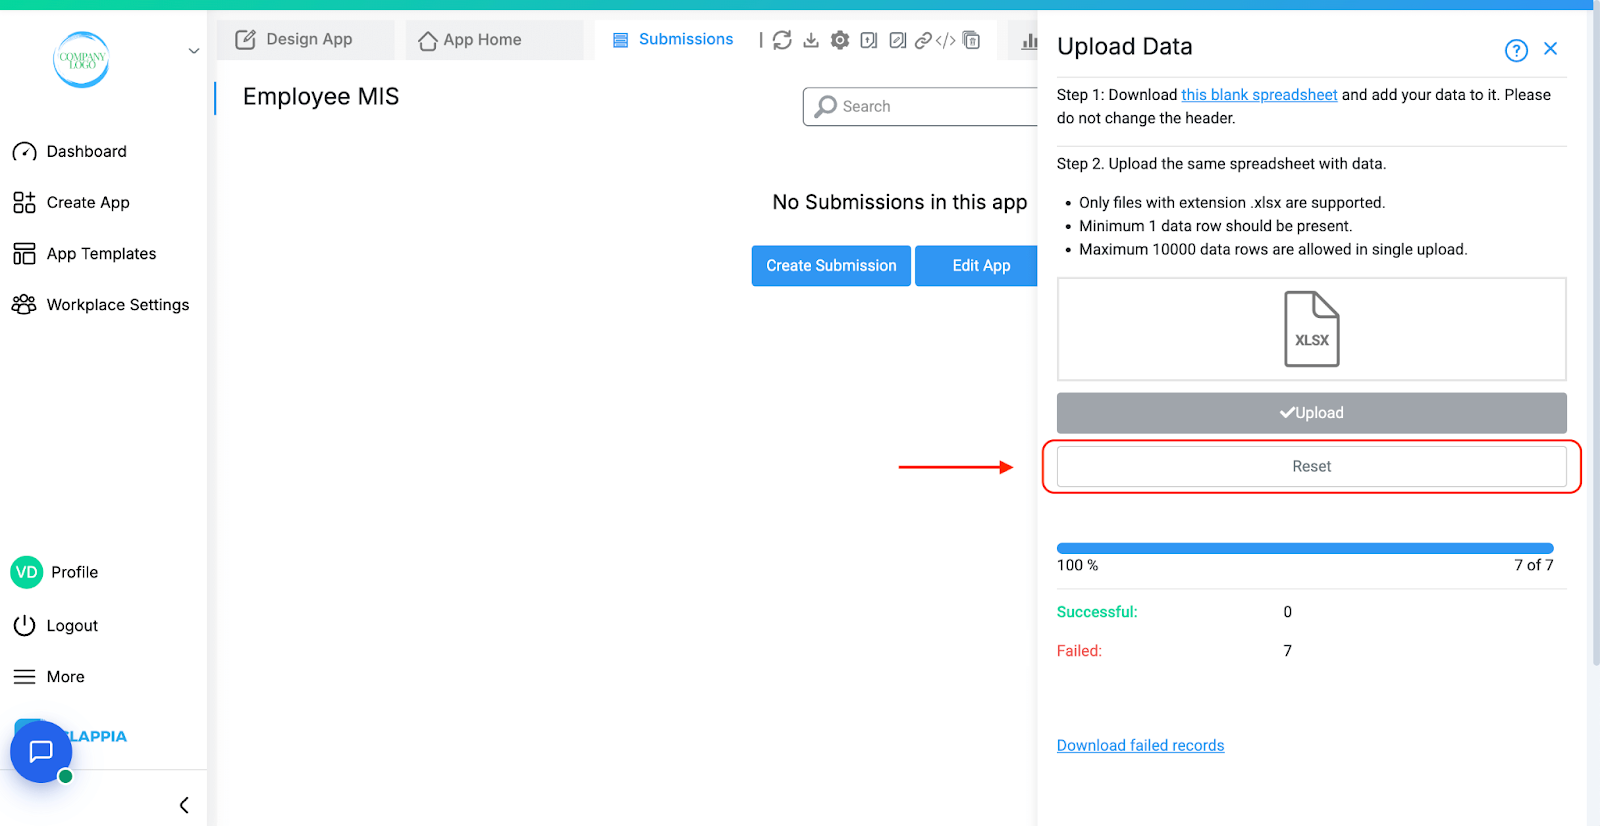
In the instance where there are failed and successful uploads for a file, it is best to re-upload the file generated by clicking Download Failed Records. This file contains only the rows that did not upload successfully. Before re-uploading, make sure you:
This process ensures that only the previously failed rows are uploaded again, while the already successful submissions remain unaffected.
Some common issues that can cause rows to fail include:
Once the upload completes, refresh the Submissions table to see your new records.
Each entry will appear just like a manually created submission, with a unique Submission ID.
Bulk Upload supports most input fields but some blocks are not supported. These fields will not appear in the downloaded spreadsheet:
To avoid errors and ensure smooth uploading:
Workflows in Clappia run on individual submissions, such as when a user submits or manually edits a record. However, when using Bulk Upload from the Submissions tab, workflows are not triggered, even though new submissions may be added.
This is because workflows are designed to process one submission at a time. Triggering them for bulk operations can lead to incomplete or inconsistent results, especially for complex workflows.
If you need workflows to run after a bulk operation, currently you will need to open each submission manually and save it. This will count as an edit and trigger the workflow normally.

L374, 1st Floor, 5th Main Rd, Sector 6, HSR Layout, Bengaluru, Karnataka 560102, India

3500 S DuPont Hwy, Dover,
Kent 19901, Delaware, USA


3500 S DuPont Hwy, Dover,
Kent 19901, Delaware, USA

L374, 1st Floor, 5th Main Rd, Sector 6, HSR Layout, Bengaluru, Karnataka 560102, India

