
Still need help?

A Status is just a label that tells you what stage a submission is at. It helps you understand where a submission stands in your process. For example, a submission can be in a stage like Submitted, Under Review, Approved, Rejected, or Resolved.
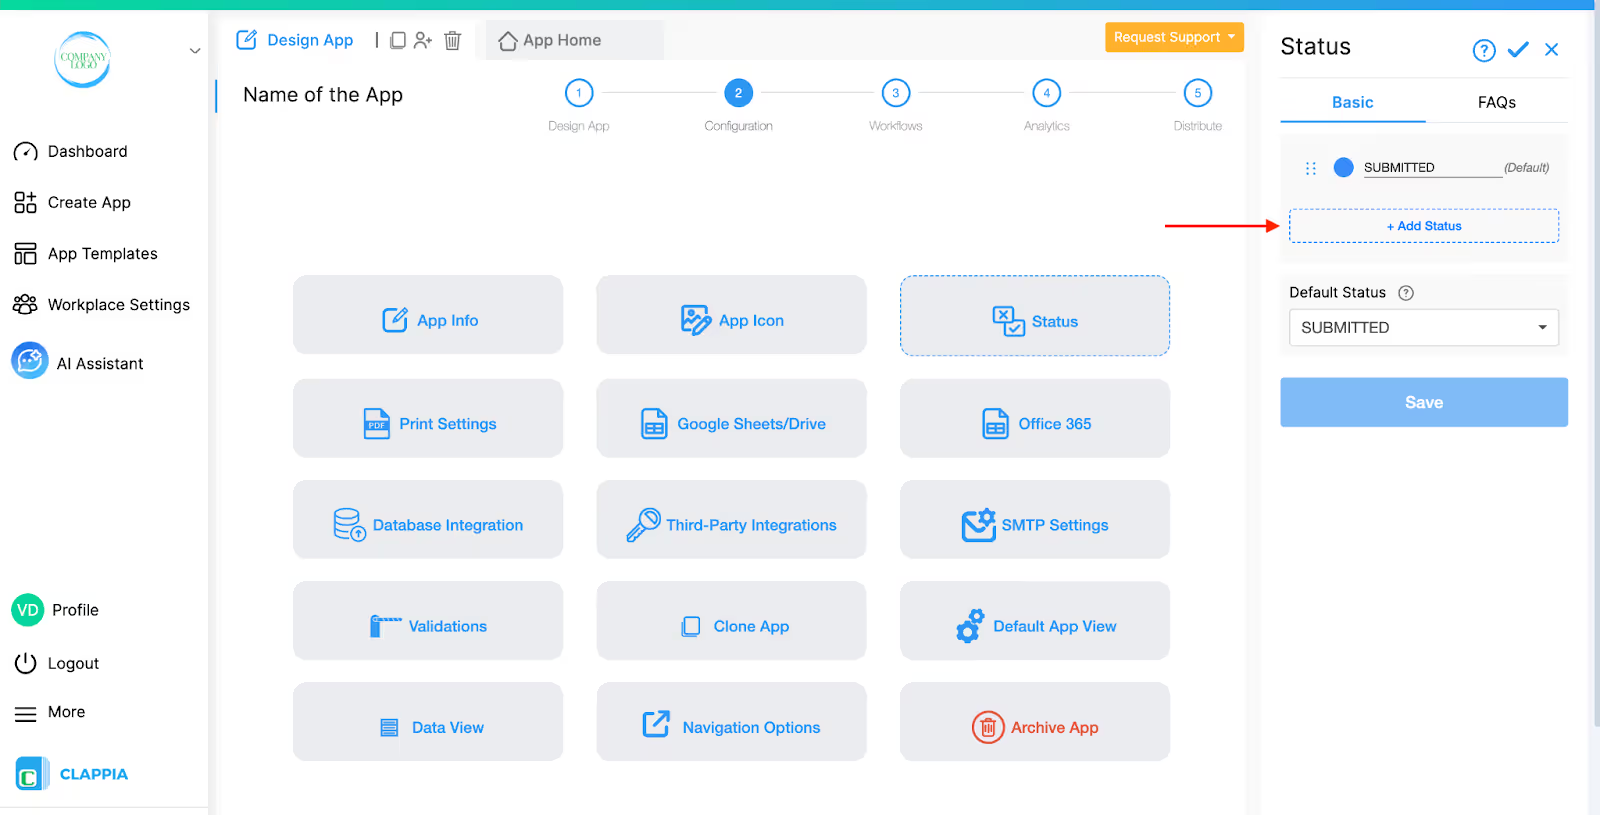
Statuses are set by you according to how your process works.
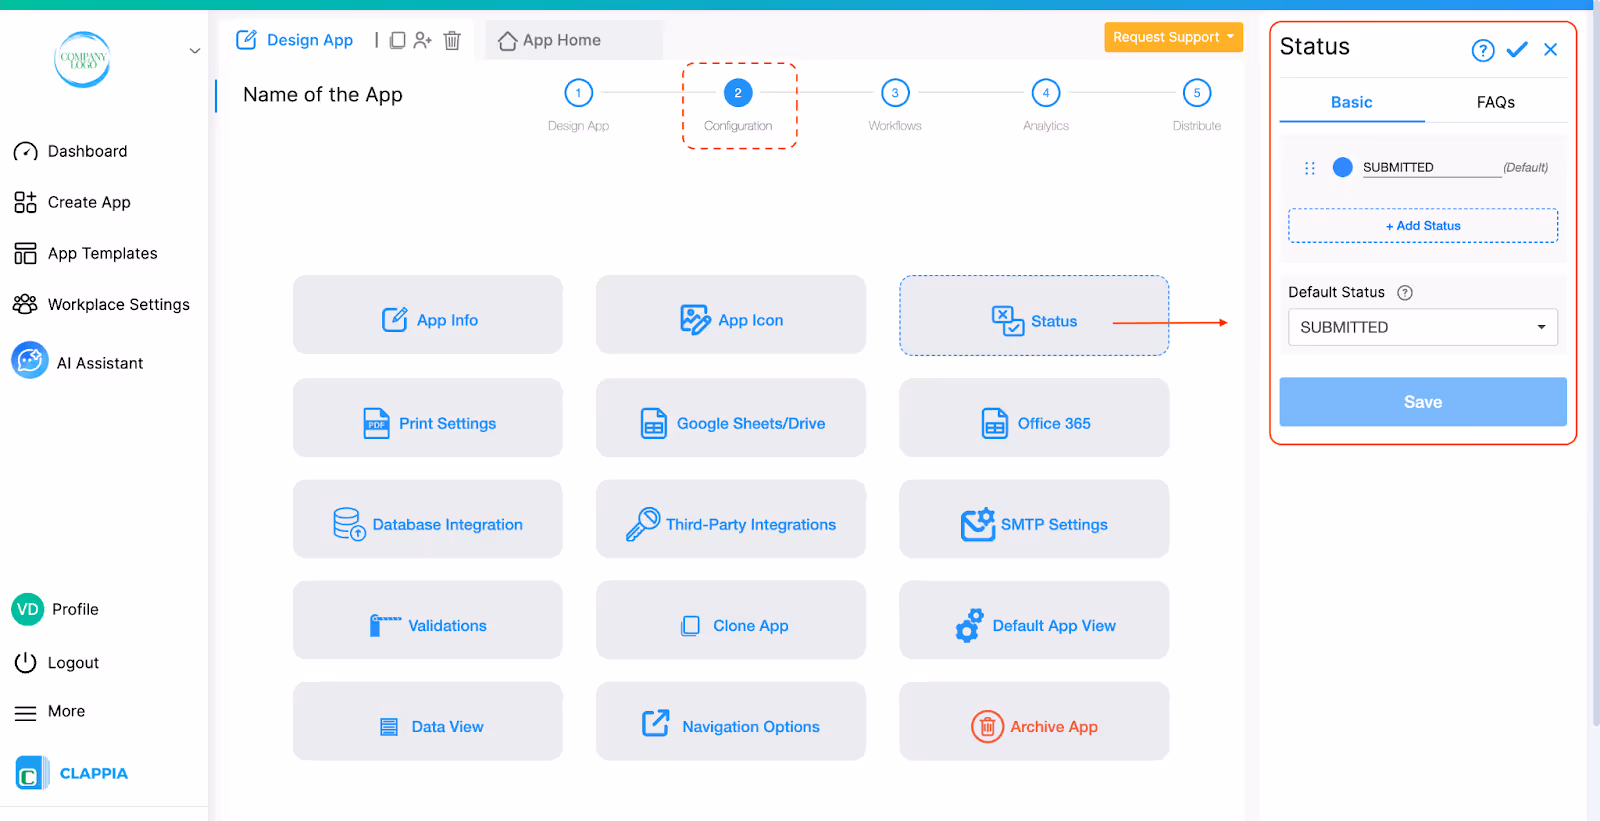
Each submission always has one status at a time and is set to “SUBMITTED” by default unless you set statuses and change it. As the submission moves through your process, the status can be changed to reflect the next step. This makes it easier for the team to see which submissions are new, which ones still need action, and which ones are already completed.
Example of How Statuses Are Used
Let’s take a simple feedback or support app as an example:
At each stage, the status clearly shows what is happening with the submission. This makes it easy for teams to manage work, follow up on pending items, and close completed ones.
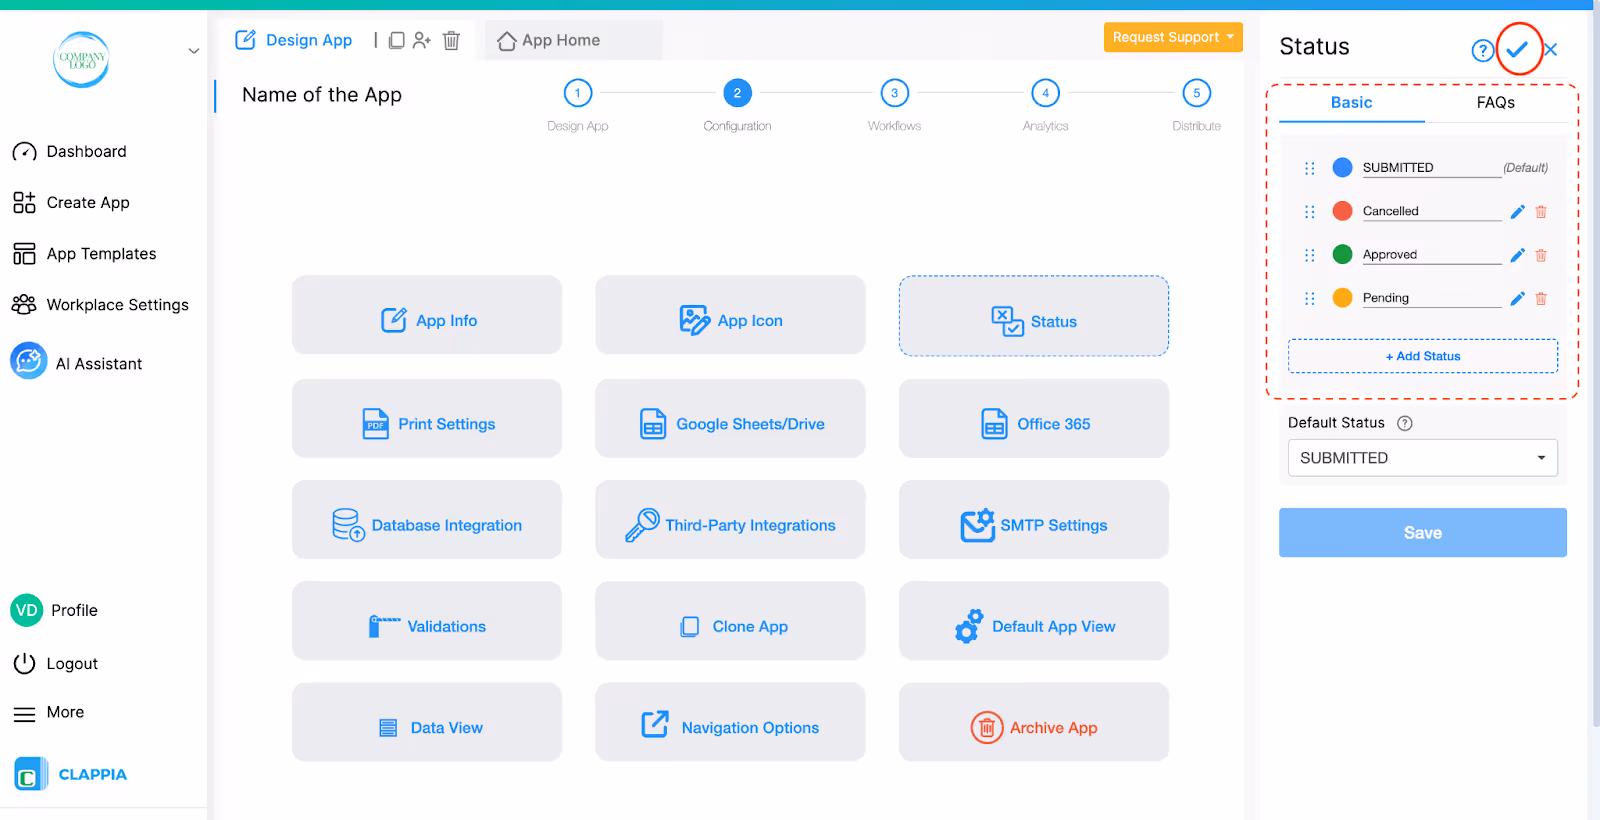
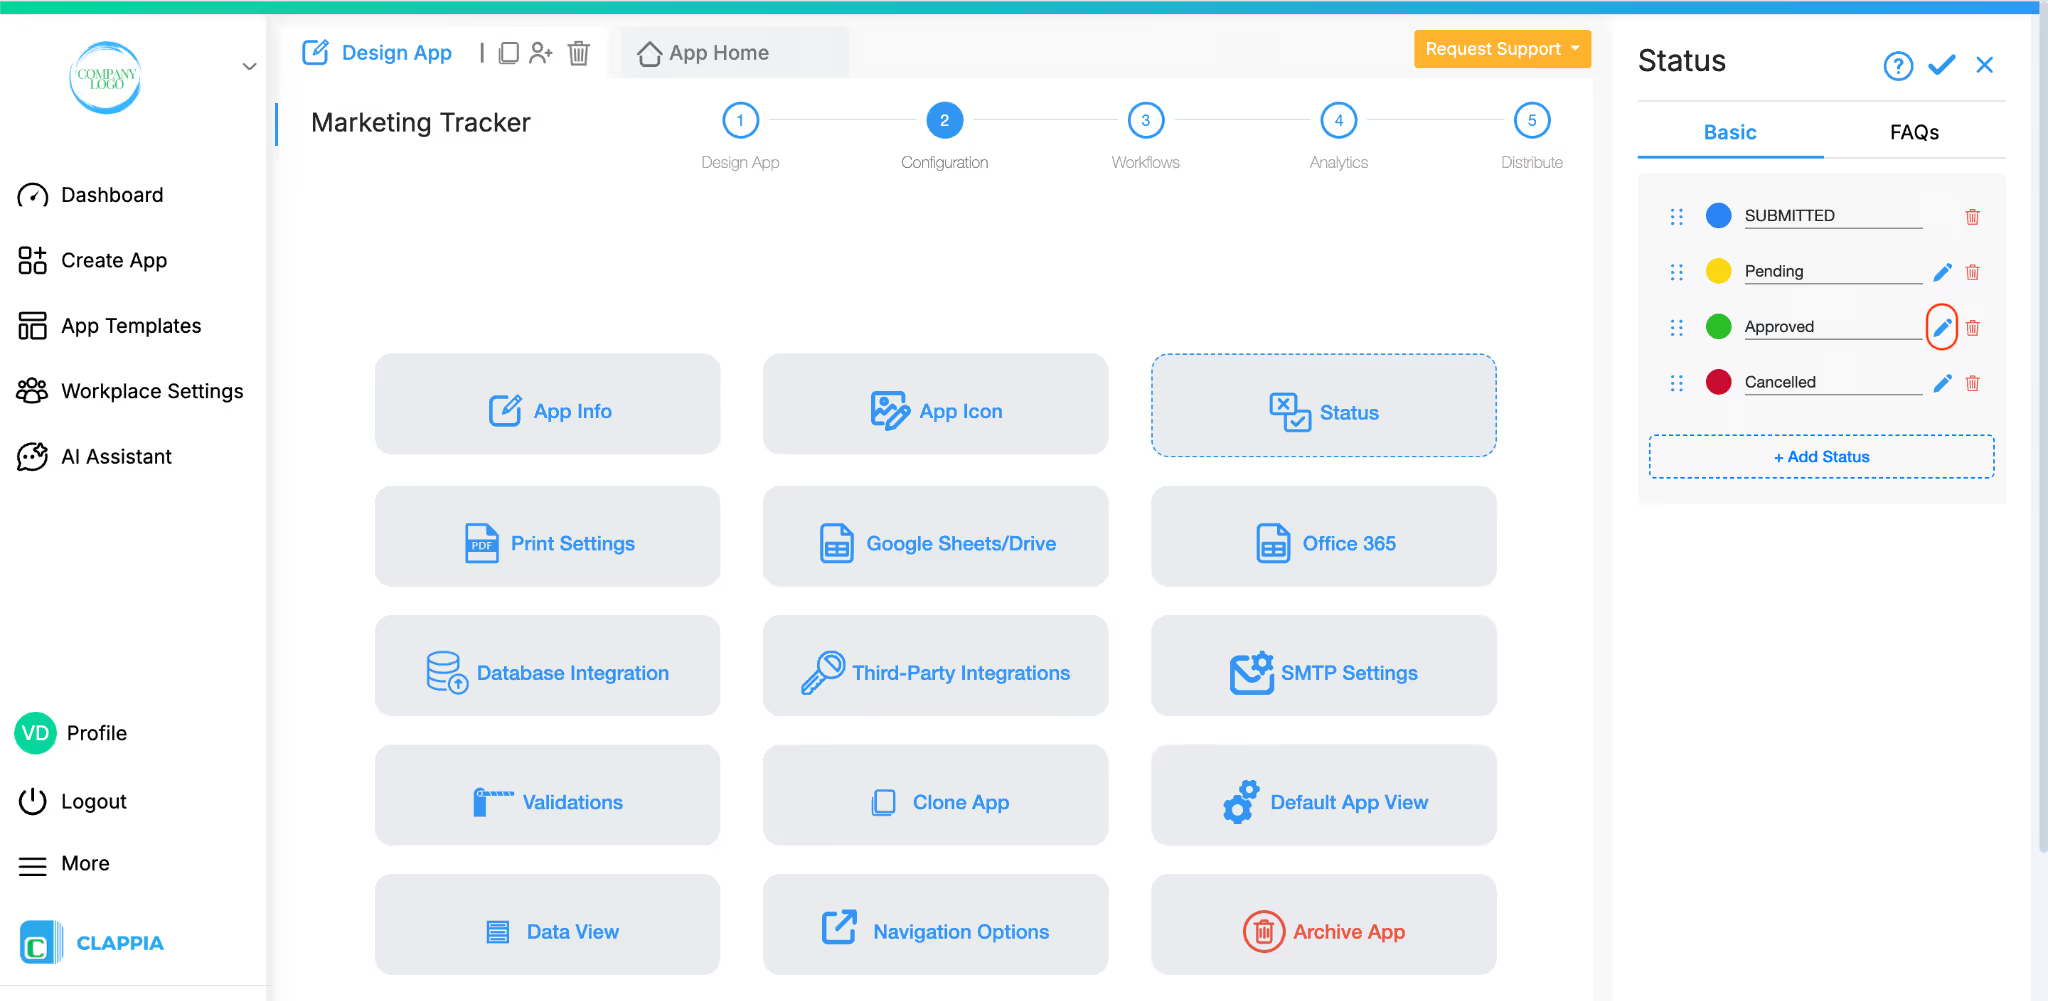
Important: Make sure to save the statuses once done, by clicking the ‘tick mark’ icon above.
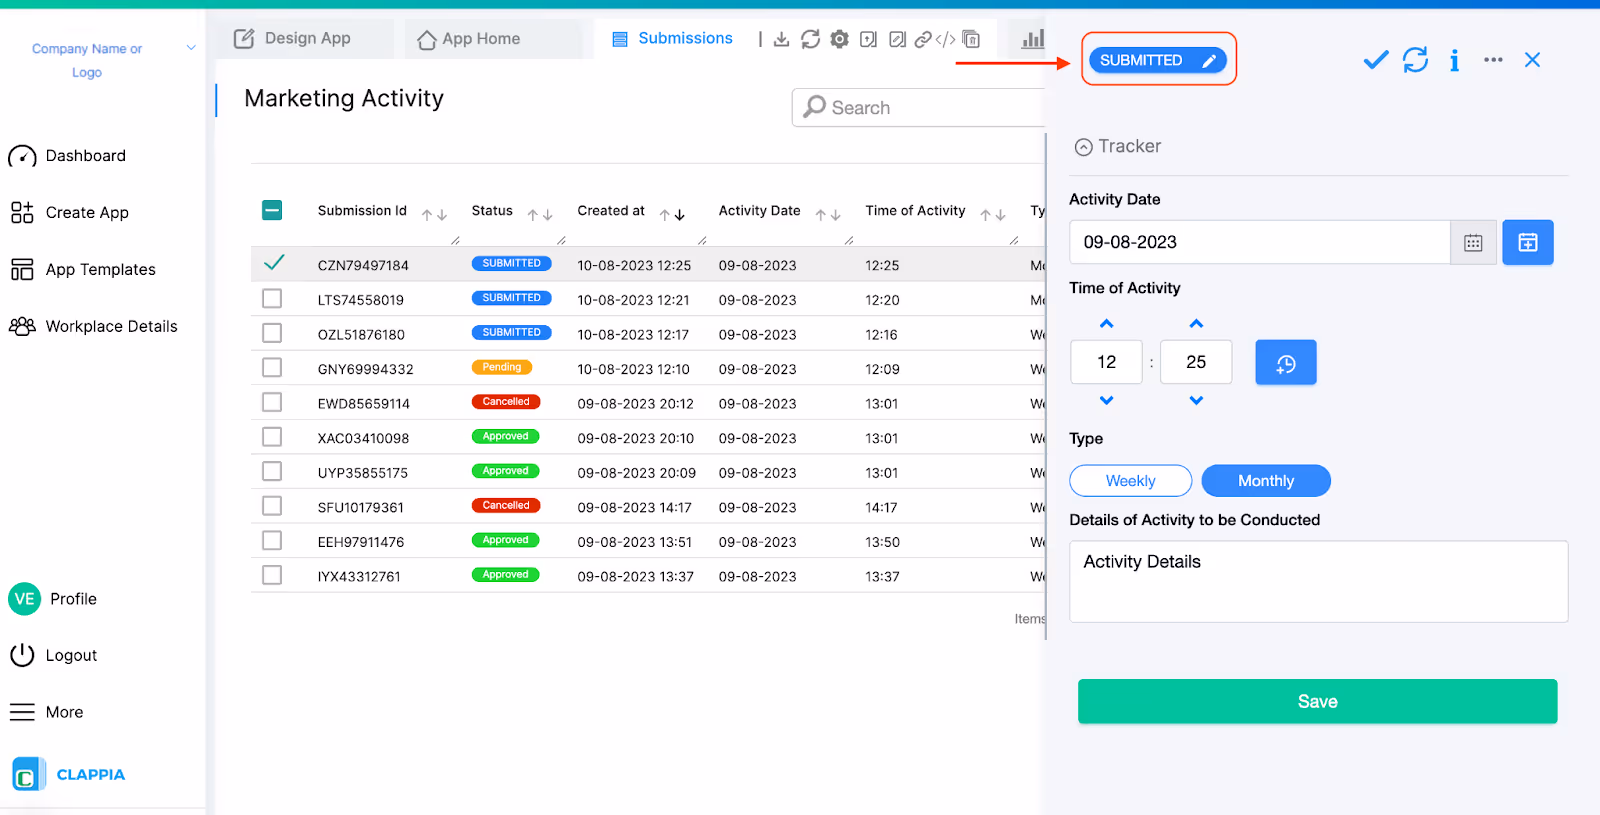
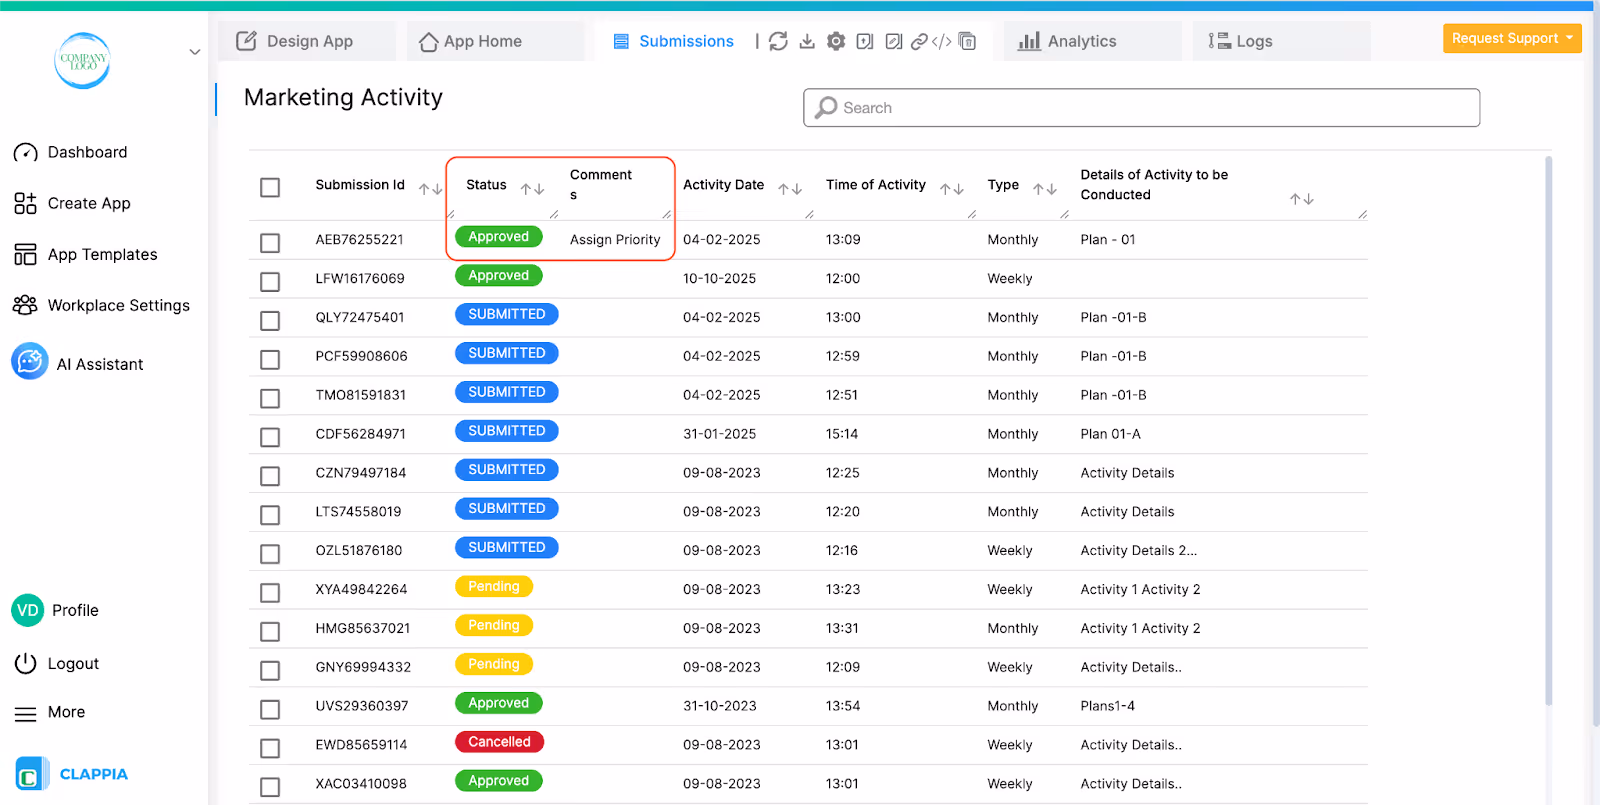
Here you can review the status of the submissions, change the status and also add comments. You can select any option you have given and that status will be saved for that submission.
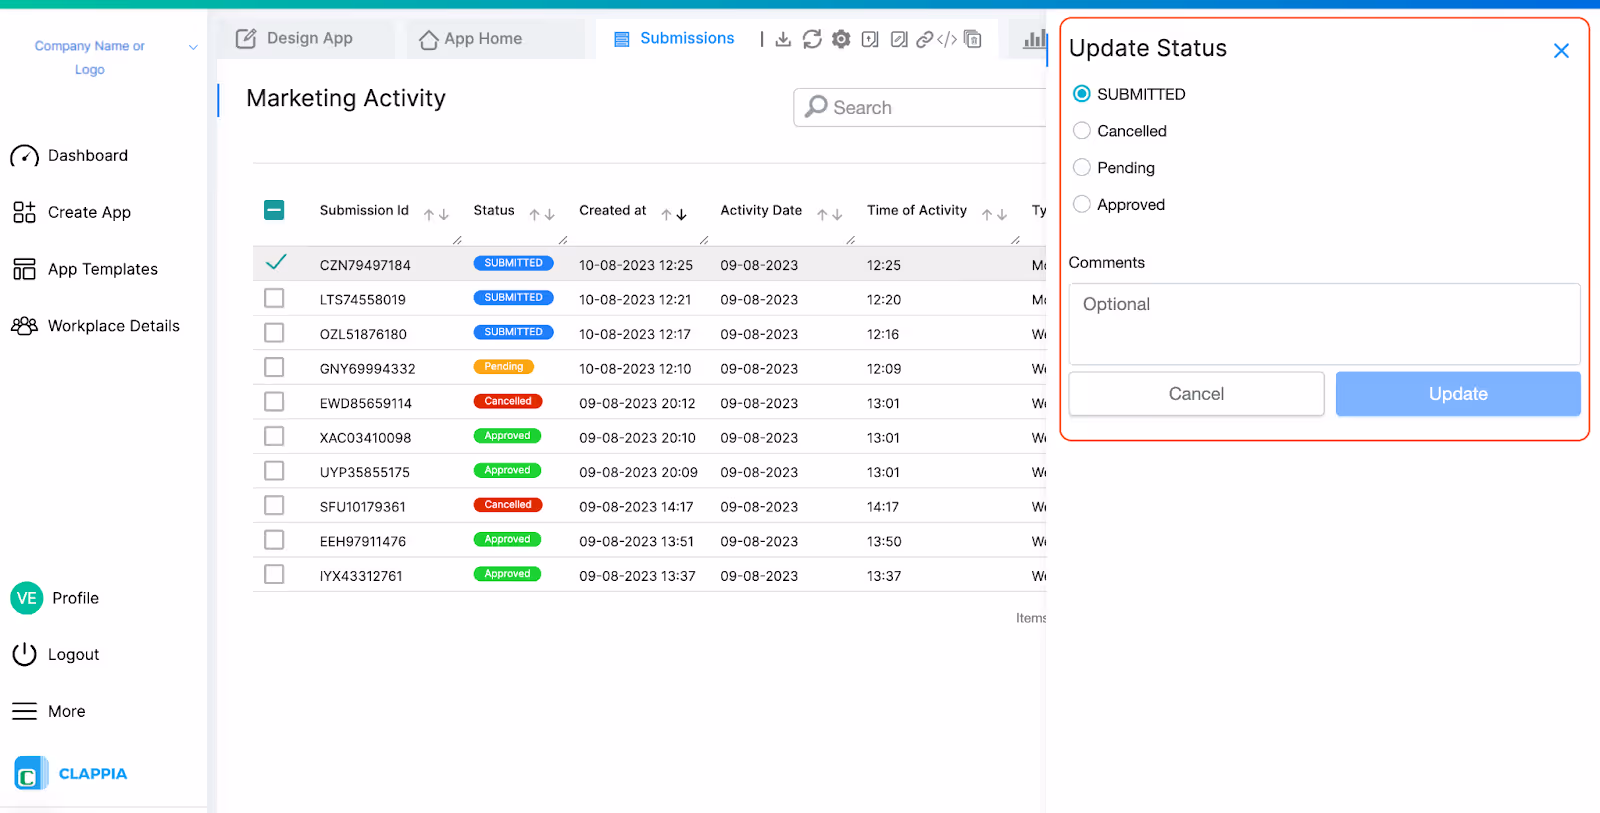
Additionally, you can also add a comment when changing the status. The comments have their own column in the Submissions.

Note: You will also be able to change statuses automatically through workflows. Use the Edit Submission node to change the status at any point according to the requirements of the app.
If no statuses are saved for the app, and a form is submitted, the submission is automatically given the SUBMITTED status.
This means every new submission will always start with SUBMITTED, even if the user does not set a status. This is by default.
Later, if added, the status can be changed either manually by a user or automatically using workflows, depending on how your app is set up.
Normally when a submission is made, it will have the default status “SUBMITTED” which can be changed manually through Submissions tab or automatically through workflows.
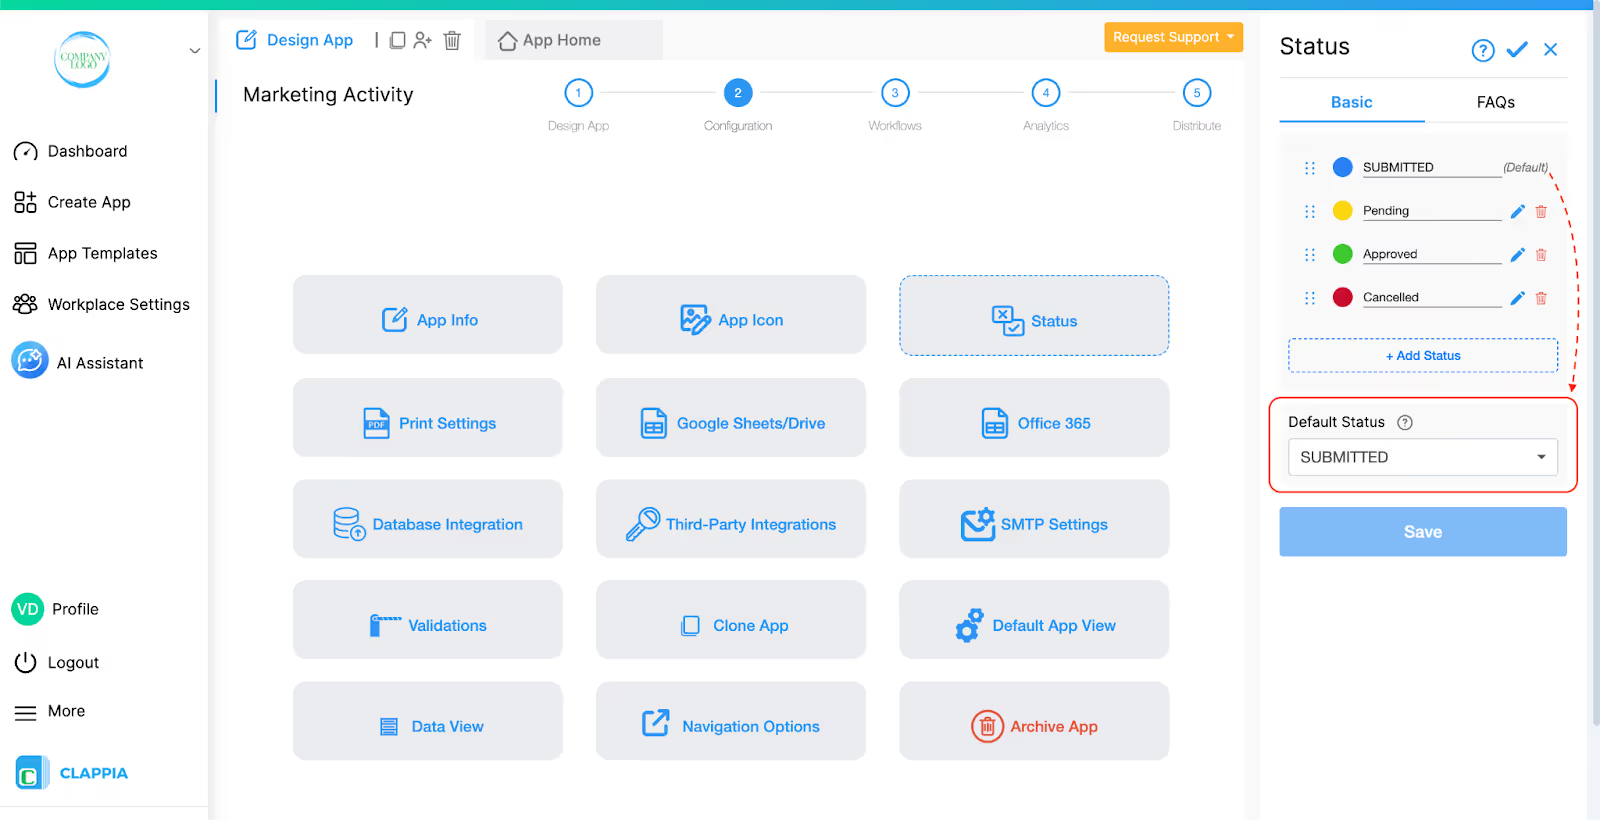
Instead, you can set a default status for new submissions directly from the Status settings, without needing to use any workflow to update the status after a submission is created.
On the right panel you will see a Default Status dropdown at the bottom. This dropdown lists all the statuses you have created for the app (such as Submitted, Resolved, Priority 1, Priority 2, etc.).
The status selected here will automatically be applied to every new submission as soon as it is created. This removes the need to create a separate workflow only to set the initial status of a submission.
For example:
This setting only affects new submissions created after the change. It does not alter the status of existing submissions.
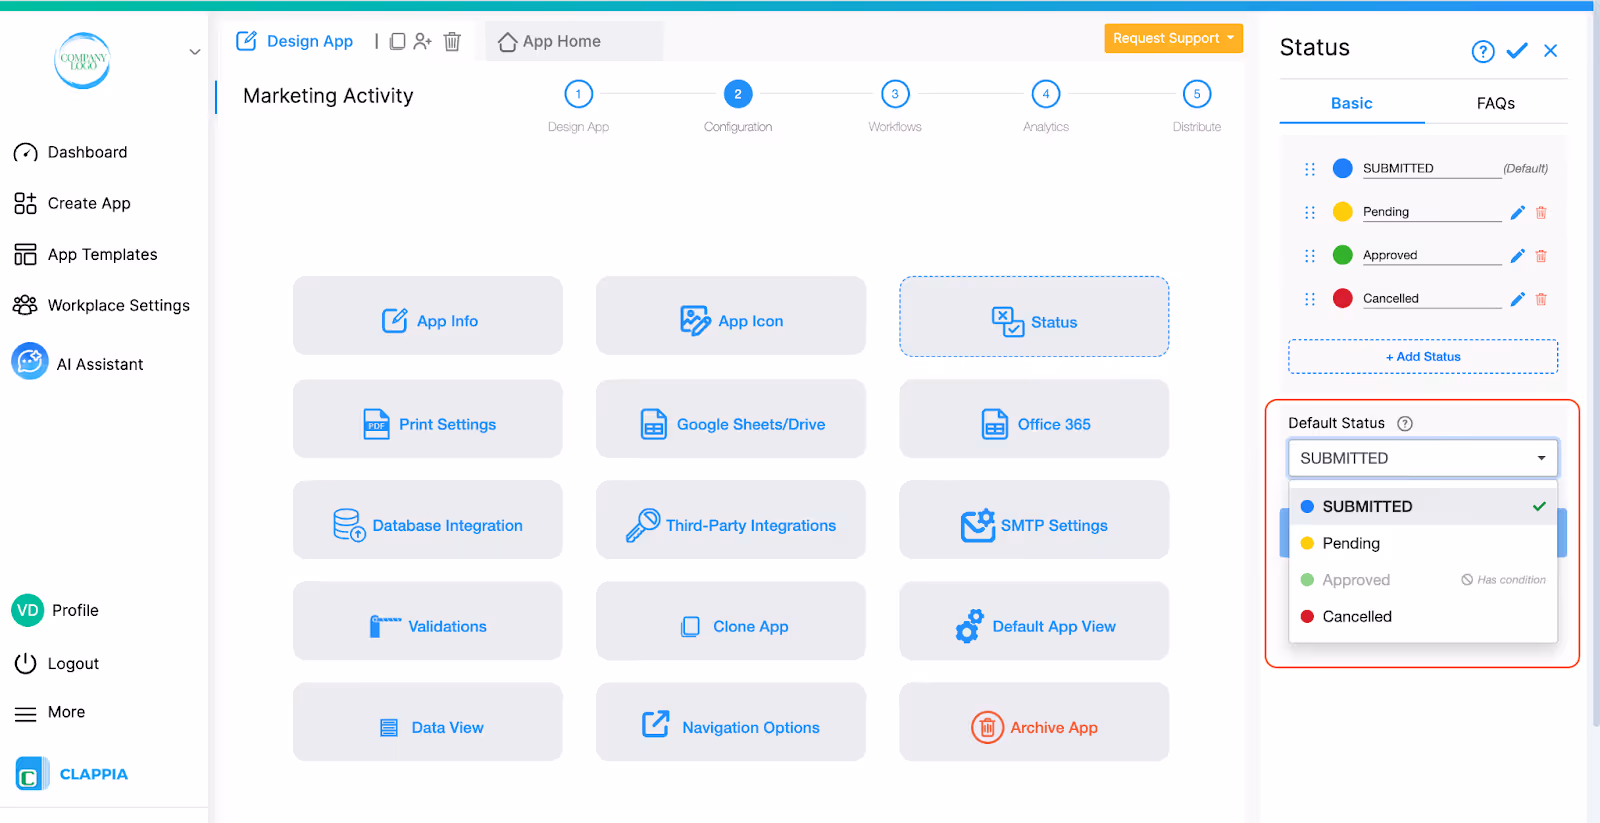
Note: You will not be able to set a status as default if it has conditions applied to it.
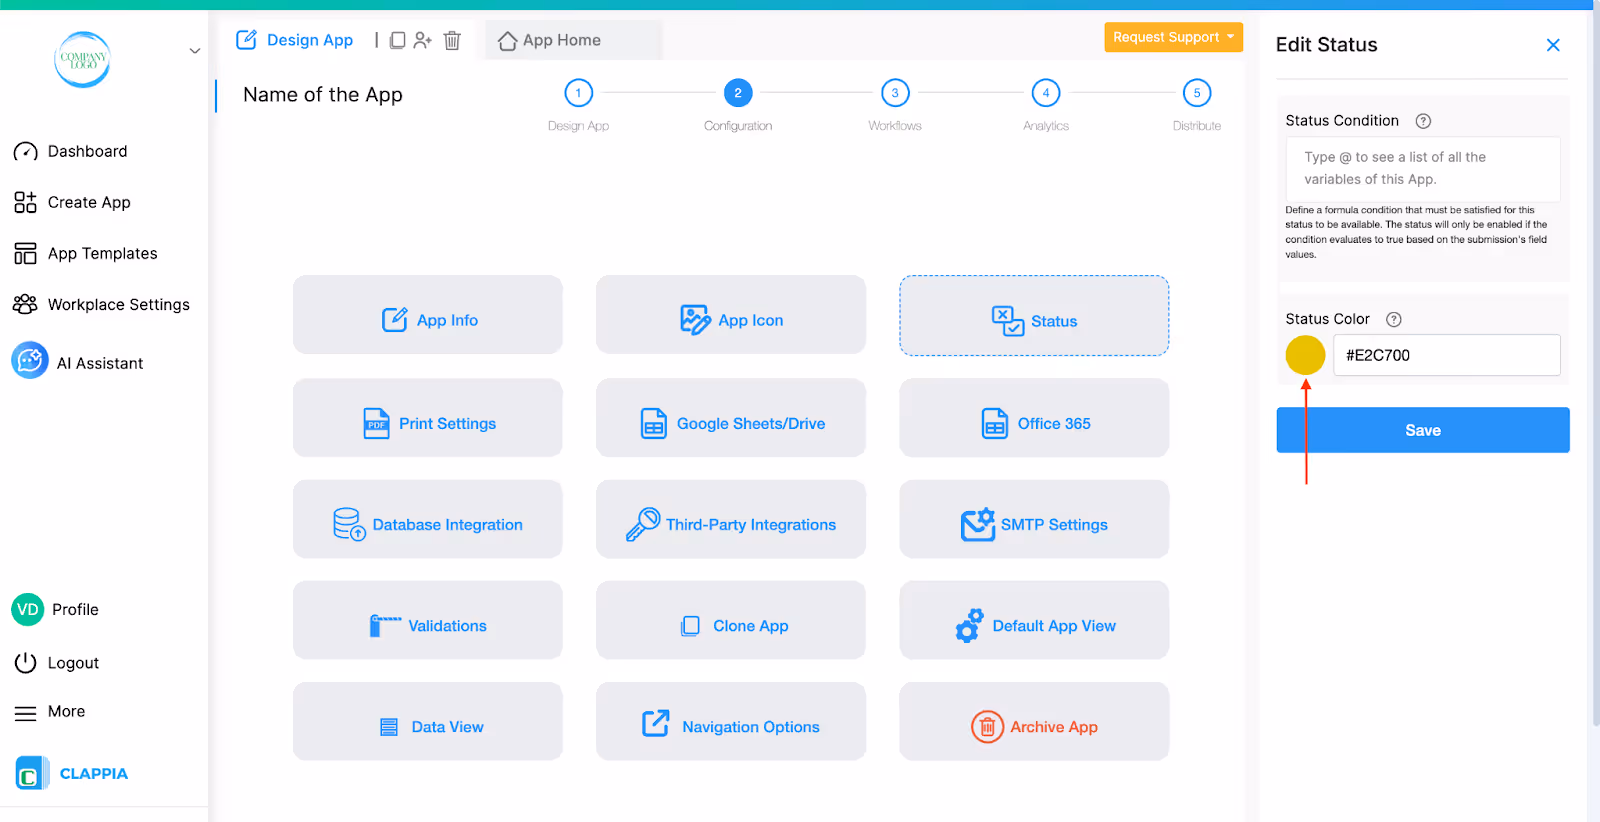
You can define conditions for statuses. This allows you to control when a particular status is available for a submission. If the submission does not meet the condition, that status will appear greyed out in the Submissions tab until the submission qualifies.
Status conditions are useful when certain statuses should only be applied once specific requirements are met.
For example:
Without conditions, users may accidentally assign statuses too early, which can lead to errors in reporting and tracking. Conditions ensure that each submission only moves to the right status at the right time.
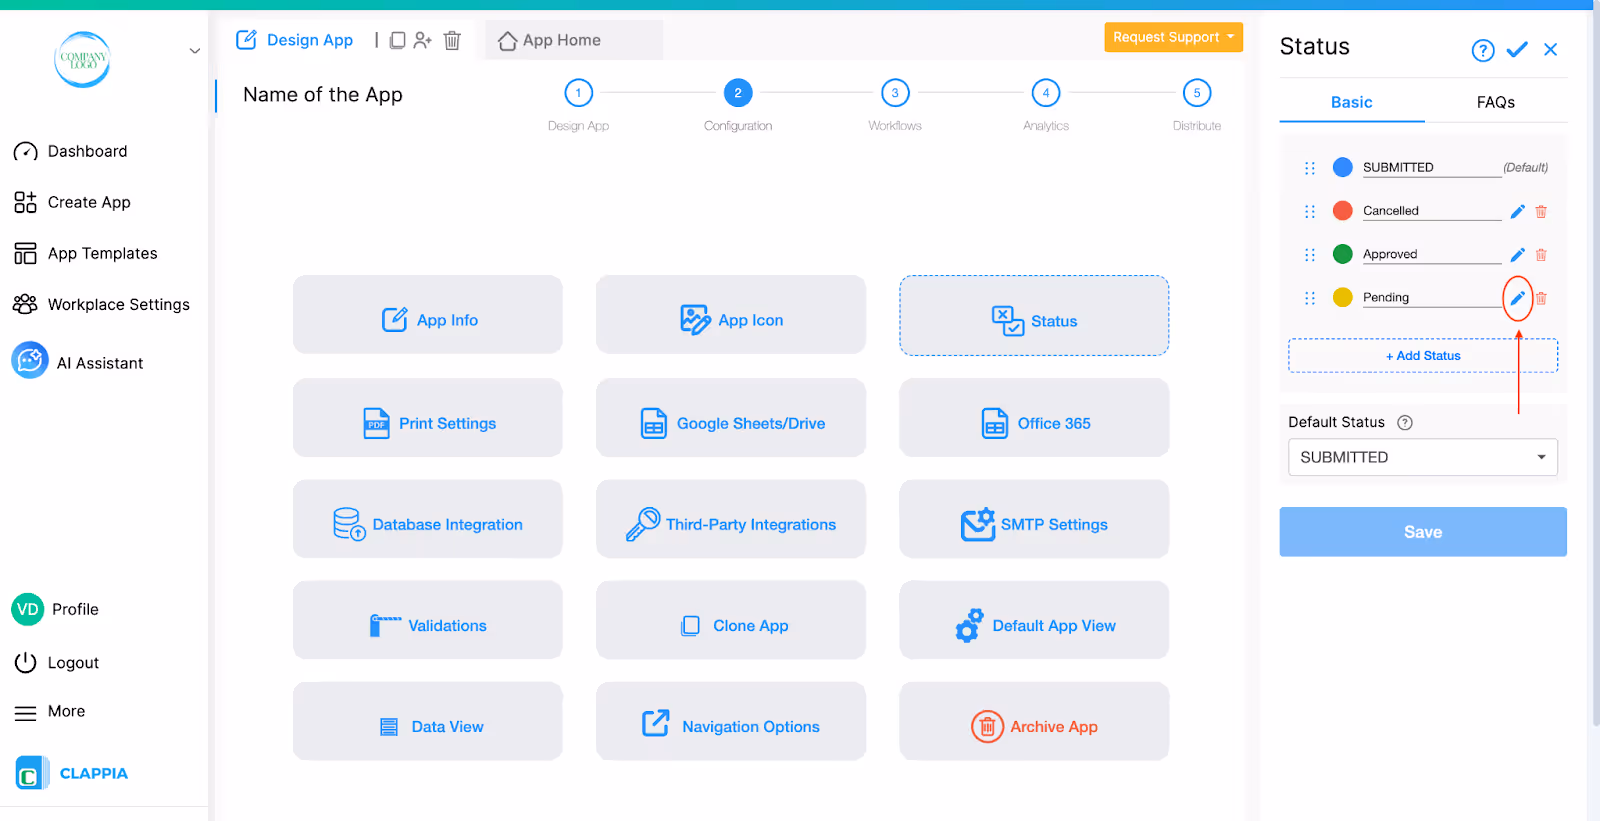
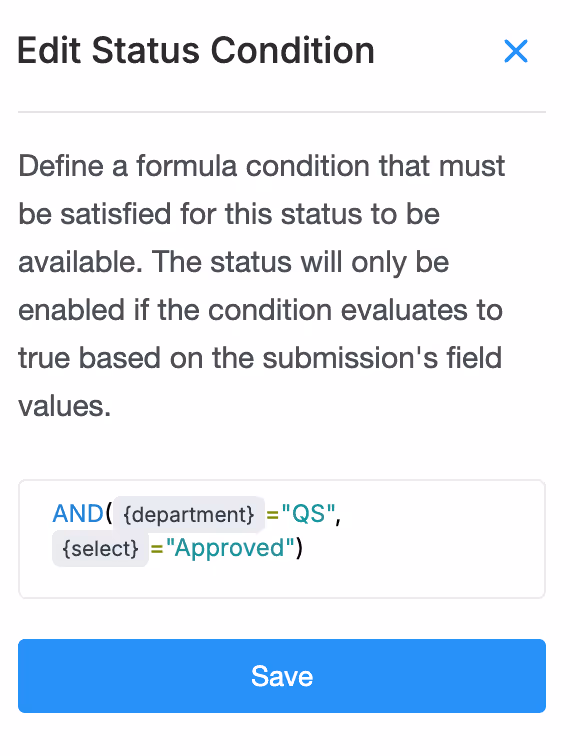
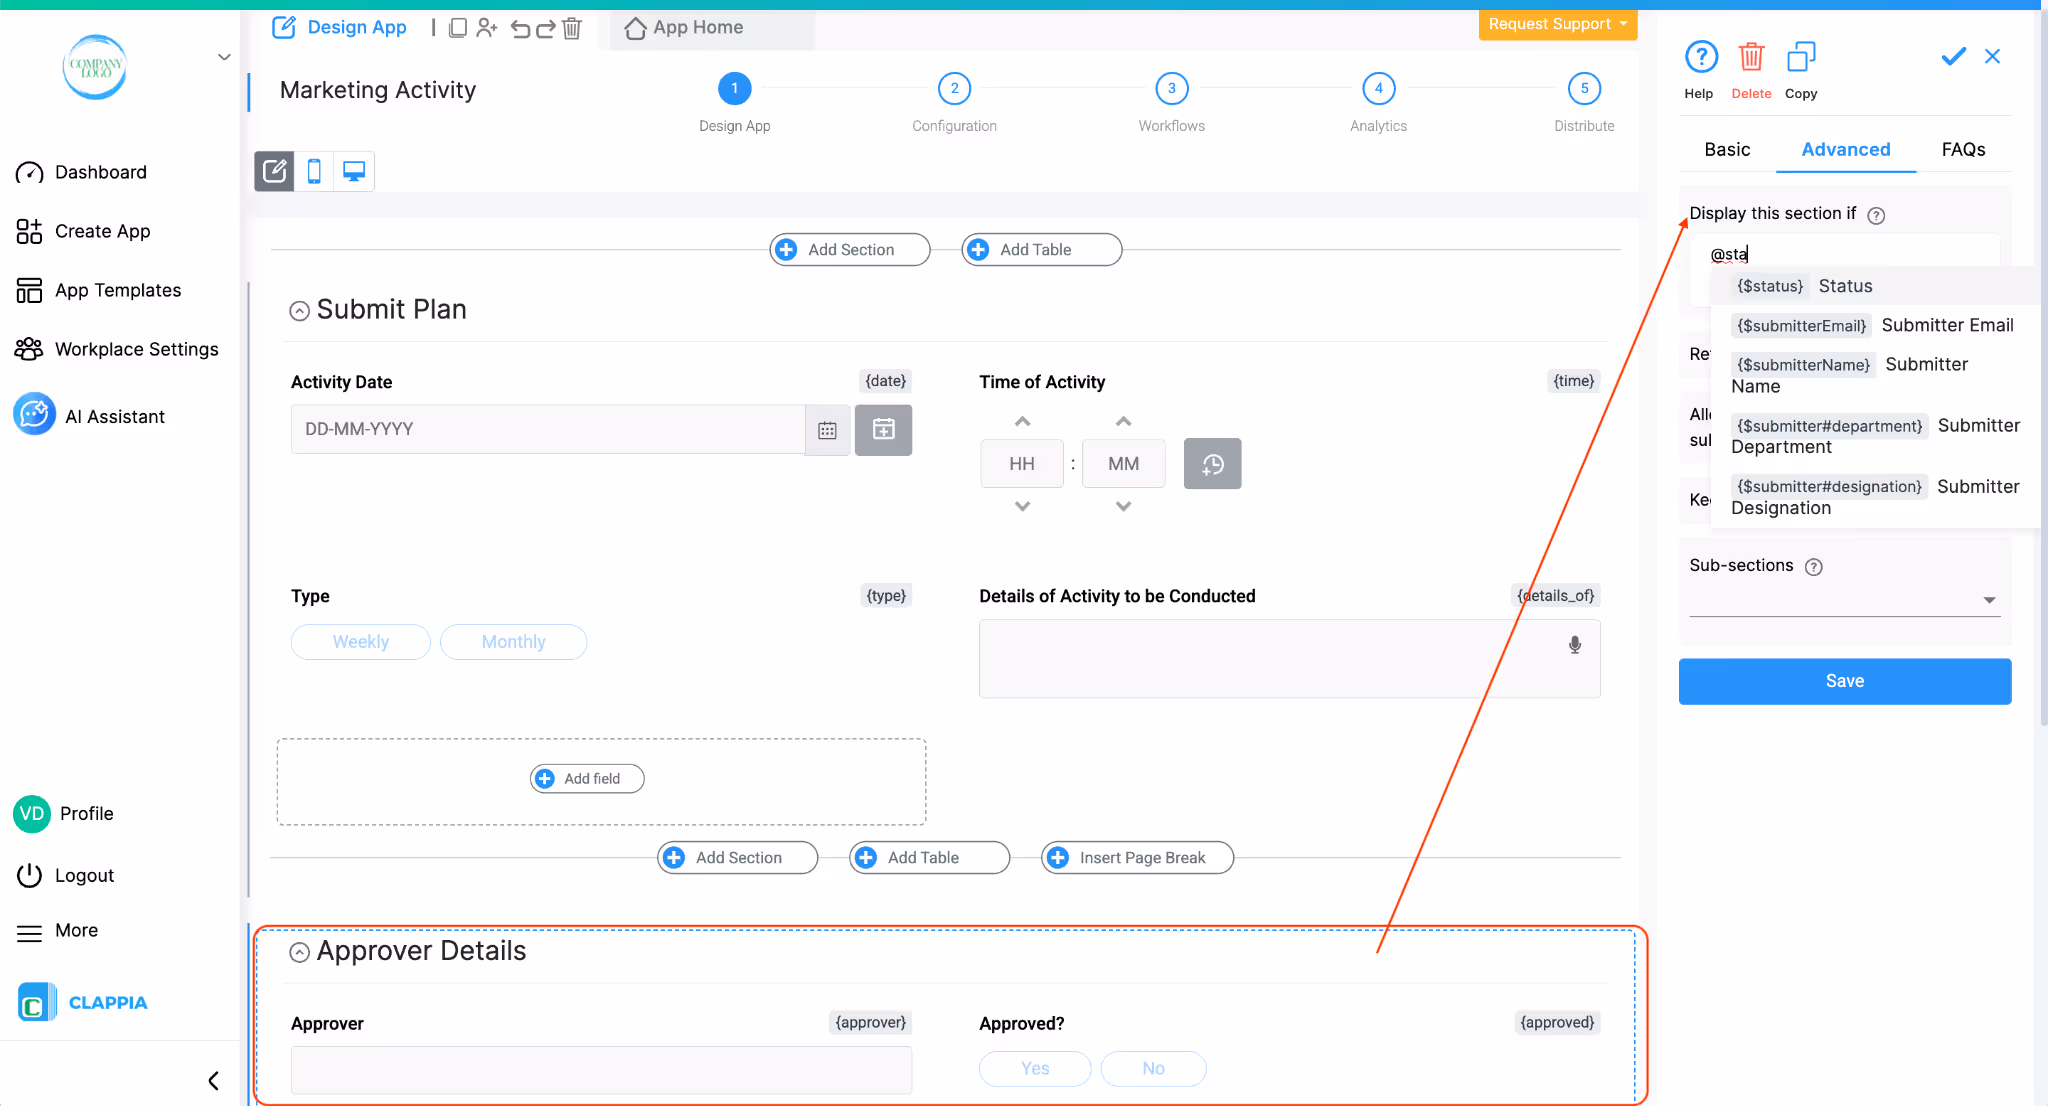
Open your app and go to Design App >Configurations > Status. On the right panel, create a new status or select an existing one to edit. Click on the edit icon.
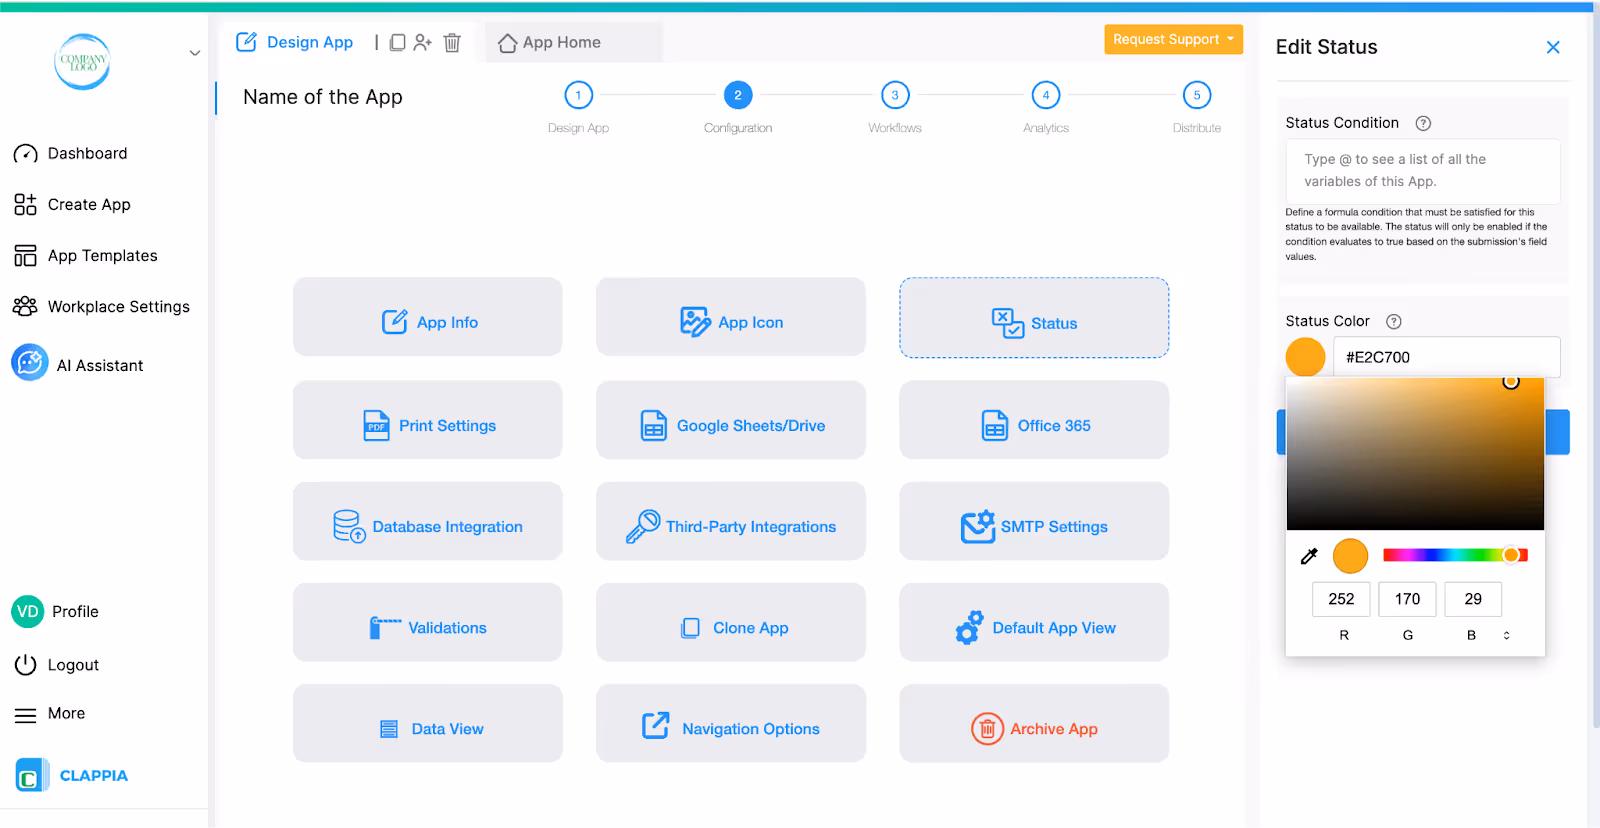
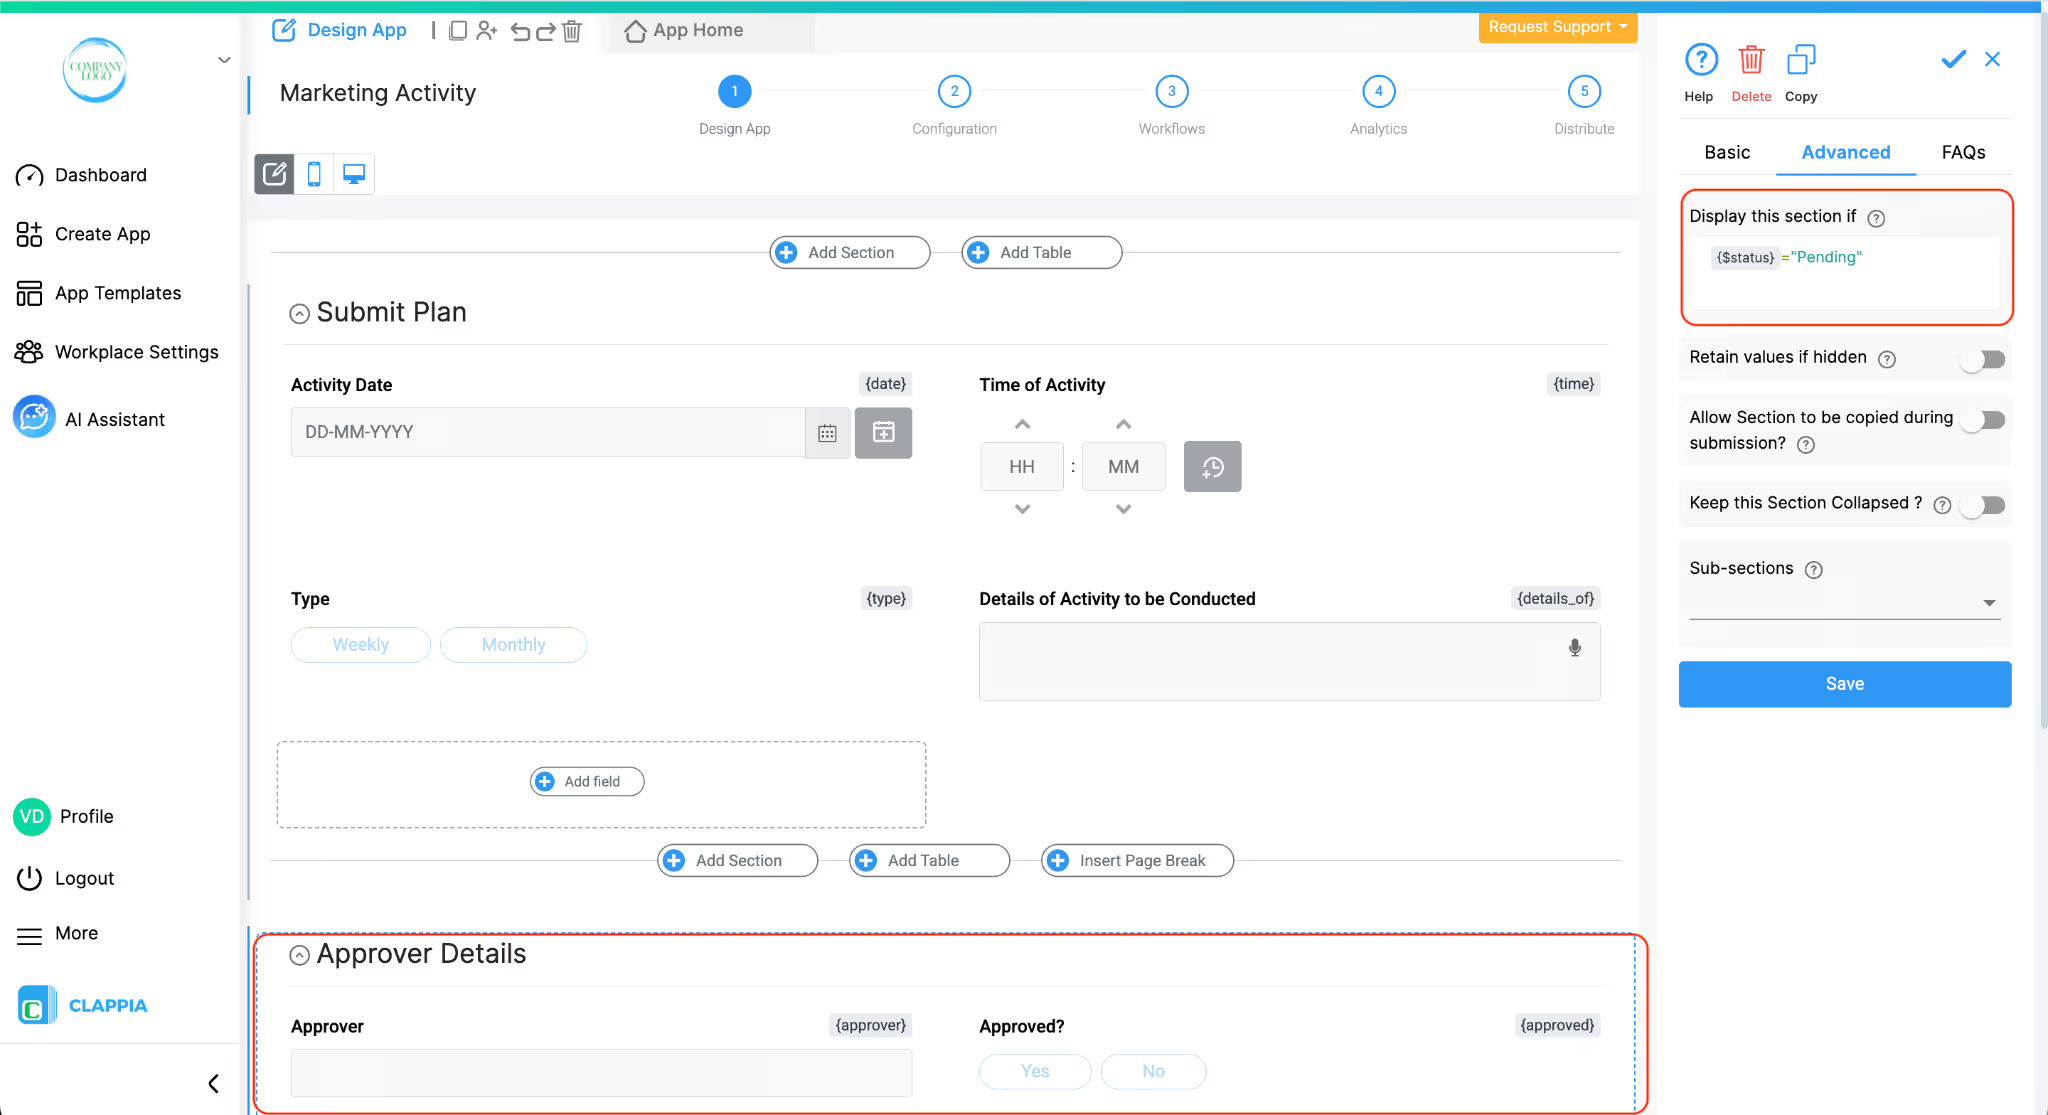
In the status settings, add a condition formula. This formula can reference fields from your app, and you can use logical expressions such as =, >, <, AND, or OR. To reference fields, you can use their variables. Type @ to pull a list of the fields to select.
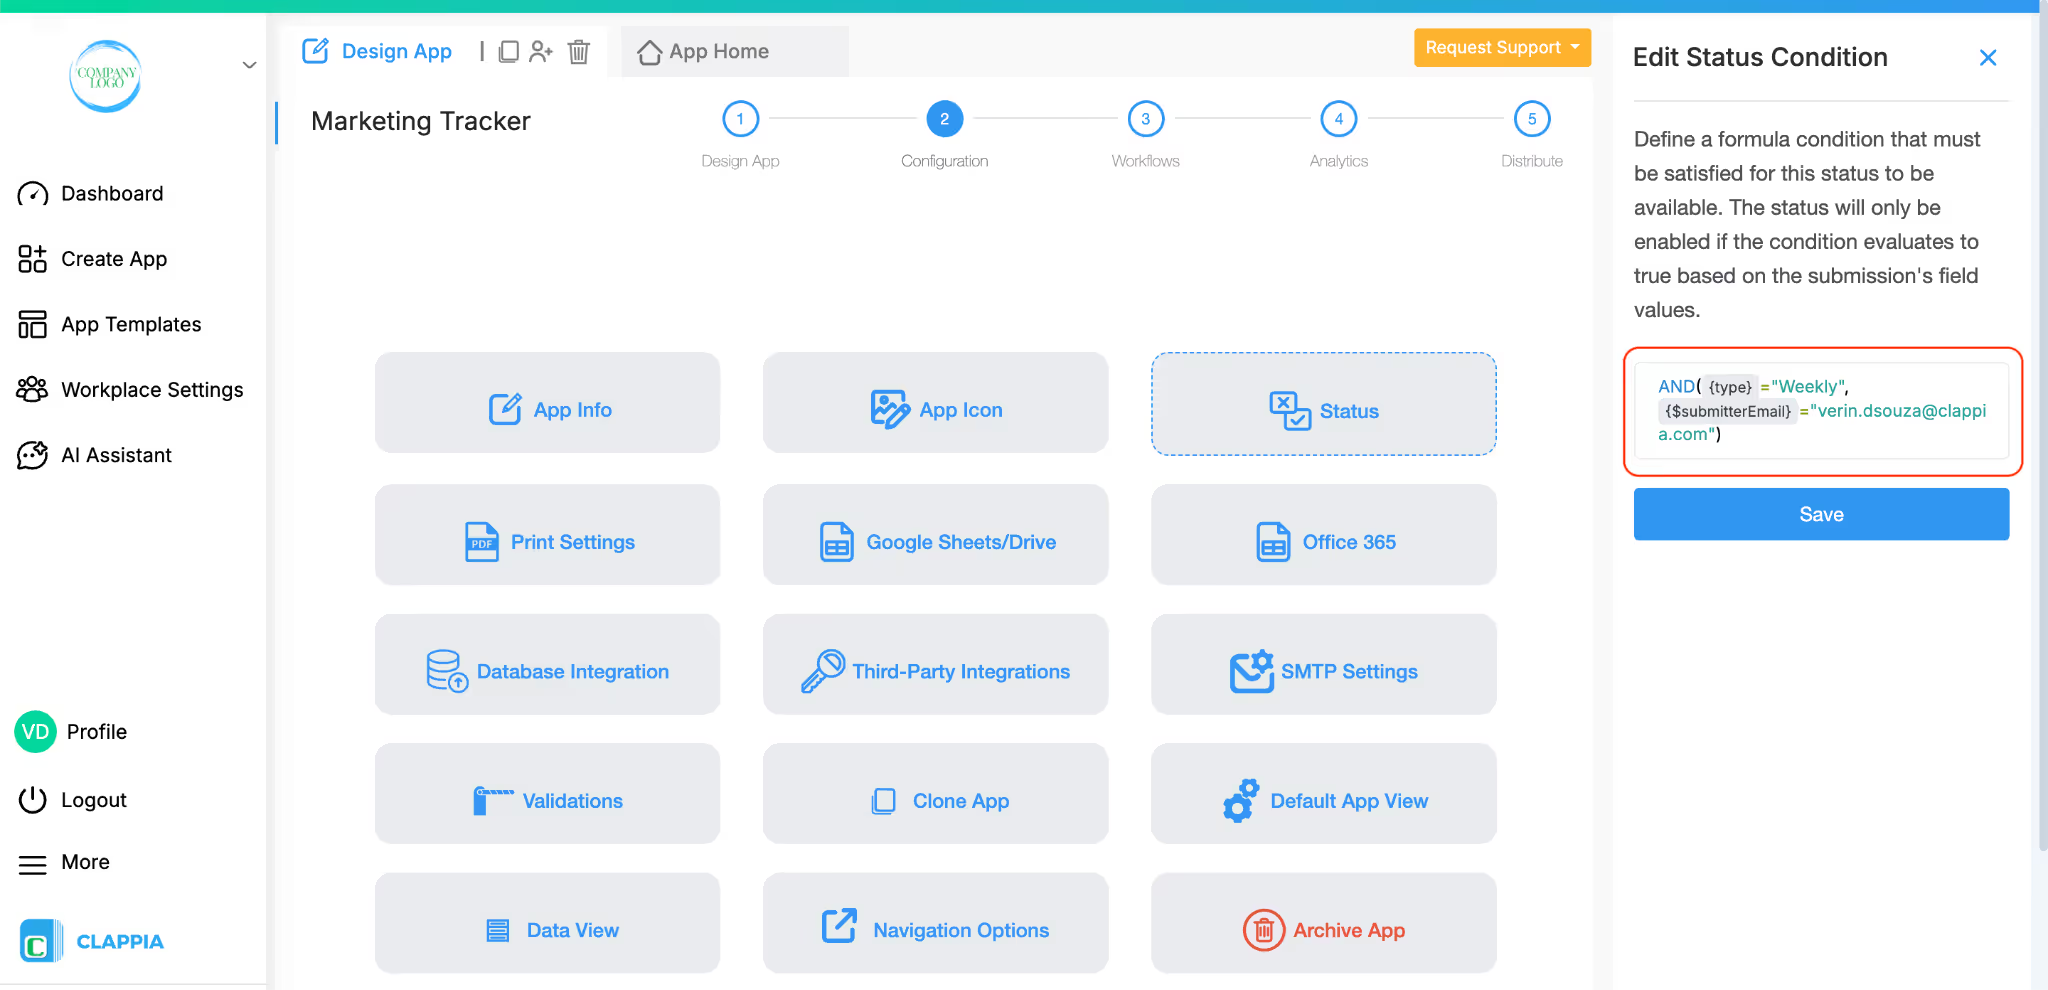
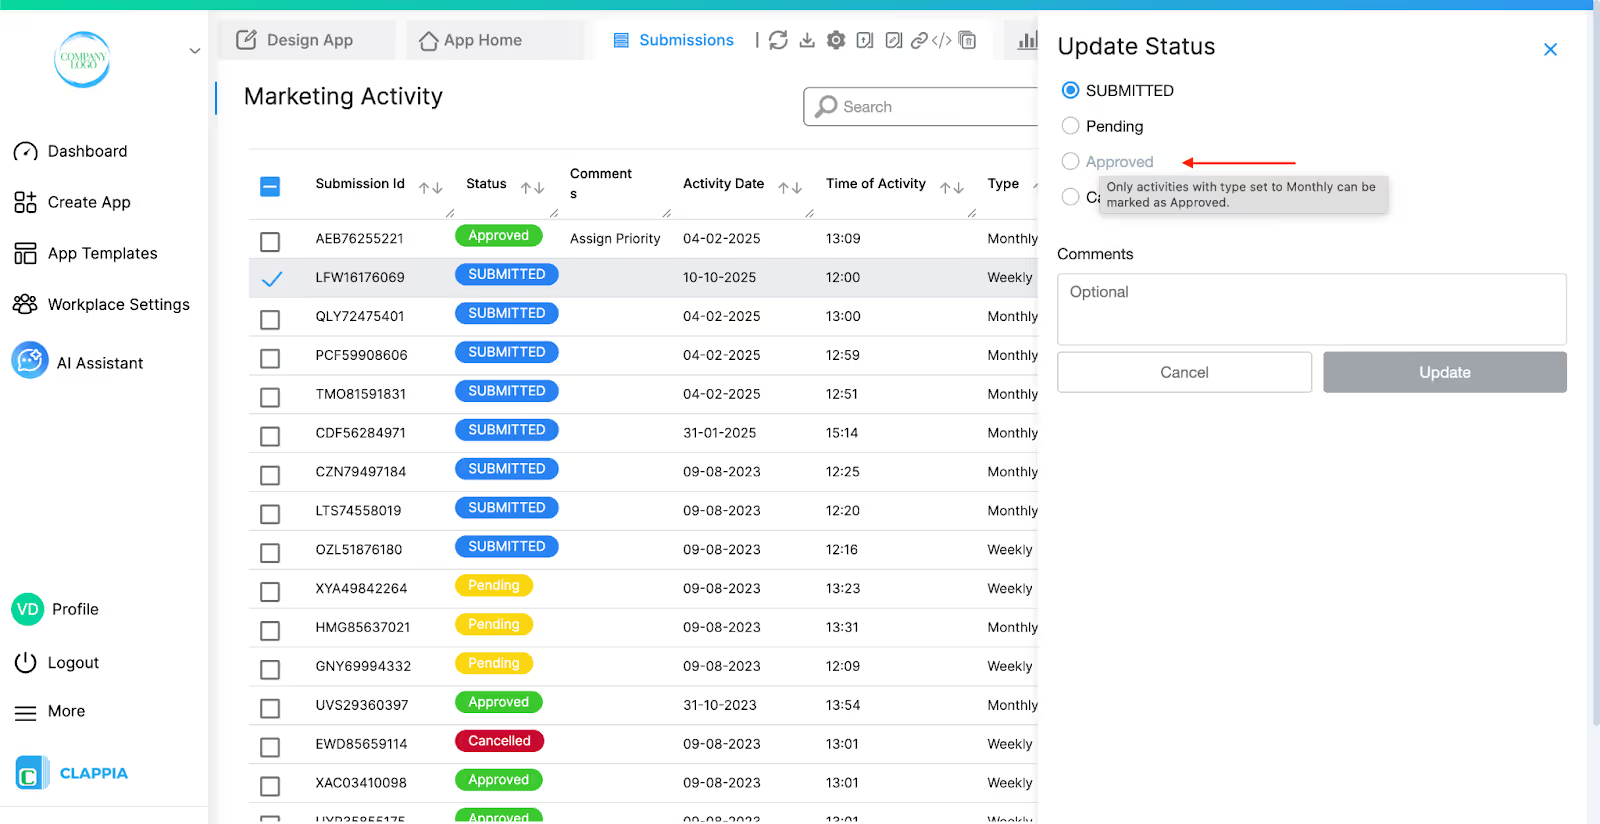
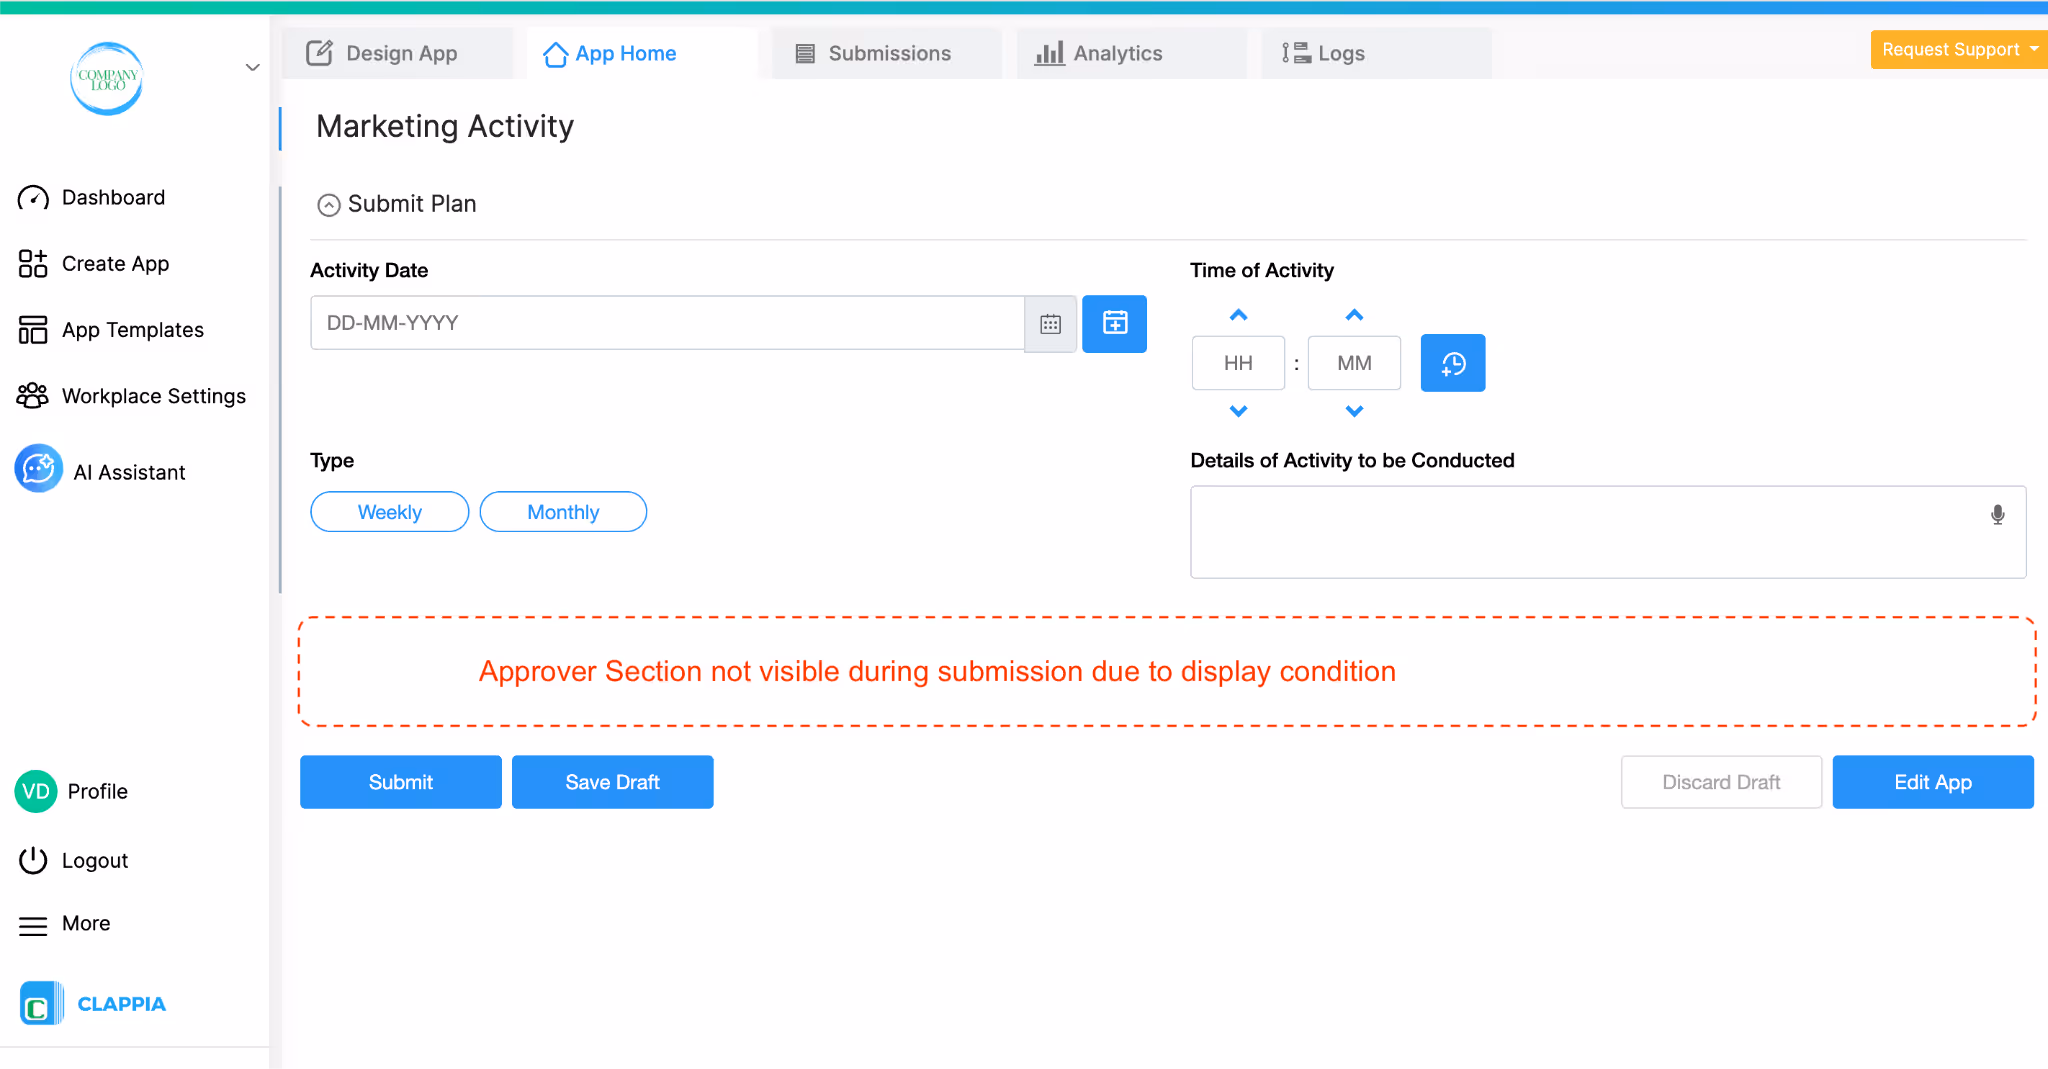
Save the status. Go to the Submissions tab and open any submission.
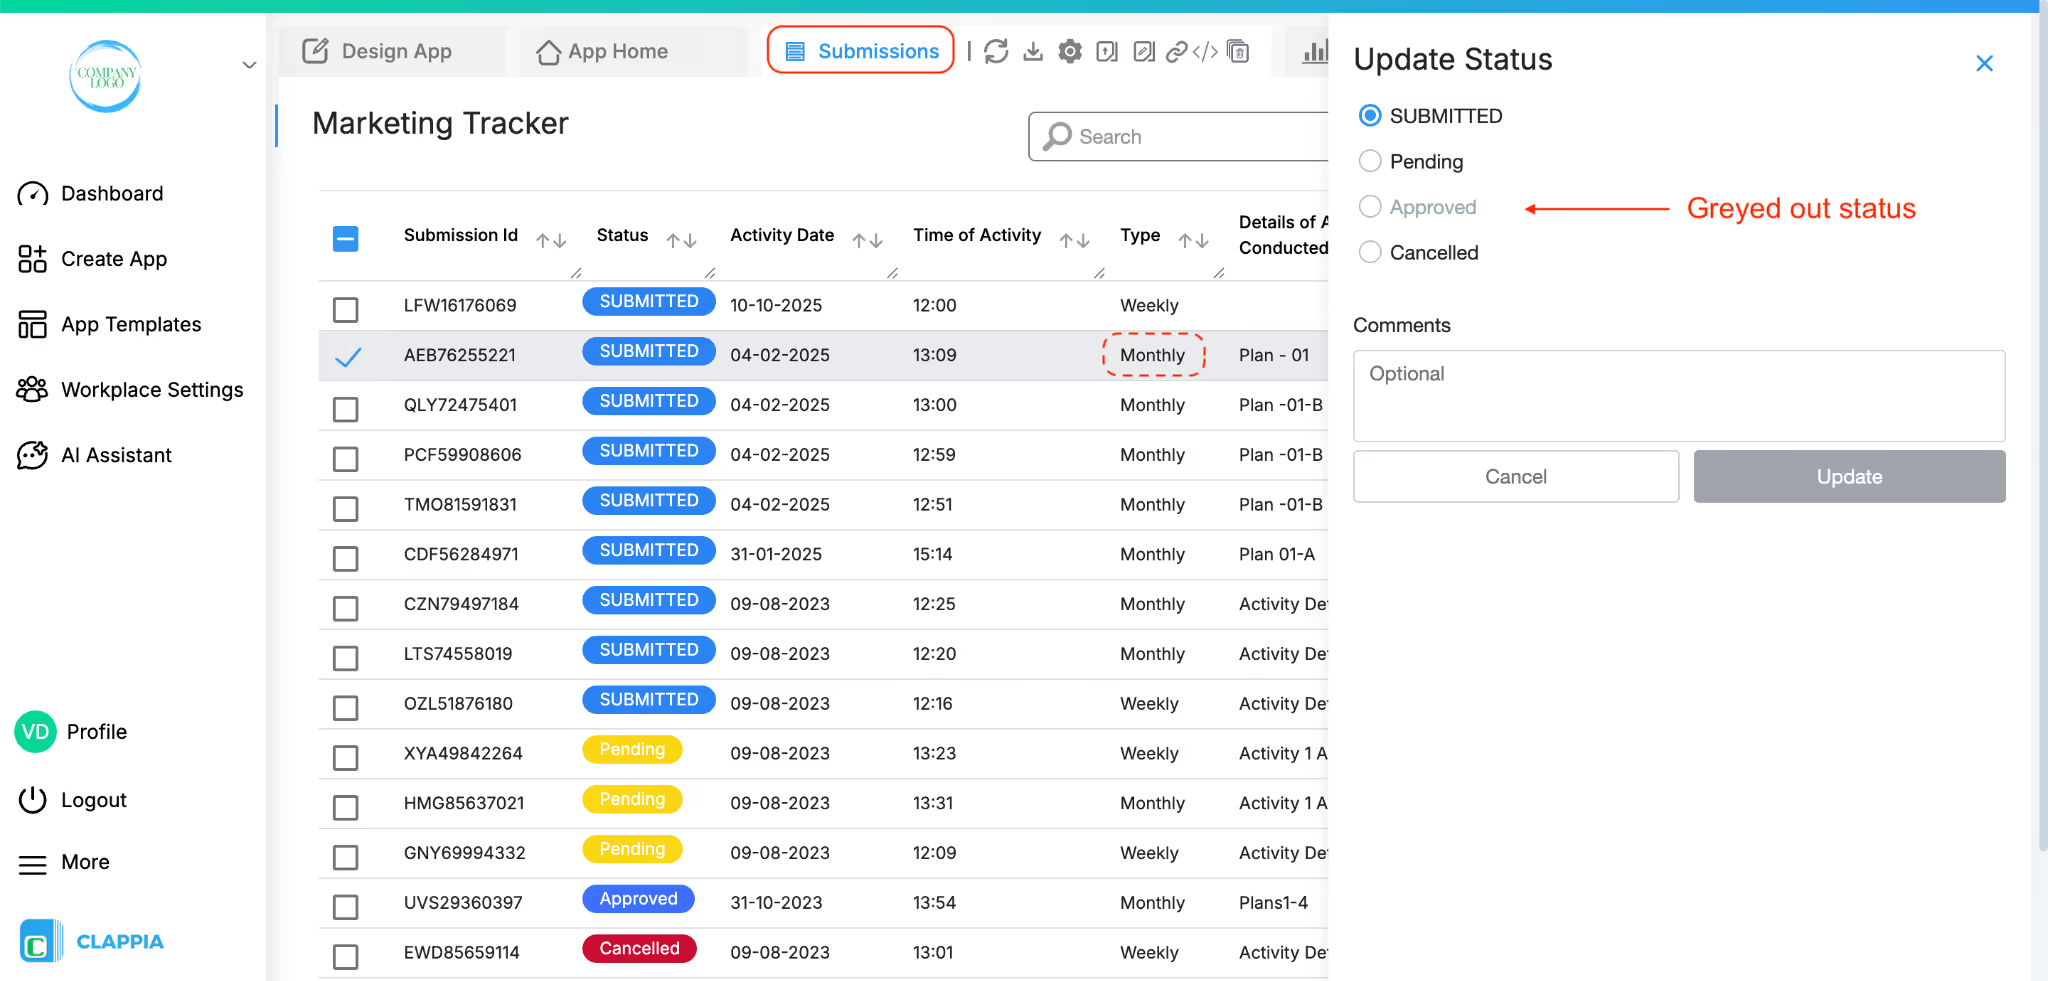
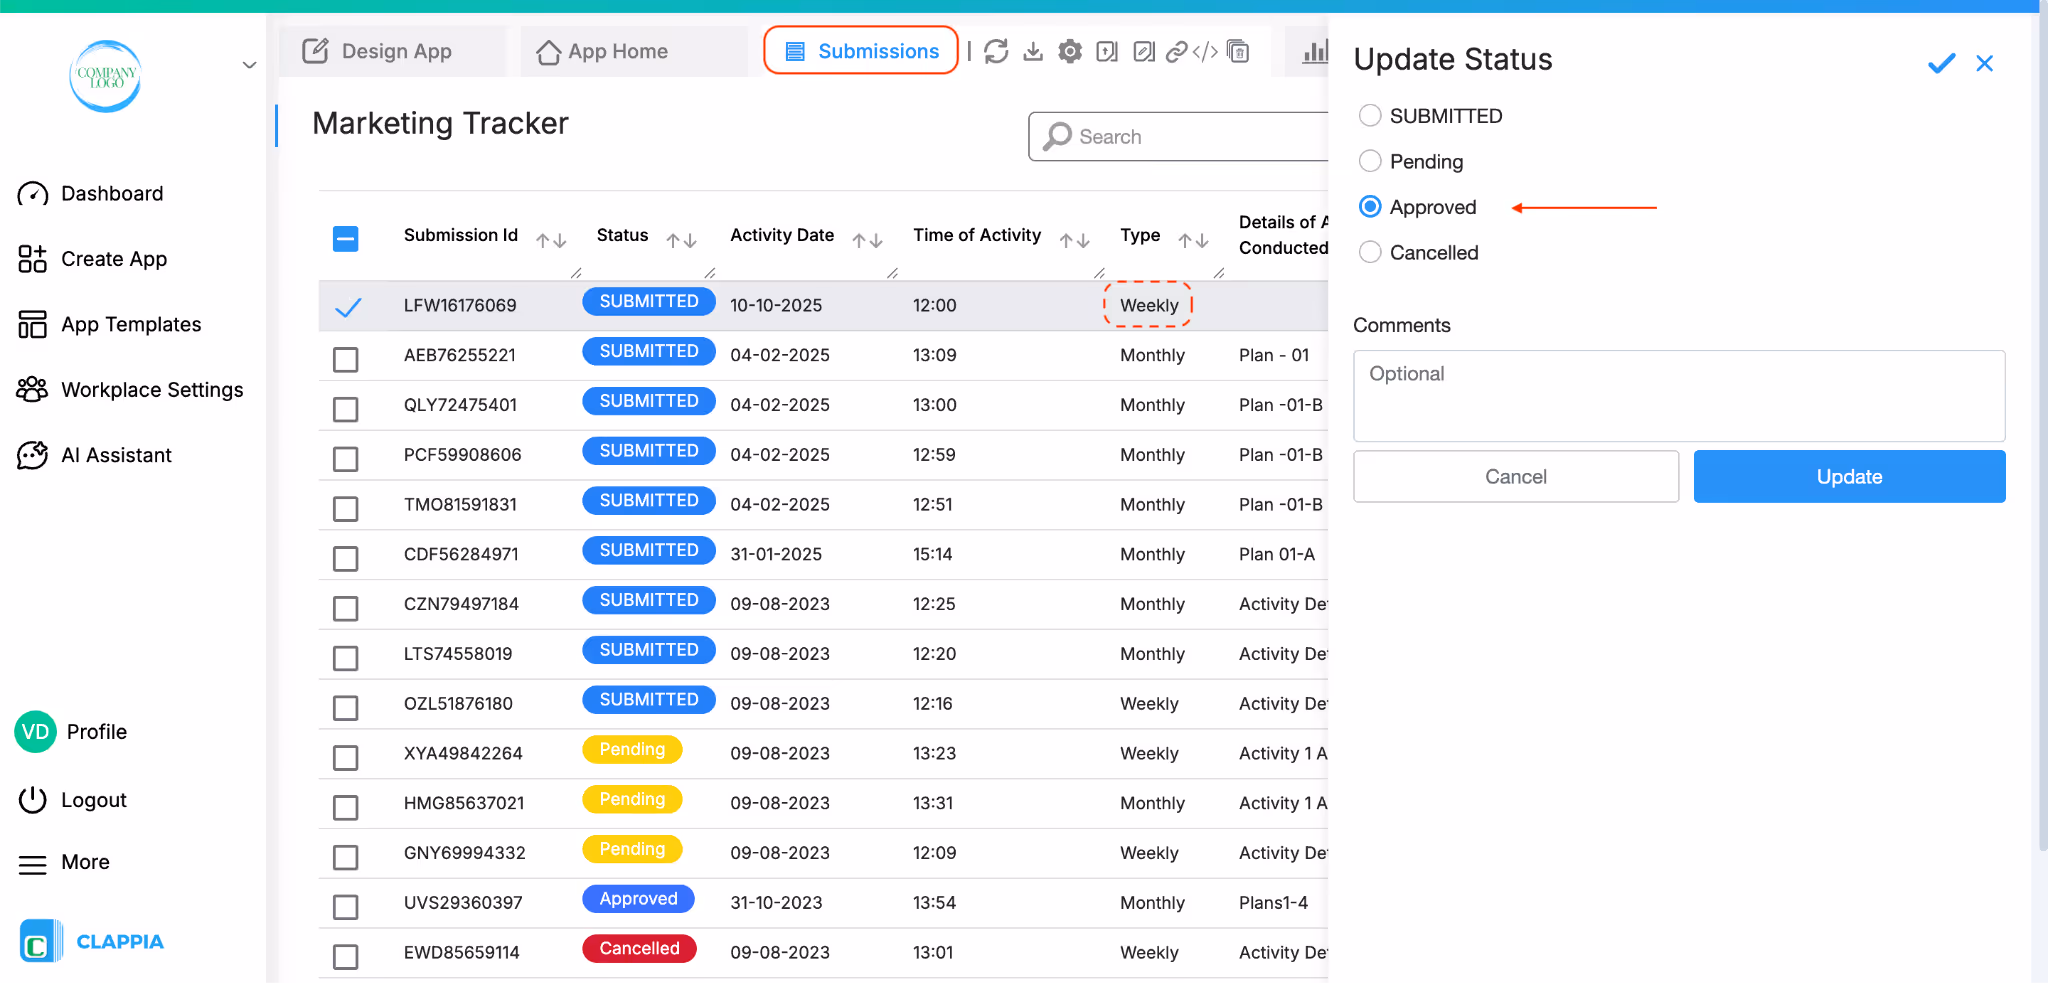
You will notice that:
Status conditions can reference data from copyable sections using formulas. This allows status logic to work with repeated data instead of being limited to single, non-repeating fields.
Formulas such as Join, Count, and Index can be used with copyable section fields when defining a status condition.
This makes it possible to:
For example, a status condition can depend on:
This is useful when review or approval logic depends on repeated inputs, such as line items, checklist entries, inspection observations, or any data collected using copyable sections.
When you apply a status condition, you can also set a custom error message that appears if the condition is not met.
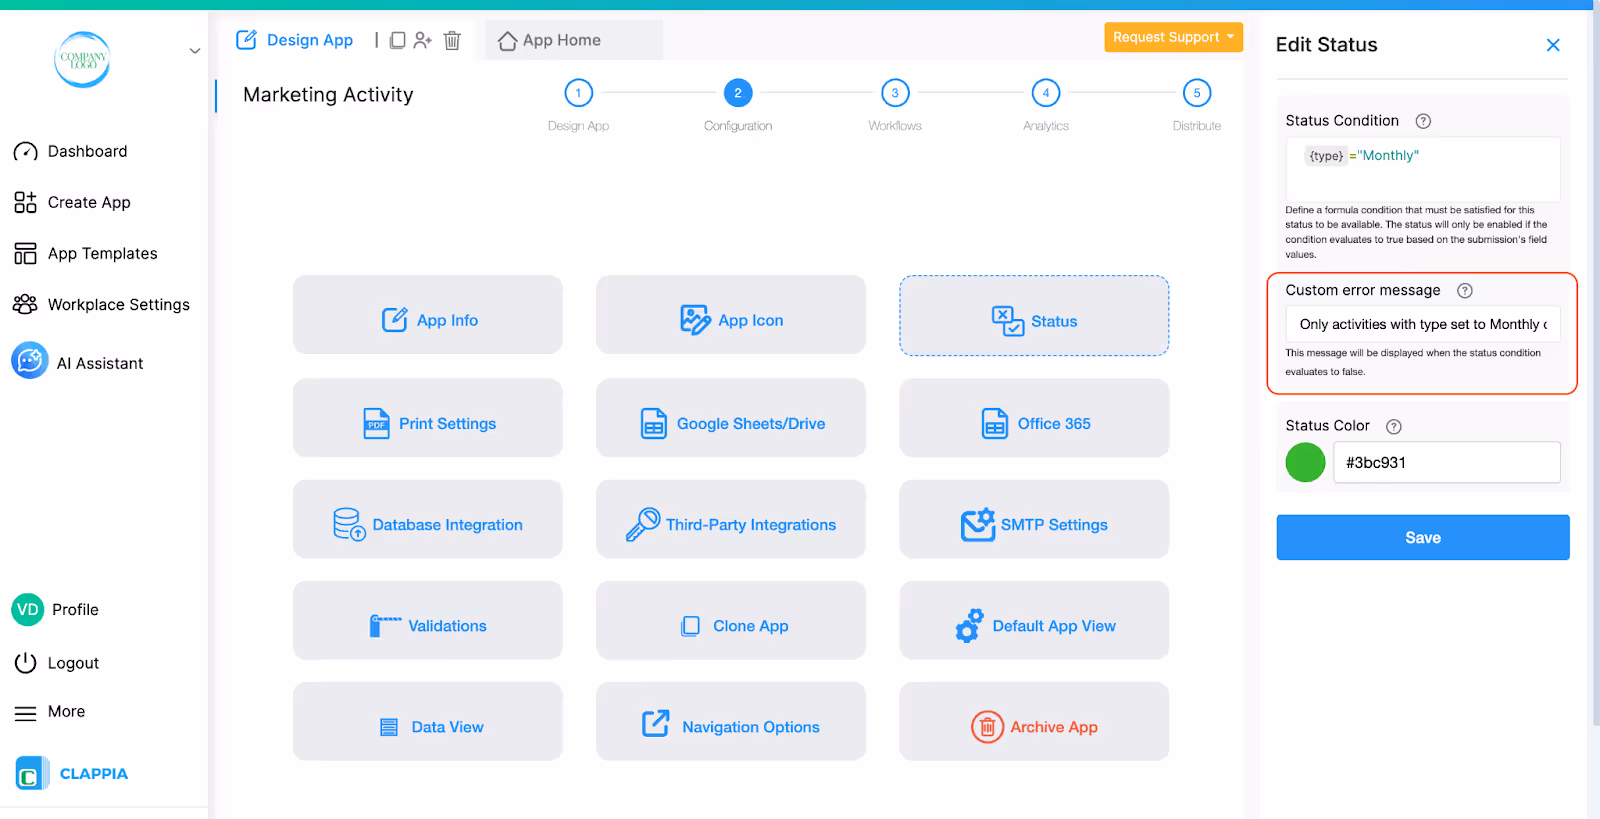
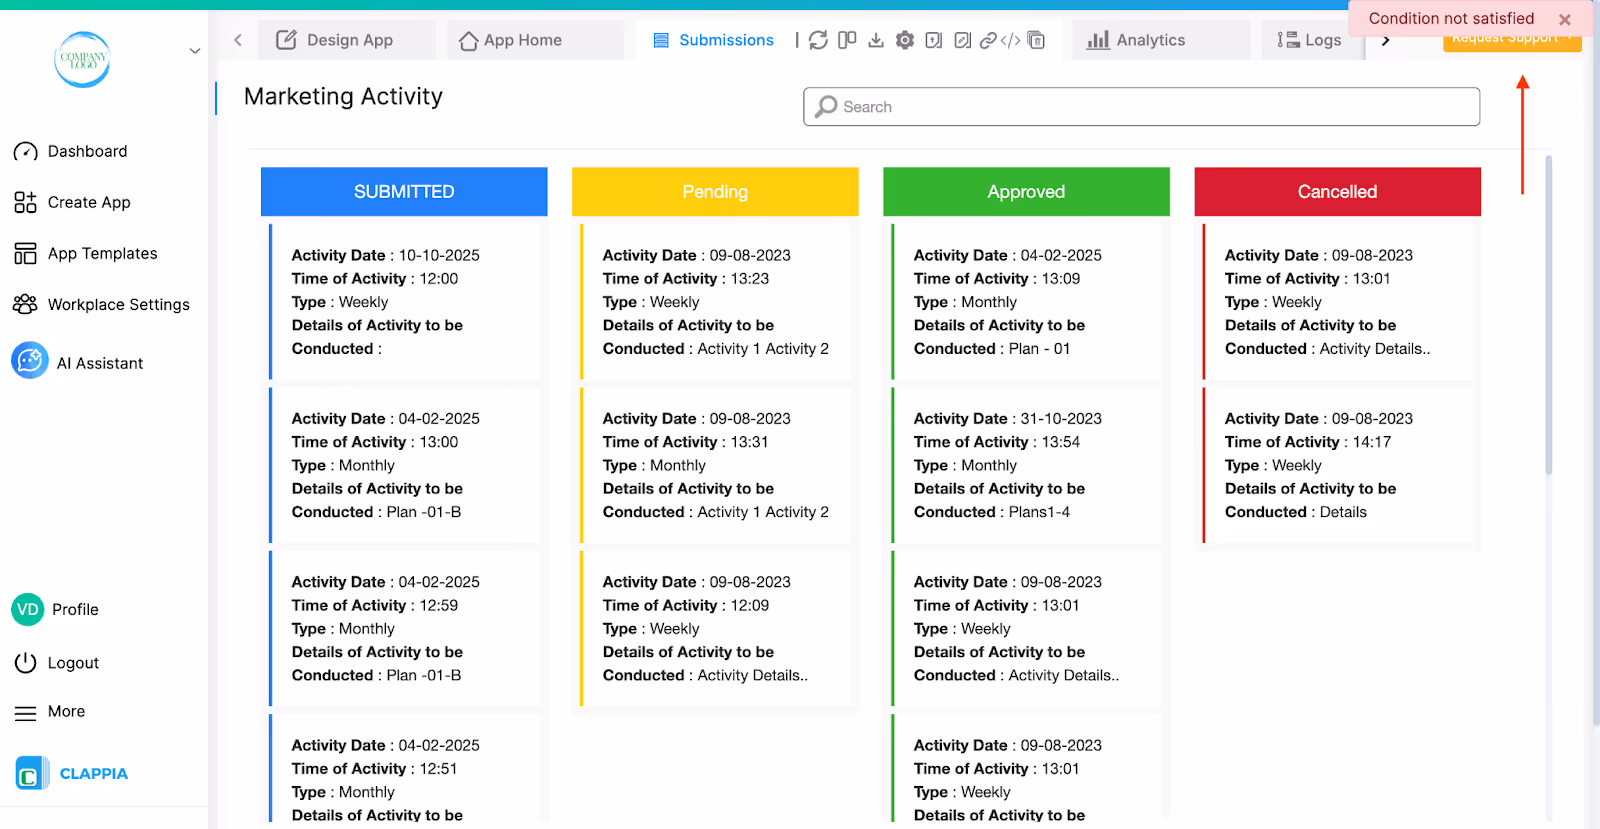
The Custom error message is the message that will be shown to the user when they hover over a greyed out status (condition is evaluated false) or try to change that status through swimlanes. This allows you to clearly explain why the status change is not allowed to the user.
For example:
If the condition is not satisfied and someone attempts to apply that status, this exact message will be displayed.
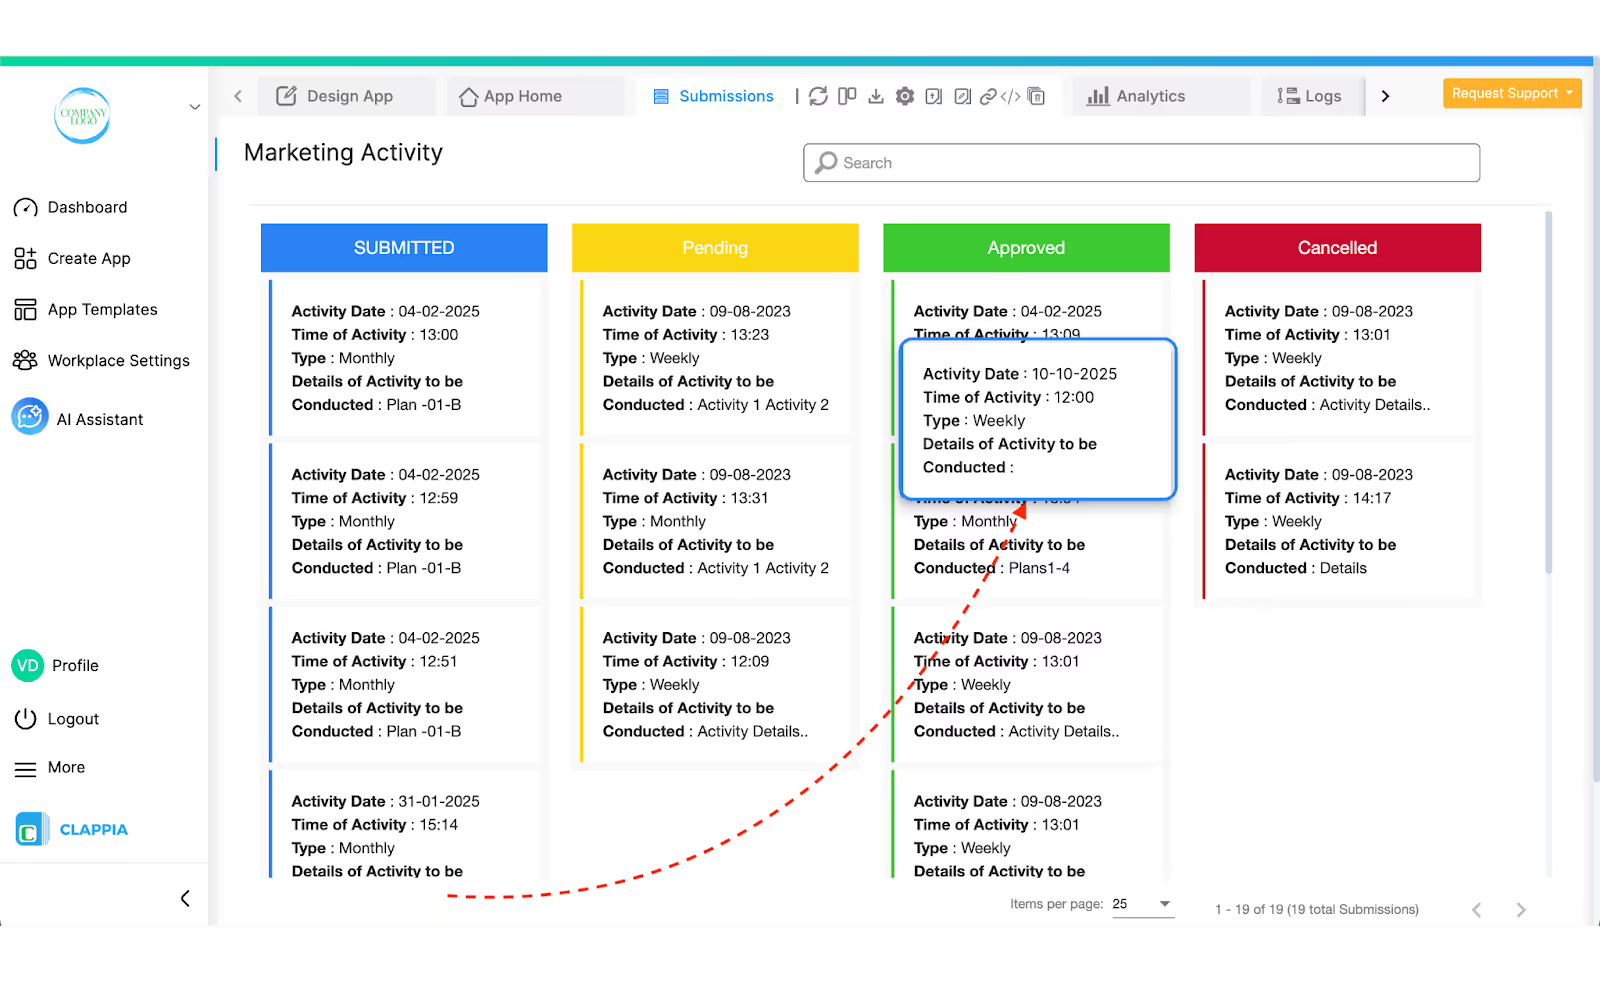
Swimlane view:
If you have multiple statuses, you can rearrange them so that the most important ones appear first:
In Design App > Configuration > Status, hover over the dotted icon next to each status. Drag and drop them into the desired order.

This ordering is especially useful if you later choose to switch from the default data table view to swimlane view, where submissions are visually grouped under different statuses. Click here to learn more about Swimlanes.
Once you add statuses to your app, they are not limited to just being used for tracking submissions in the Submissions tab. Status values can also be used across your app and workflows for display control, field logic, and calculations.
You can use the submission status in:
For example:
To pull status values, type @ followed by status and select it. This will come up only in areas where logic can be applied.
Similarly, the status can be used inside a Calculation & Logic block to apply different logic based on whether a submission is Approved, Rejected, or In Review.
This allows you to control what users see and how fields behave based on the current stage of the submission.
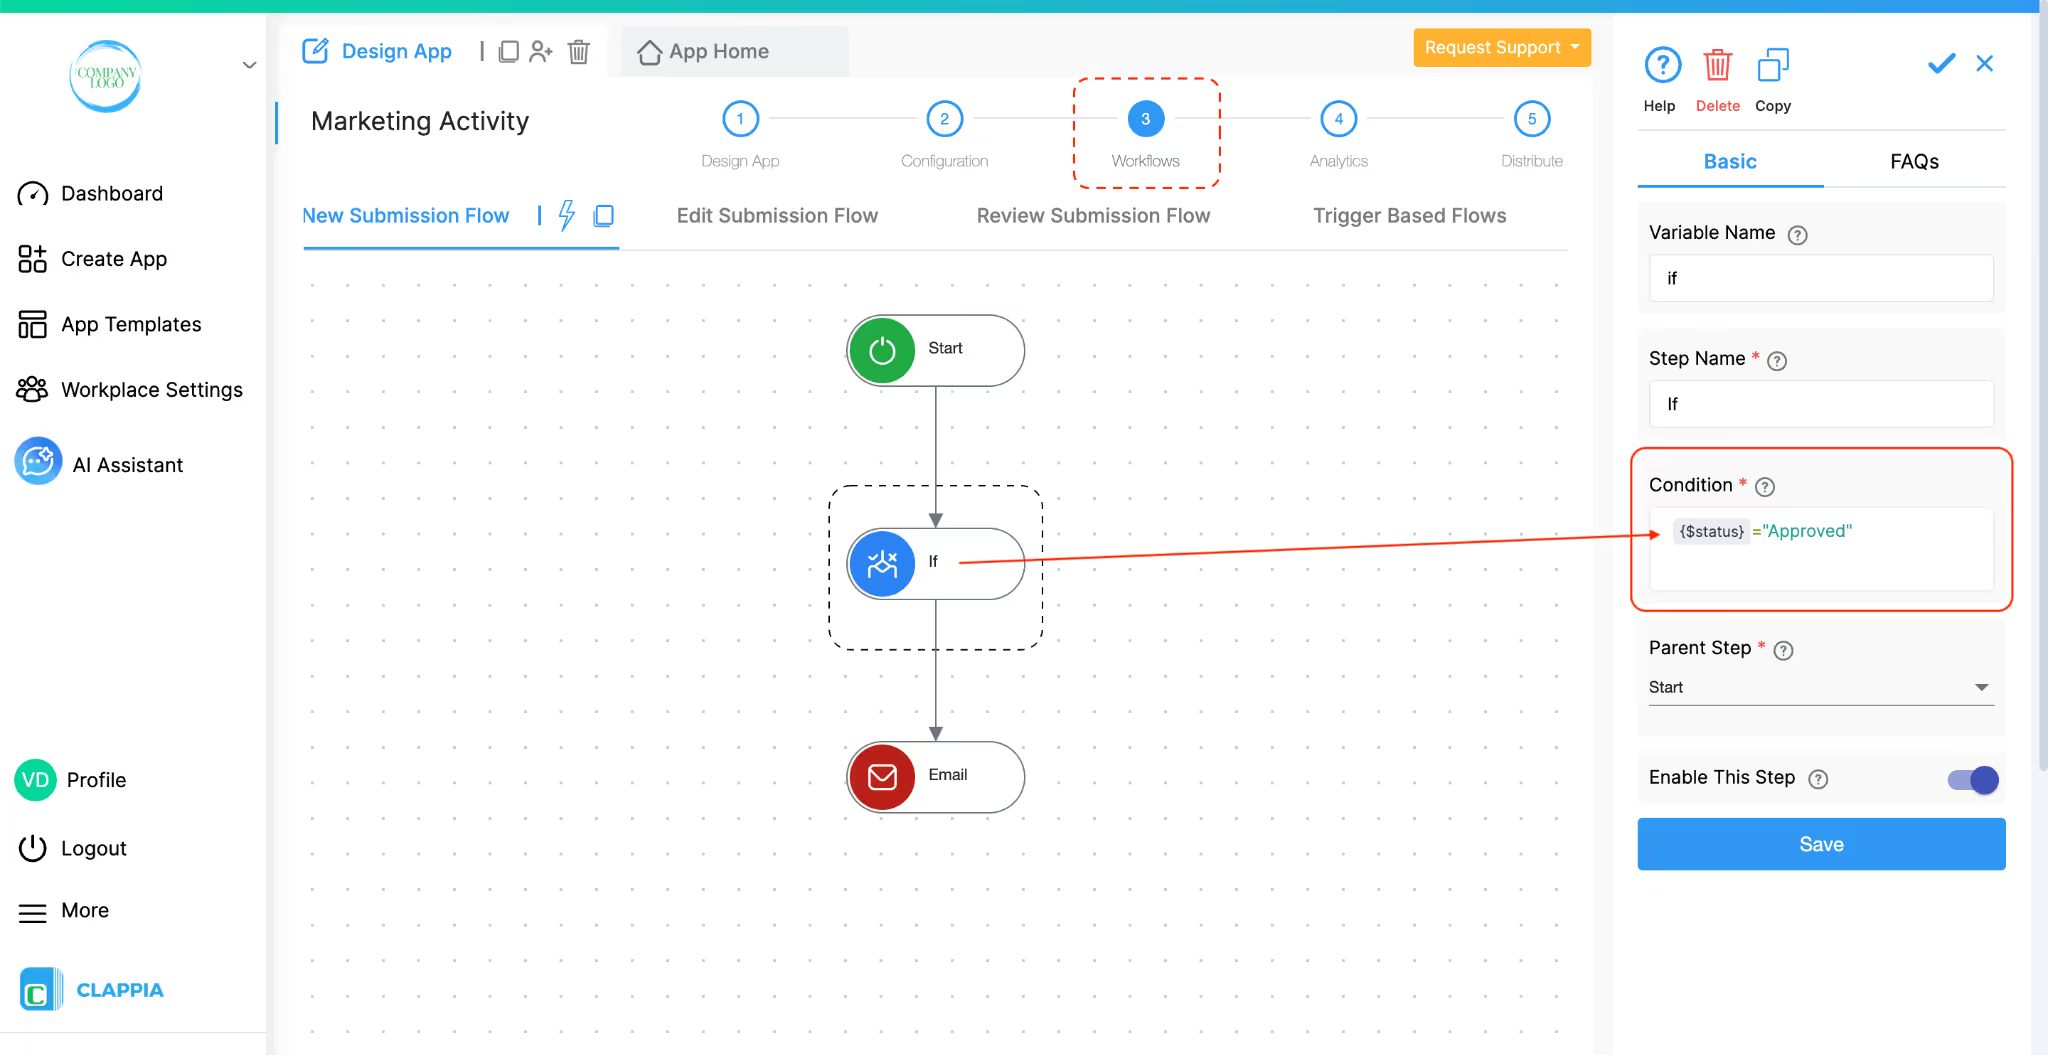
Status values can also be used in workflow conditions.
For example: Let’s say if a submission has been approved, an email needs to be sent to the right team.
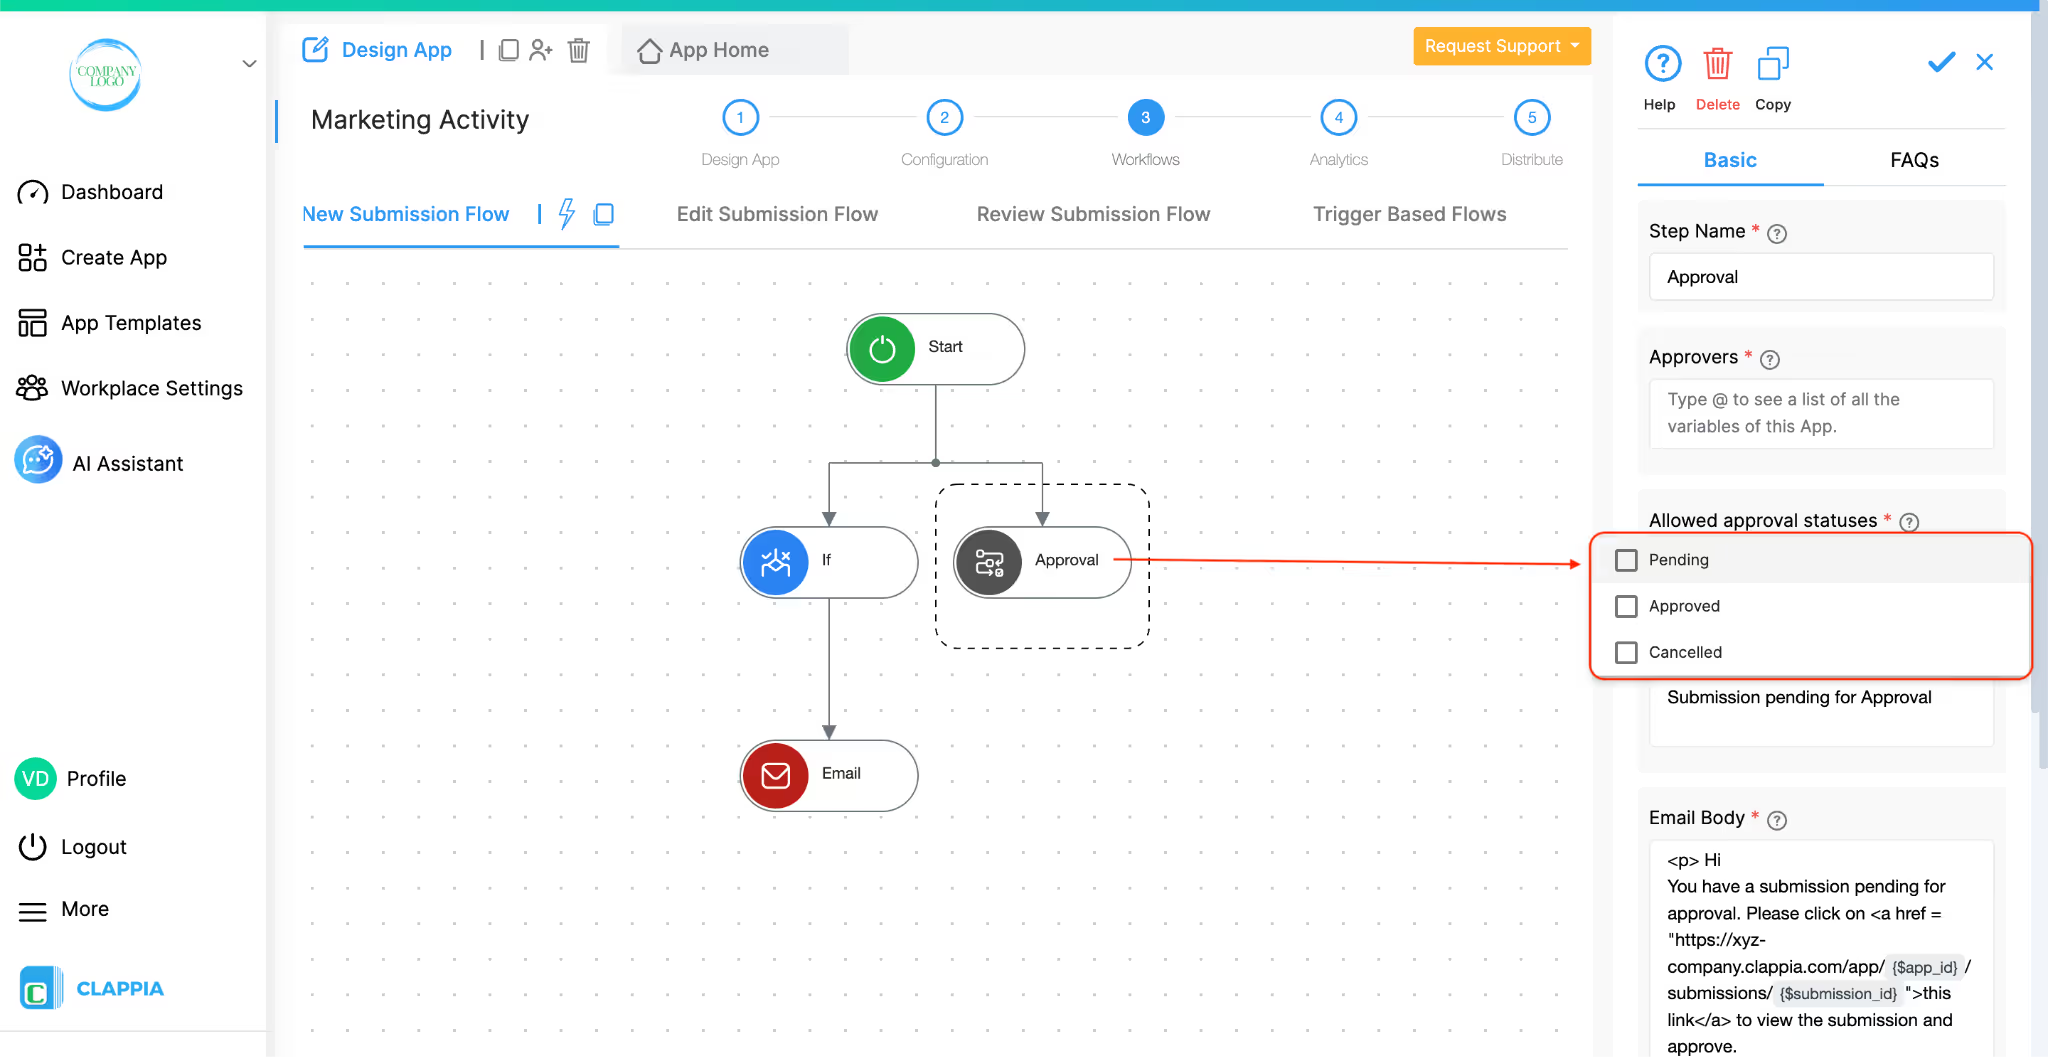
Statuses also play an important role in the Approval Workflow Node. The Approval node works only when statuses are already set up in the app. The approval node is used to send notifications to reviewers who can change the status of a submission.
Click here to know more about how approvals work.
L374, 1st Floor, 5th Main Rd, Sector 6, HSR Layout, Bengaluru, Karnataka 560102, India
3500 S DuPont Hwy, Dover,
Kent 19901, Delaware, USA


3500 S DuPont Hwy, Dover,
Kent 19901, Delaware, USA
L374, 1st Floor, 5th Main Rd, Sector 6, HSR Layout, Bengaluru, Karnataka 560102, India
.svg)
